How to Check the Battery Level of Your Notify360 Panic Buttons
Learn how to check the battery level on your Notify360 Panic Button
- Emergency Management
- Campus360
- Connect360
- PBIS Rewards
- Hall Pass
- Preparation & Response Training
- Behavioral Case Manager
- Visitor Management
-
Compass Curriculum
Training Workshops Getting Started On-Demand Release Notes & Updates Data & User Management Compass Curriculum for Students, Staff, & Families Compass Behavior Intervention Compass Mental Health + Prevention Compass for Florida - Character Ed, Resiliency, & Prevention Compass for Texas - Character Ed Analytics & Reporting Additional Resources
- School Check In
- ALICE Training Institute
- Digital Threat Detection
- Anonymous Tip Reporting
- Resources
- Back-to-School
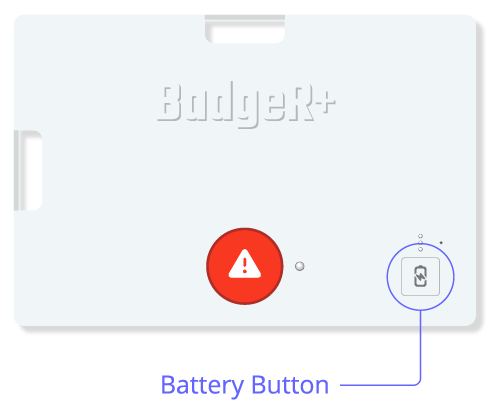
As a best practice, wearable panic buttons should be charged monthly, and wall-mounted buttons should be checked each semester to ensure they remain connected and fully operational. Follow the steps below to view the battery level on your device.
- All 3 Lights On: Battery level is 75% - 100%.
- 2 Bottom Lights On: Battery level is 50% - 74%.
- 1 Bottom Light On: Battery level is 15% - 49%.
- 1 Bottom Light Flashing: Battery level is Less than 15%. Charge immediately.
- No Lights On or Flashing: Battery level is 0%. Charge immediately.
* Wall Mounted Units: Remove the unit from the wall to view the LED lights on the white unit inside the button.
Battery levels can be checked in the 911Cellular Portal, Manage Devices - each button will have a battery status. Once batteries have less than 15% battery life, they run the risk of not connecting to the network.
Check battery levels while the device is charging:
- All 3 Lights Cycling On and Off: Battery level is less than 50% and actively charging.
- Top 2 Lights Cycling, Bottom Light Solid: Battery level is 50% - 74% and actively charging.
- Top Light Cycling, Bottom 2 Lights Solid: Battery level is 75% - 99% and actively charging.
- All 3 Lights Solid: Battery is 100% fully charged.