Web Camera Install- VMS
Learn how to install a web camera for use with Navigate360 VMS.
- Emergency Management Suite
- Navigate360 Training Institute
- Suite360
- PBIS Rewards
-
Behavioral Threat Assessment Case Manager
Getting Started BTA Webinar Links User Management BTA Feature/Function Overview Behavioral Threat Assessment: CSTAG Behavioral Threat Assessment: NTAC Behavioral Threat Management: Suicide Risk Screening and Management Analytics & Reporting Troubleshooting Release Notes & Updates Click here for BTA Resources / User Guides State Specific Guidance
- Visitor Management
- School Check In
- ALICE Training Institute
- Detect - Social Sentinel
- P3 - Anonymous Tip Reporting
- Resources
- Back-to-School
Web Camera Install

Step 1: Plug the webcam into your computer USB port.
Step 2: Log into https://navigate360vm.com/login using your login credentials.
Step 3: Go to “Device Settings” in the bottom left corner.
Step 4: Click on “Camera Set Up”.
Step 5: Select the Camera you wish to use at the top.
Step 6: Click on “Start Camera” to test functionality and then click "Save".
Step 7: Click on “ID Scanning Method”.
Step 8: Select “Camera Only”.
See also: Camera Set Up
See also: ID Scanning Method
Desktop Setup
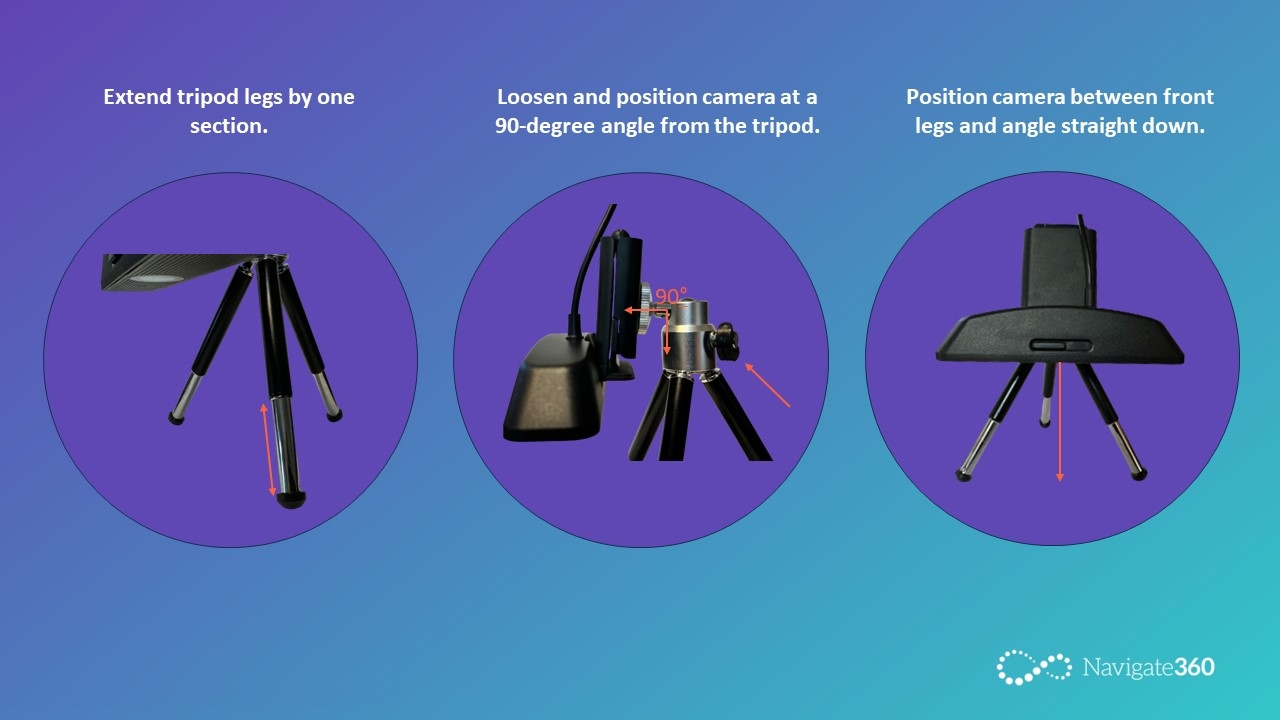
To ensure the most effective and efficient scan from your webcam, we recommend setting the webcam on a flat surface as outlined in this image.
Visitors can then place their ID flat on the surface below during the process.