How to Enroll Users in Courses
Learn how to quickly and easily enroll users into courses manually or via .CSV file upload.
- Emergency Management
- Campus360
- Connect360
- PBIS Rewards
- Hall Pass
- Preparation & Response Training
- Behavioral Case Manager
- Visitor Management
-
Compass Curriculum
Training Workshops Getting Started On-Demand Data & User Management Compass Curriculum for Students, Staff, & Families Compass Behavior Intervention Compass Mental Health + Prevention Compass for Florida - Character Ed, Resiliency, & Prevention Compass for Texas - Character Ed Analytics & Reporting Release Notes & Updates Additional Resources
- School Check In
- ALICE Training Institute
- Digital Threat Detection
- Anonymous Tip Reporting
- Resources
- Back-to-School
How to Enroll Users Via .CSV:
ELearning Managers have the ability to enroll users into a single or multiple courses within Navigate360 Preparation & Response Training via .CSV. Before starting this process, users should have been added to the platform.
Prepare the .CSV File
- Download the template
- Remove the example rows
- For single course enrollment, add the username of each user in their own row
- For multi-course enrollment, create a row for each username and fill in the course code. Each course code should be a single row with the username repeated in each of those rows. (It is possible to enroll different users into different courses through this method as well)
- In the level column, enter the word learner for every row on the spreadsheet
- Save the file as a .CSV for upload in the next section
Finding the Course Code
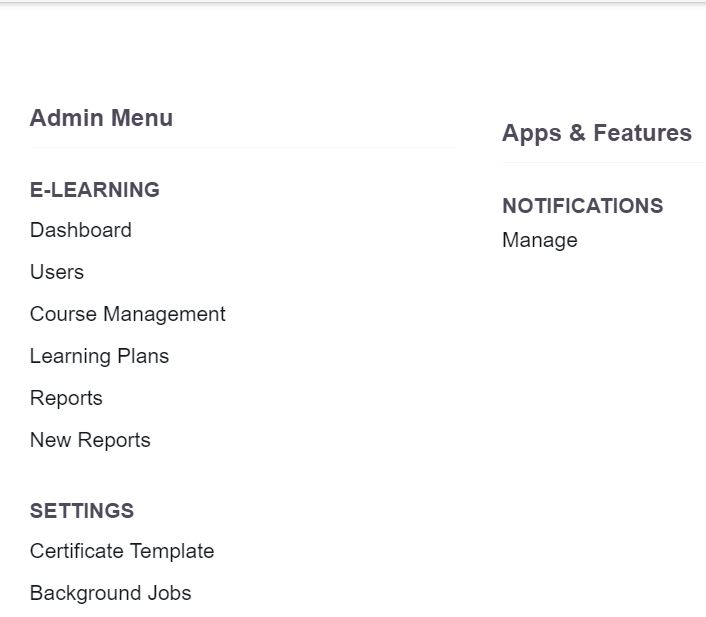
Click on the Admin Menu Gear in the top, right corner

Click on Course Management
A list of courses available for enrollment will show (Note: exact available courses can vary by district)
Course Code is an alphanumeric identifier found under the Code column on the Course list

Enrolling into a Single Course
- Log into https://learn.navigate360.com using your login credentials.
- Click on the Admin Menu Gear in the top, right corner
- Click “Course Management” or select it from the Quick Links on the Home Screen
- Navigate to the course in which you want to enroll users, or use the search field to locate the course more quickly
- Click on either the Course Name or the People Icon under Enrollment

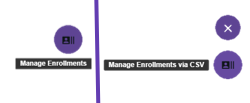
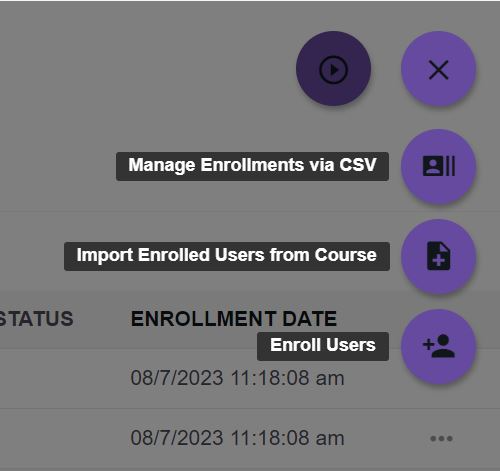
- On the Enrollment Screen, click the “Manage Enrollments” icon (purple circle in the upper-right corner)
- Then, click “Manage enrollments via CSV”
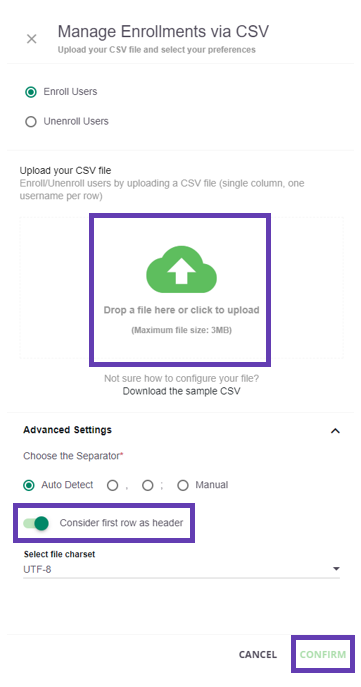
- Click the green cloud and select your saved .CSV file.
- Open “Advanced Settings” and ensure “Consider first row as header” is toggled on. Click “Confirm” in the lower right-hand corner.
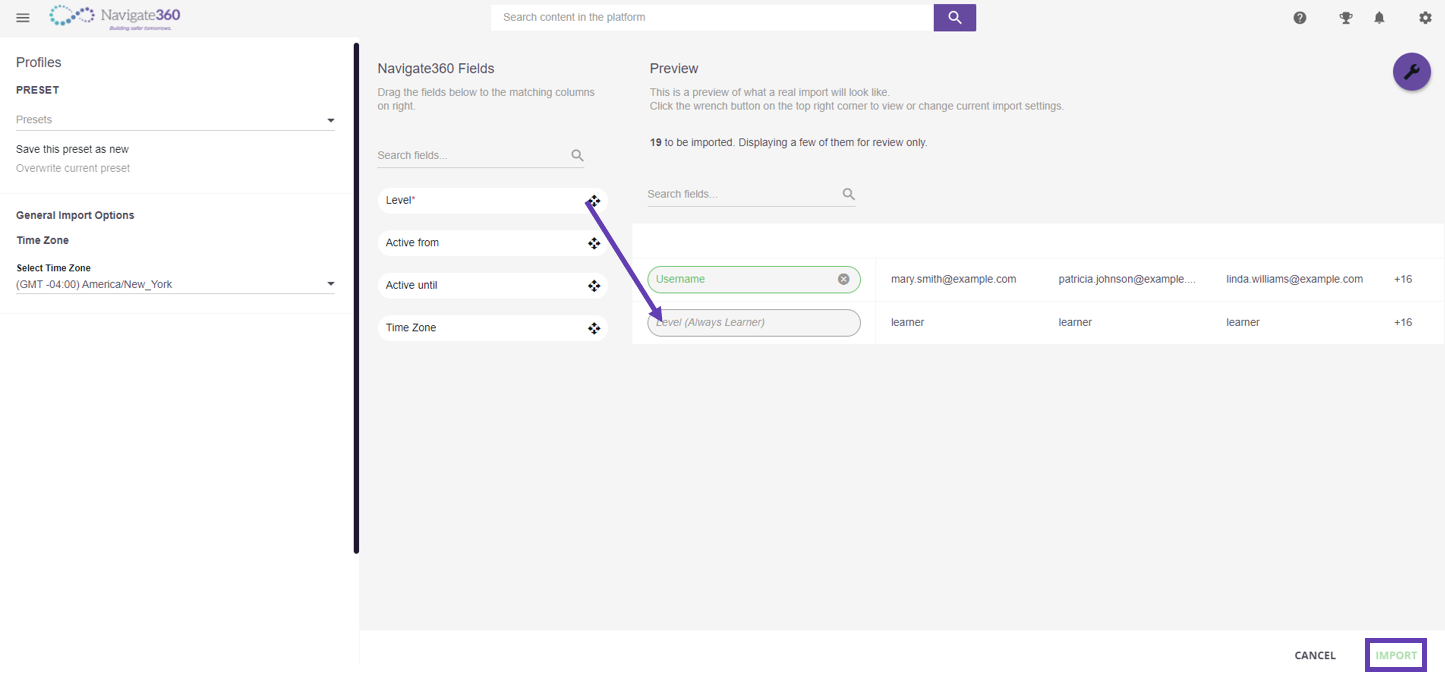
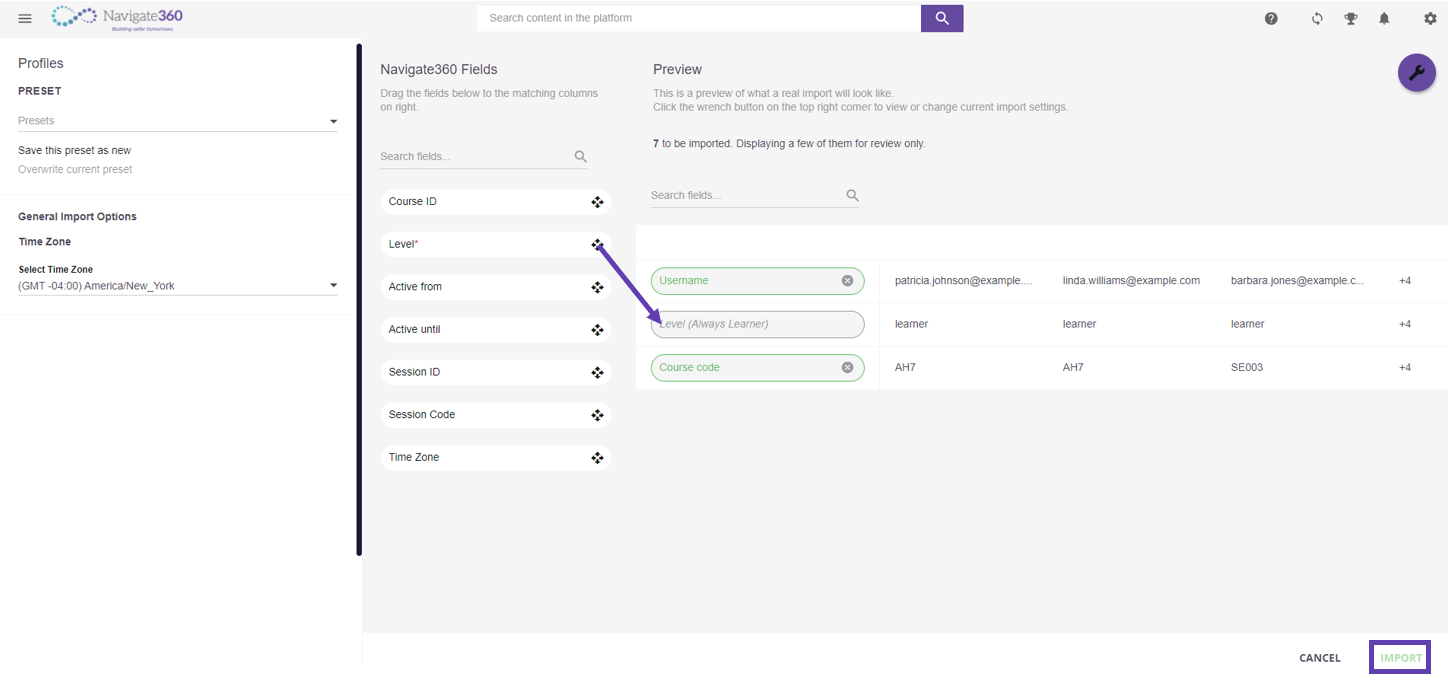
- Under the Navigate360 Fields column, drag Username and Level over to match the Header labels in the Preview column
- Click Import
- A confirmation box will appear. Click Enroll Users to complete the enrollment
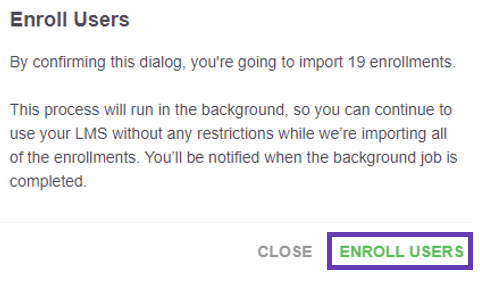
- A notification will appear when the job is complete. Note: larger imports may become a background job. Background jobs will email you once complete
Enrolling into Multiple Courses
- Log into https://learn.navigate360.com using your login credentials.
- Click on the Admin Menu Gear in the top, right corner
- Click “Course Management” or select it from the Quick Links on the Home Screen
- On the Course Management screen, click the “Manage Enrollments” icon (purple circle in the upper-right corner)
- Then, click Manage Enrollments via .CSV
- Click the green cloud and select your saved CSV file.
- Open “Advanced Settings” and ensure “Consider first row as header” is toggled on. Click “Confirm” in the lower right-hand corner.
- Under the Navigate360 Fields column, drag Username, Level, and Course Code over to match the Header labels in the Preview column
- Click Import
- A confirmation box will appear. Click Enroll Users to complete the enrollment
- A notification will appear when the job is complete.
Note
Larger imports may become a background job. Background jobs will email you once complete
How to Enroll Users Manually:
Step 1: Navigate to the  gear wheel in the top right corner to access admin settings.
Step 2: Click “Course Management" or select it from the Quick Links on the Home Screen.
Step 3: Click on the name of the course you want to enroll users in. You will then access the enrollment menu.
Example: Click on the name “ALICE Basic for Schools" |
Step 4: Click on  “Manage Enrollments” and then “Enroll Users.”
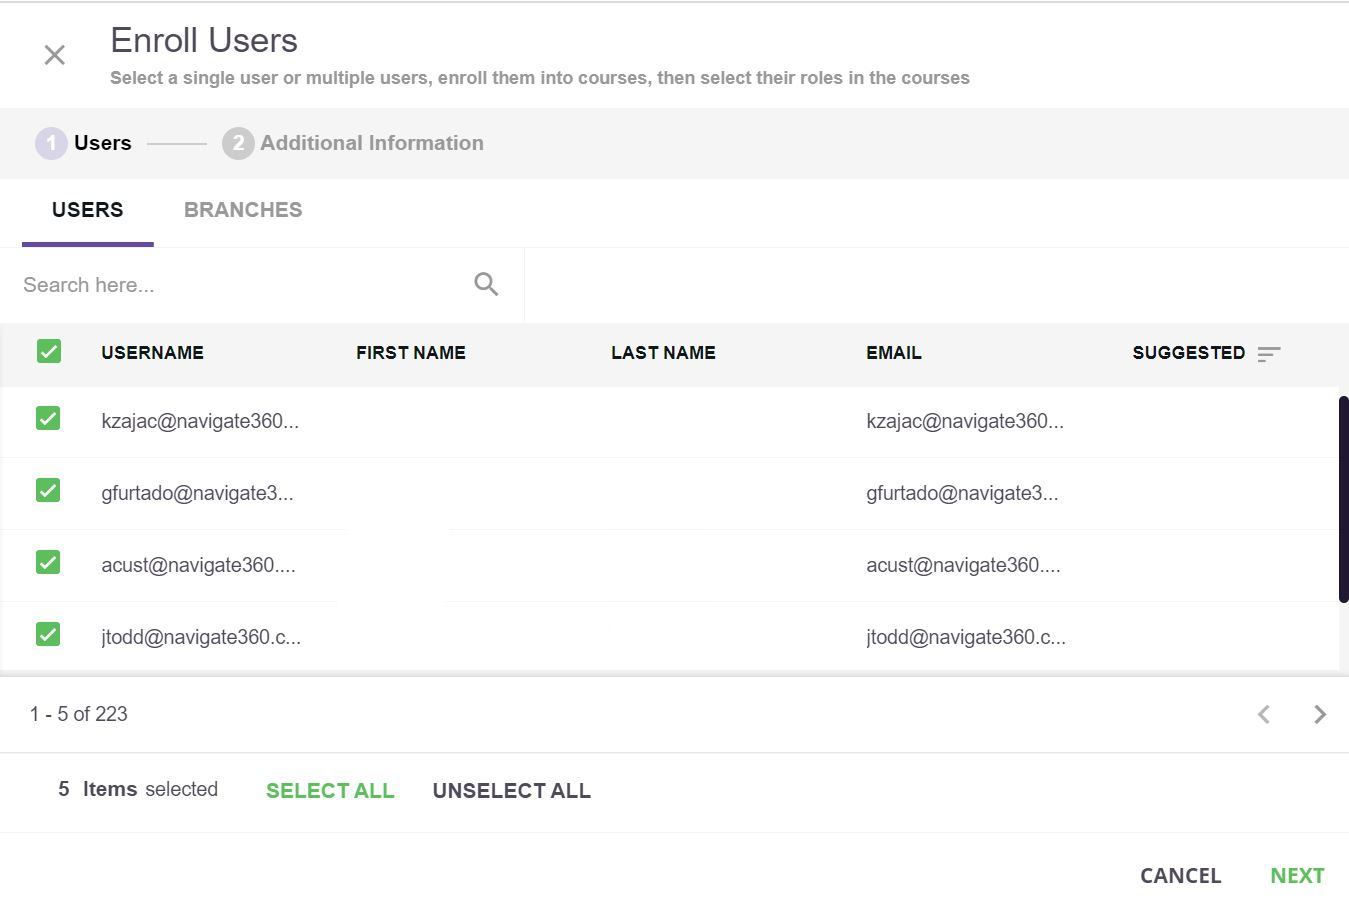
Step 5: Select one, multiple, or all users and click “Next.”
Step 6: Review the enrollments and “Confirm” at the bottom of the page.
Video Training: Enrolling Users in a Course (click to expand)