ID Card Wizard- PBIS Rewards
Learn how to use the ID Card Wizard.
- Emergency Management Suite
- Preparation & Response Training
- PBIS Rewards
-
Compass
Getting Started Webinar Links Data & User Management Compass Curriculum for Students, Staff, & Families Compass Behavior Intervention Compass Mental Health + Prevention Compass for Florida - Character Ed, Resiliency, & Prevention Compass for Texas - Character Ed Analytics & Reporting Release Notes & Updates Additional Resources
- Behavioral Case Manager
- Visitor Management
- School Check In
- ALICE Training Institute
- Detect
- Anonymous Tip Reporting
- Resources
- Back-to-School
How do I request a quote for PBIS Rewards ID Cards or Lanyards?
If you would like to request a quote for ID Cards or Lanyards from PBIS Rewards, you can reach out to your Account Executive directly or email sales@pbisrewards.com for more information.
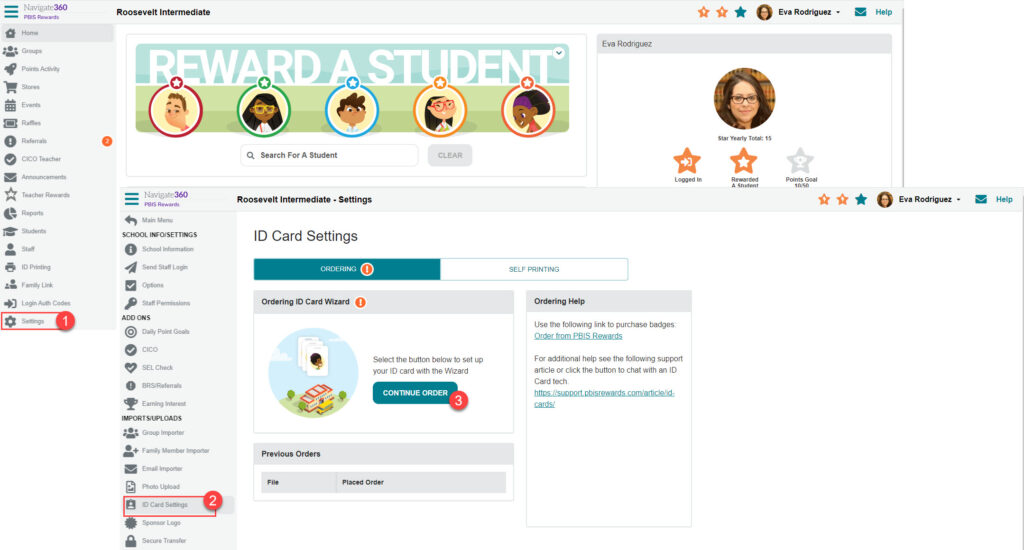
How do I place my ID Card order within PBIS Rewards?
Orders for ID Cards can be placed directly within PBIS Rewards using the ID Card Wizard. Follow the instructions below to place an order for ID Cards:
- Navigate to “Settings” in your left-side menu. If you do not have a “Settings” tab, you will need to reach out to a PBIS Rewards Admin at your school to complete these steps.
- Select “ID Card Settings” from the new menu that appears.
- Click “Begin/Continue Order” to enter the ID Card Wizard and complete your order.
Please note: Once your order is submitted through the ID Card Wizard, it will be delivered to you within 10-14 business days. At this time, we can only provide and ship ID Cards in the United States. A minimum $15 shipping fee will apply to each order placed through the ID Card Wizard.
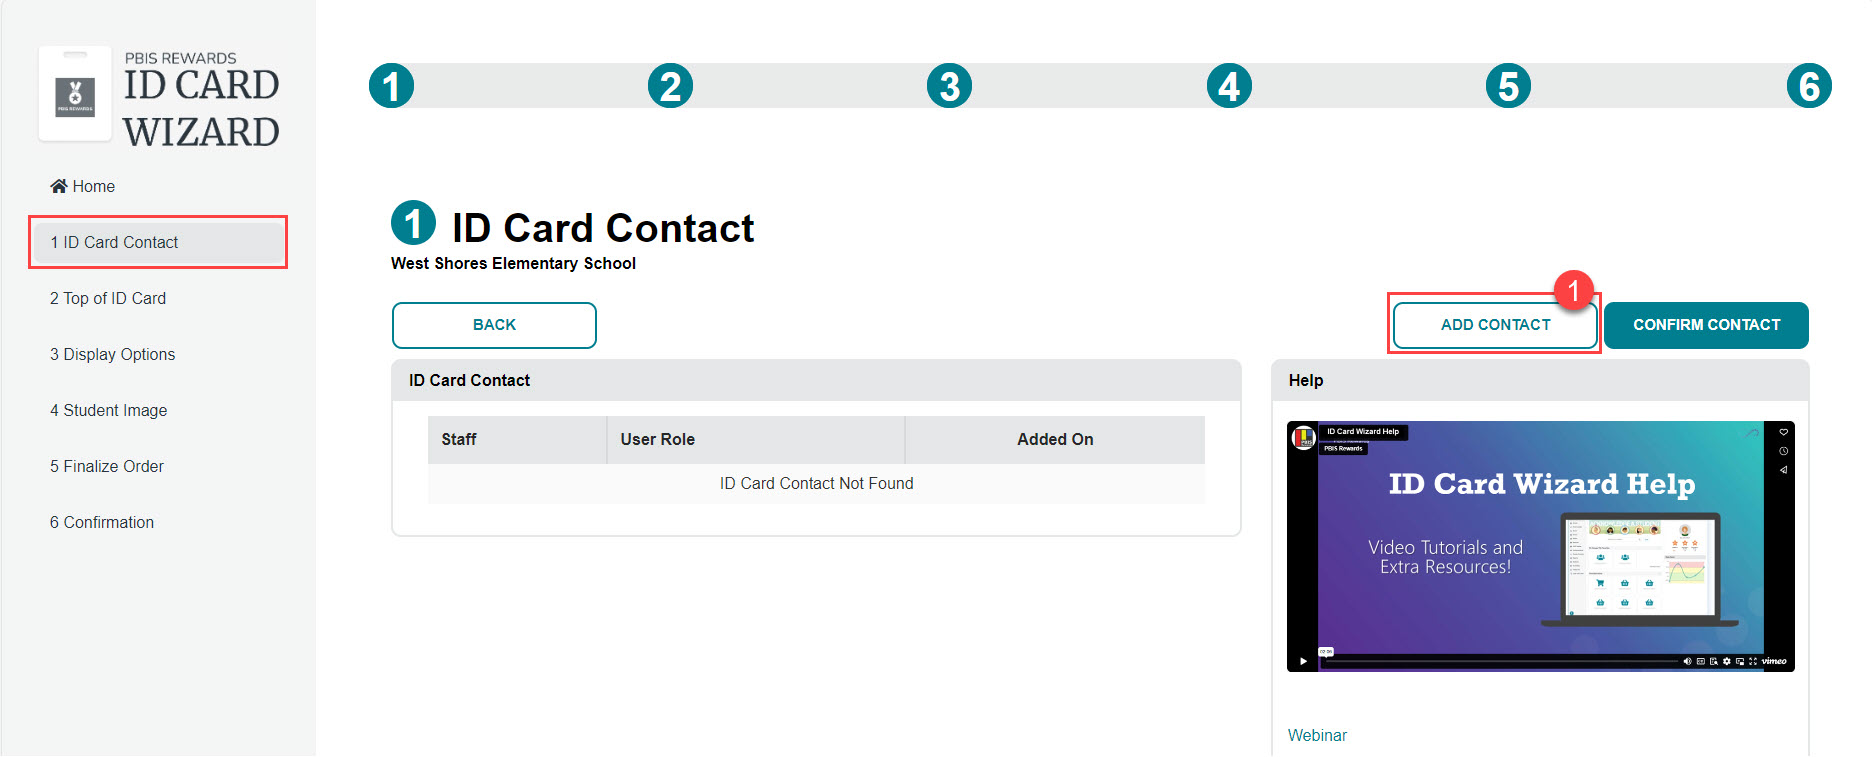
Step 1: ID Card Contact
In this step, you will select the person at your school that will be completing this wizard or the person responsible for finalizing your ID Card order. If the appropriate person is currently shown, click the “Confirm Contact” button or use the “Change Contact” button to select a different staff member.
Step 2: Top of ID Card Design
In this step, you will be deciding what appears on the top of your ID Cards. You have three options to choose from:
- Use the PBIS Rewards logo
- Upload a custom image (300 pixels wide and 96 pixels high)
- Create a text logo by choosing the colors and font and entering your text in the Top Text and Bottom Text fields.
Once a selection is made, you can use the ID Card Preview on the right. “Front” and “Back” views are available. Once you are satisfied with your selection, select “Next” in the upper-right to save and move to the next step.
Here is the default header from the 2023-2024 school year, if needed.

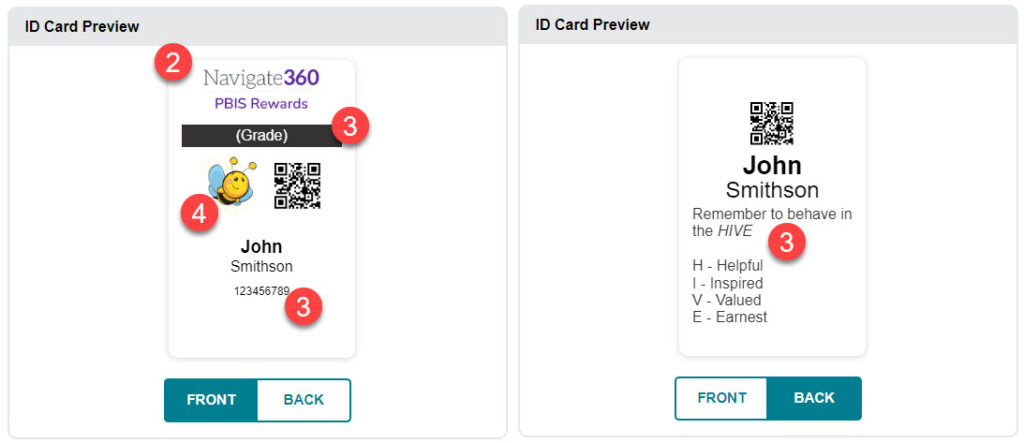
Step 3: Display Options
This step allows you to choose what will appear on the front and or back of your ID Cards. Note: if you don’t choose the option for additional information on the back of your card then your ID Card front and back will be identical. Options are as follows:
- Grade identifier (each grade will be displayed in a different color)
- ID Number displays the student’s ID number found in PBIS Rewards
- Note: If you are using Clever or ClassLink, we may be able to switch your ID numbers to match the ID number that you prefer. Please reach out to support if you need assistance with changing your student IDs.
- Include a bar code that correlates to the student’s ID number
- Add hotline numbers (default numbers are the national suicide prevention and domestic violence hotlines)
- Selecting additional information on the back of ID card allows you to include information specific to your school on the back of the ID Card
Once selections are made, you can use the ID Card Preview on the right. “Front” and “Back” views are available. Once you are satisfied with your selection, select “Next” in the upper-right to save and move to the next step.
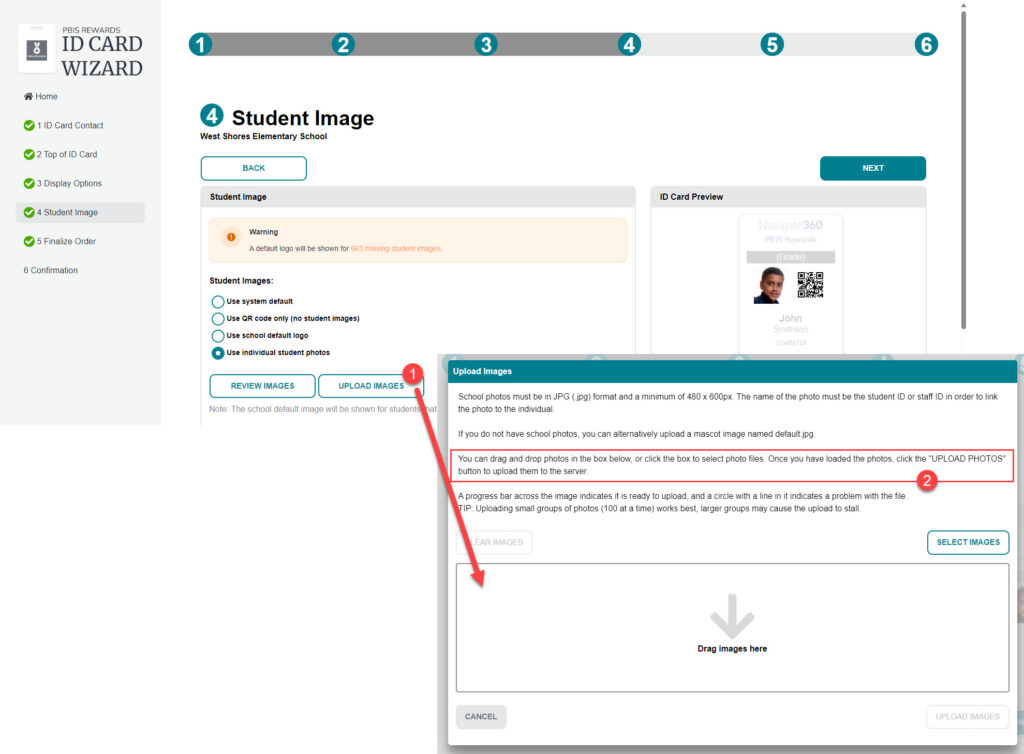
Step 4: Student Image
This step provides options to show, hide or replace the student image. The options are as follows:
- Use the system default (PBIS Rewards logo)
- Have no student image and center the QR code
- Add and use a default school image (i.e. mascot, school logo, etc.)
- Add and use student images
If you choose to use student images you will need to provide the images.
Here is the default student image from the 2023-2024 school year, if needed.

To upload multiple images at one time:
- Select the “Upload Images” button
- Drag and drop images in the upload field or browse your computer using “Select Images”
To add upload individual photos:
- Use the “Review Images” button
- Add student images individually
- Approve the images
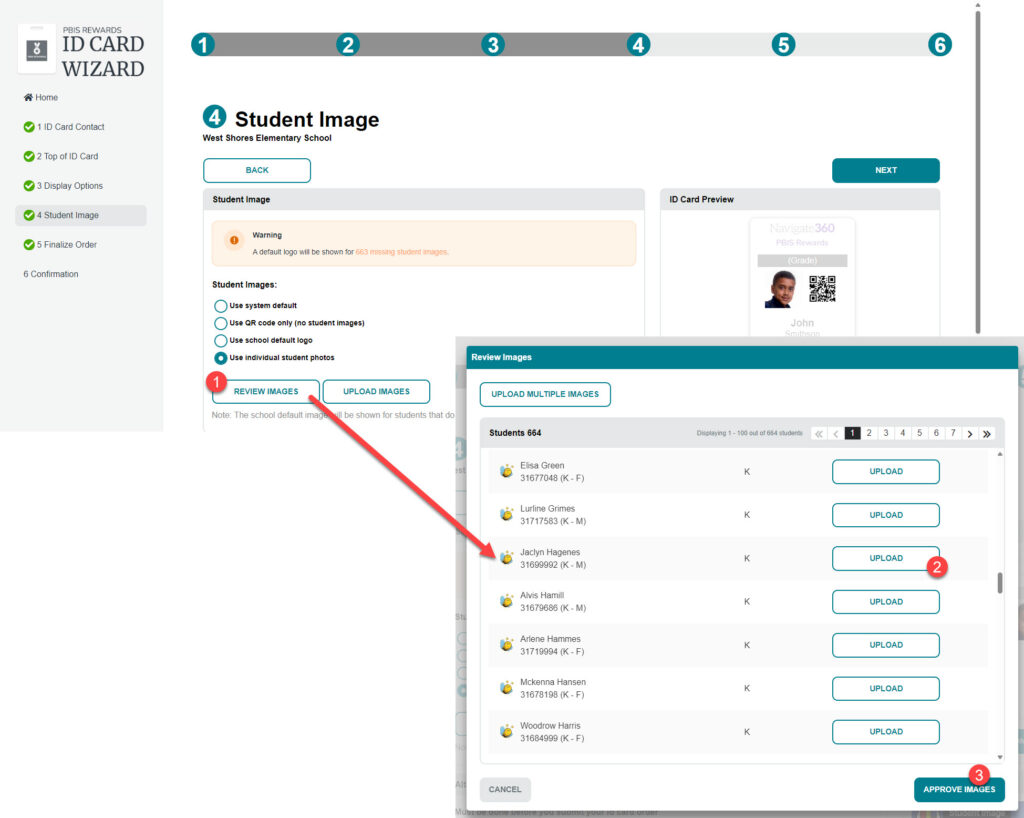
Using the mobile app to take student photos or the desktop portal to add students individually are also options. Visit our support site article for information on how to use these options.
Do you see this pop-up?

The warning message above is to let you know that your roster may not be up to date. Some possible causes would be that you don’t have any students in your lowest grade (all your students have moved up a grade at the end of the year) or you haven’t used the “Upload Students” button on the Students page. Please verify your students in PBIS Rewards by selecting “Students” from the left-side main menu and using the “Grades” filter in “Student View Options” to check the students in each grade level.
Step 5: Finalize Order
Use this step to make the final decisions on your order:
- Use the dropdown provided to select the users you are printing IDs for
- Review the information to make sure that it is correct (i.e. ID Number, grade level, & totals)
- Confirm/enter the correct shipping address
- Preview the front and back of the card
Do you see this pop-up?
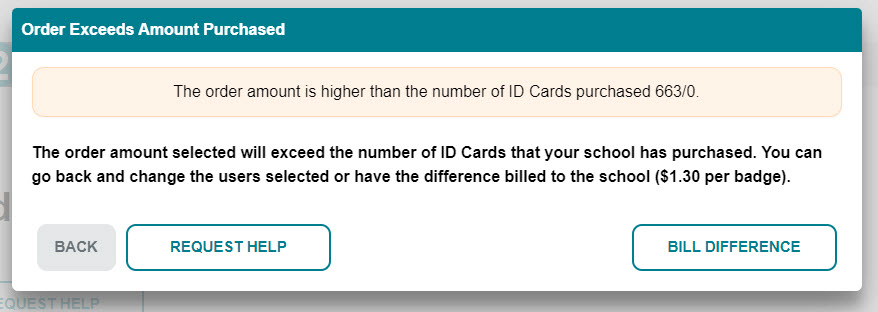
The warning message above is to let you know that the number of users selected exceeds the number of badges that you have purchased. In order to continue you can:
1. Change the user selection on the previous step (i.e. if you chose All Students And Staff you could switch to Students Only) in order to have the order number equal to or less than the number if ID Cards purchased.
2. Select the “Bill Difference” button and PBIS Rewards will bill your school the difference at $1.30 per ID Card.
3. Use the “Request Help” button to get in touch with one of our ID Card Techs to assist you.
Step 6: Confirmation
This step allows you to see all of the details of your order and provides a pdf that can be viewed to review the options selected, the design of both sides, and a list of all the users to be printed. Once you are ready to submit your order, select the “NEXT” button and choose the “SUBMIT” button to send your order.