How to add photos - PBIS Rewards
Learn how to add photos to the web portal and mobile app.
- Emergency Management
- Connect360
- PBIS Rewards
- Hall Pass
- Preparation & Response Training
- Behavioral Case Manager
- Visitor Management
-
Compass
Training Workshops Getting Started On-Demand Data & User Management Compass Curriculum for Students, Staff, & Families Compass Behavior Intervention Compass Mental Health + Prevention Compass for Florida - Character Ed, Resiliency, & Prevention Compass for Texas - Character Ed Analytics & Reporting Release Notes & Updates Additional Resources
- School Check In
- ALICE Training Institute
- Detect
- Anonymous Tip Reporting
- Resources
- Back-to-School
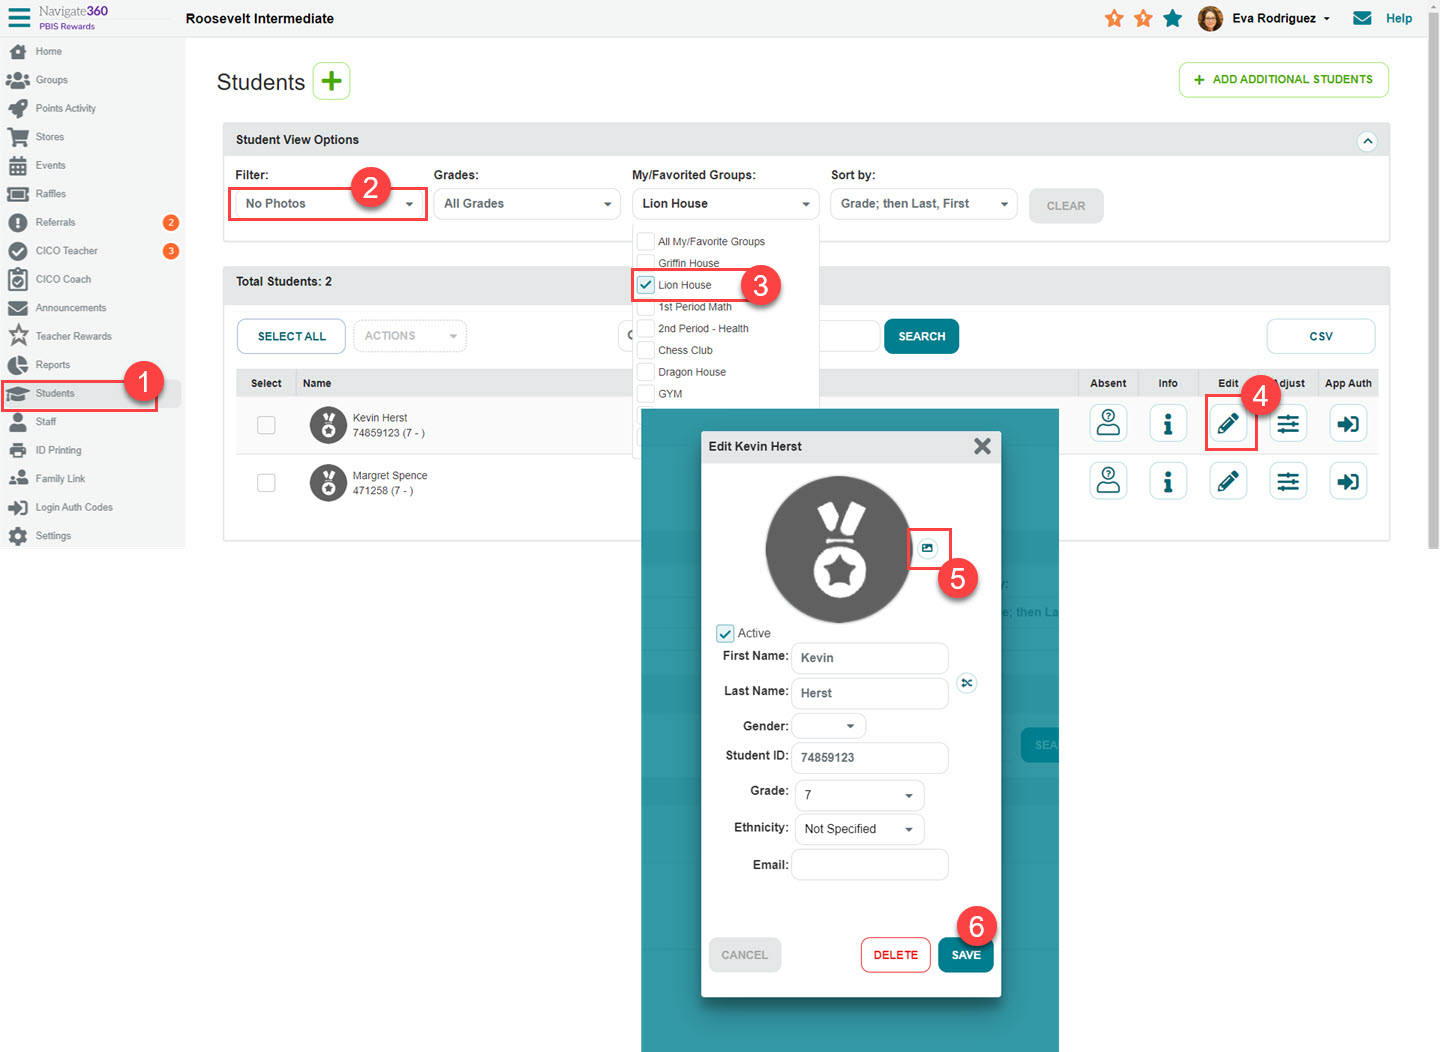
Web Portal – Student Page
Add Photos individually using the Student Page on the Web Portal (pbisr.navigate360.com)
- In the Web Portal, an Admin can select “Students” from the left-side “Main Menu.”
- Filters- Uses the “Filters” button to select “No Photos.” This will show all students without photos.
- Select the appropriate group from “My/Favorited Groups” to upload photos for students in a particular group.
- Select the edit “pencil” icon from the right column in the row for the appropriate student.
- Select the photo button to upload a new photo. Once you have selected the photo you can go back and crop or rotate the image.
- Select “Save.”
Tip: A great way to add photos is to sign in to the Web Portal using an iPad (pbisr.navigate360.com). Clicking the edit and then the camera icon will let you use the iPad’s camera to take a photo. Use the plus to add a photo. You will be offered the option of using the camera. Select the camera icon. Take the photo and then select “Save.” This example screenshot was taken on an iPad.
This same process can be used to add staff photos. Simply start by selecting “Staff” from the left-side main menu for the first step.
Web Portal – Group
- Select “Groups” from the left-side main menu
- Choose “Settings”
- Select “Edit Group” from the drop-down
- Choose the photo icon on a student card
- Select the image button to upload a photo and select the photo from your computer
- Save the new photo
- Save the changes to the group

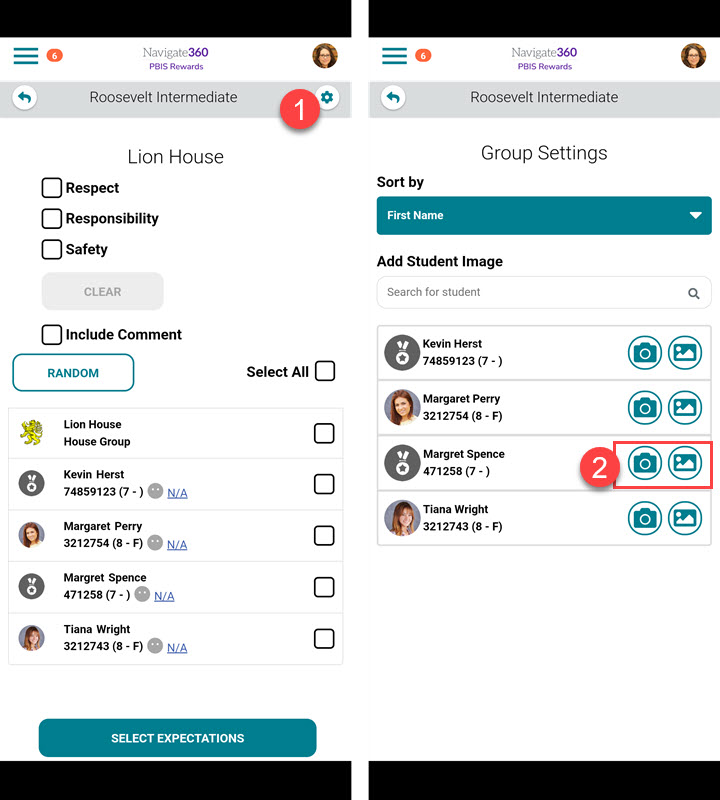
Staff Mobile App
On the Staff Mobile App, select one of your groups.
- Choose the setting icon in the upper-right
- Add an image for a student by taking a picture with the “camera” icon or select a photo with the picture icon
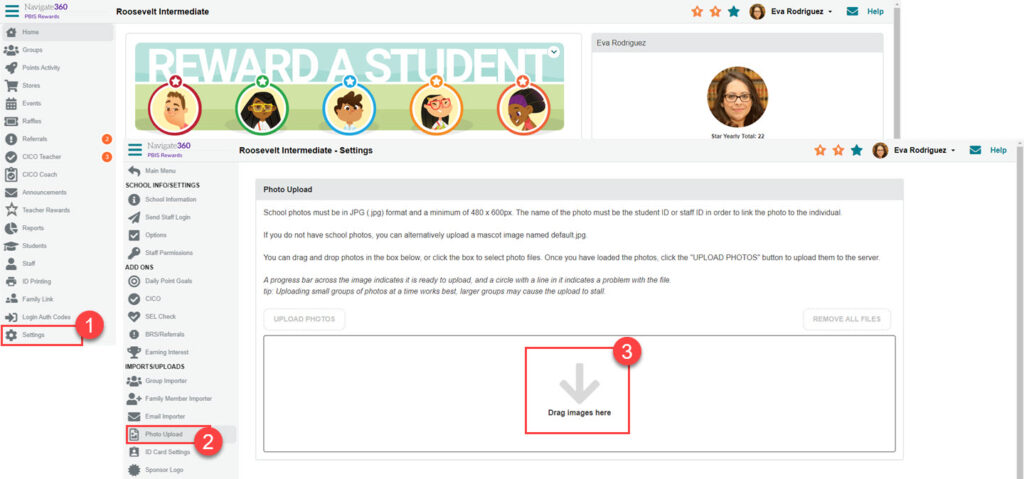
Upload a Photo File
- Select “Settings” from the left-side main menu
- Choose “Photo Upload” from the next left-side menu
- Drag and drop you photo file in the field or click in the box and search for your photos
- Once the images populate, use the “Upload Photos” button to import the images
Note: The name of each photo file must match the student or staff ID in PBIS Rewards. If you are using Clever or ClassLink, we may be able to switch your ID numbers to match the ID number that was used for the name on the photo files. Please reach out to support if you need assistance with changing your student IDs.