Configuration Overview- School Check In
Understand the setup and operation of School Check IN systems, including features and customization options.
- Emergency Management
- Campus360
- Connect360
- PBIS Rewards
- Hall Pass
- Preparation & Response Training
- Behavioral Case Manager
- Visitor Management
-
Compass Curriculum
Training Workshops Getting Started On-Demand Release Notes & Updates Data & User Management Compass Curriculum for Students, Staff, & Families Compass Behavior Intervention Compass Mental Health + Prevention Compass for Florida - Character Ed, Resiliency, & Prevention Compass for Texas - Character Ed Analytics & Reporting Additional Resources
- School Check In
- ALICE Training Institute
- Digital Threat Detection
- Anonymous Tip Reporting
- Resources
- Back-to-School
Configuration Overview
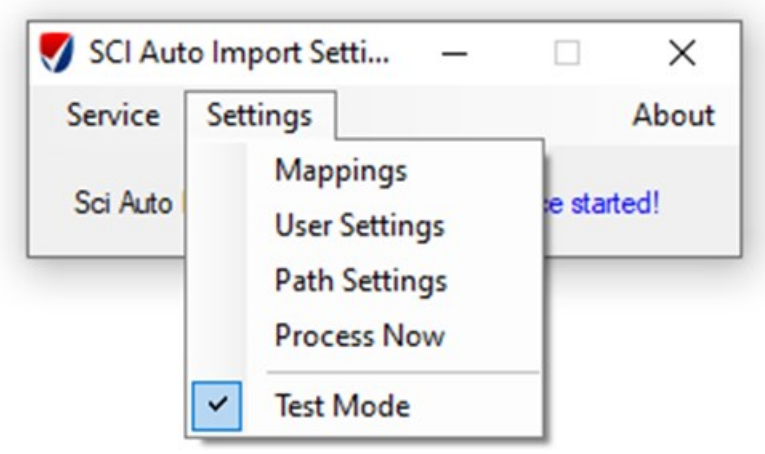
Open the Auto Import Application and select the Settings dropdown menu.
Follow the Setup Process in this order:
- User Settings - page 6
- Path Settings - page 7
- Mappings - page 8
- Test Mode - page 9
- Process Now - page 10
 Configuration: User Settings
Step 1: Open the Auto Import Application and select the Settings drop down menu.
Step 2: Select User Settings.
Step 3: Enter your School Check IN credentials and select Save.

Upon a successful login the User Settings login box will disappear.
Configuration: Path Settings
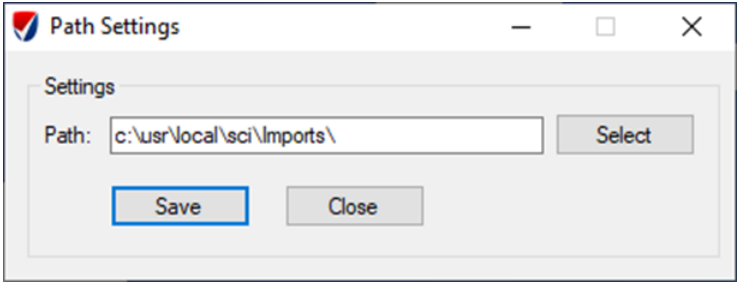
Step 1: Open the Auto Import Application and select the Settings drop down menu.
Step 2: Select Path Settings.
Step 3: Click Select to browse for the location where the import file will be found.
Step 4: Click Save to keep the location.
| Import Type | Example File Name |
|---|---|
| Student Import; must contain the text “student” | SCI_student.csv |
| Class import; must contain the text “class” | SCI_class.csv |
| Faculty/Staff import; must contain text “faculty” for “fs” | SCI_fs.csv |
| Parent import; must contain text “parent” or “pg” | SCI_pg.csv |
| Vendor import; must contain text “vendor” or “ven” | SCI_vendor.csv |
| Volunteer import; must contain text “volunteer” or “col” | SCI_volunteer.csv |
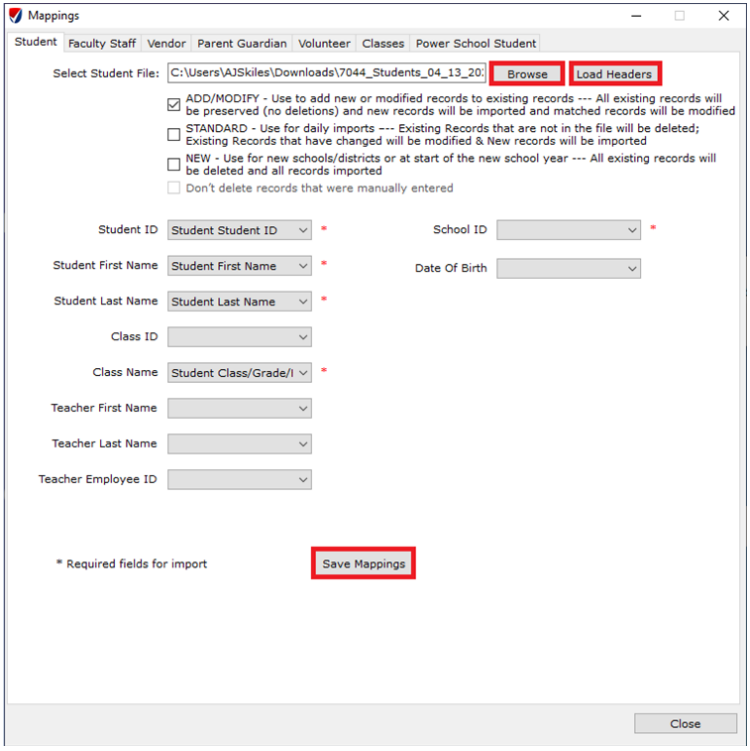
Configuration: Mappings
Step 1: Open the Auto Import Application and select the Settings drop down menu.
Step 2: Select Mappings.
Step 3: Click Browse.
Step 4: Navigate to the location of the file to be imported. Select the file.
Step 5: Click Load Headers.
Step 6: Check the preferred import option.
Step 7: Click on the field pick list.
Step 8: Select the correct field.
Step 9: Repeat steps 6-7 for all required fields.
Step 10: When complete, click Save Mappings.
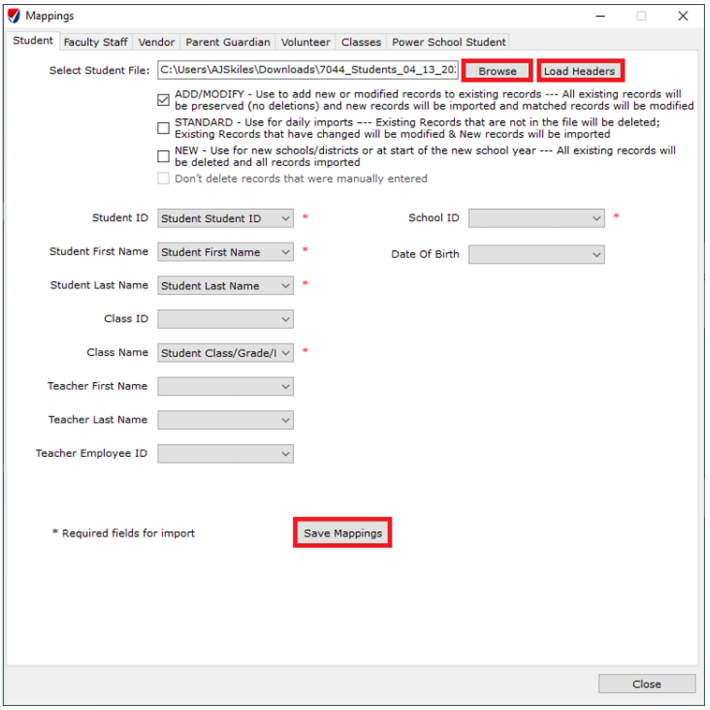
Repeat mapping process for other tabs with data to be imported.
| Required Fields for Mapping: | |||||
|---|---|---|---|---|---|
| Student | Faculty / Staff | Vendor | Parent/Guardian | Volunteer | Classes |
|
|
|
|
|
|
Configuration: Modify Mapping
If the format of your SIS export changes, your data will no longer properly import into School Check IN. You will have to modify the mapping of the file with the new template. Remapping will also be required if the Automatic Import Utility has been relocated to another computer/server.
Step 1: Open the Auto Import Application and select the Settings drop down menu.
Step 2: Select Mappings.
Step 3: Click Browse.
Step 4: Navigate to the location of the file to be imported. Select the file.
Step 5: Click Load Headers.
Step 6: Check the preferred import option.
Step 7: Click on the field pick list.
Step 8: Select the correct field.
Step 9: Repeat steps 6-7 for all required fields.
Step 10: When complete, click Save Mappings.
Repeat mapping process for other tabs with data to be imported.
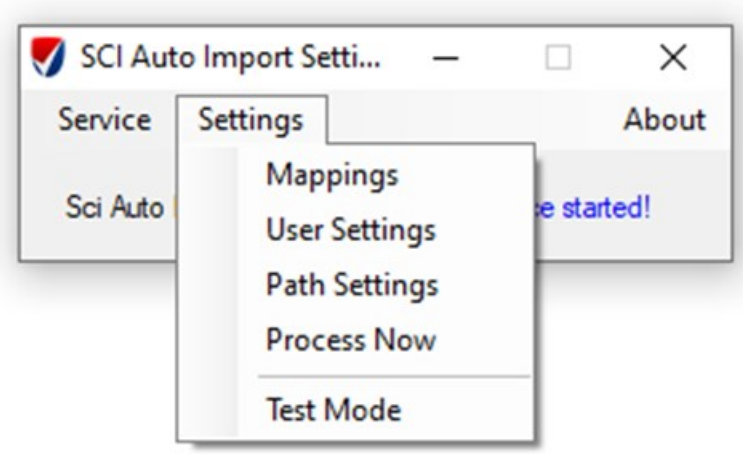
Configuration: Test Mode
By unchecking Test Mode, the application will look at the path folder for any new files and process them to be uploaded to the School Check IN server.
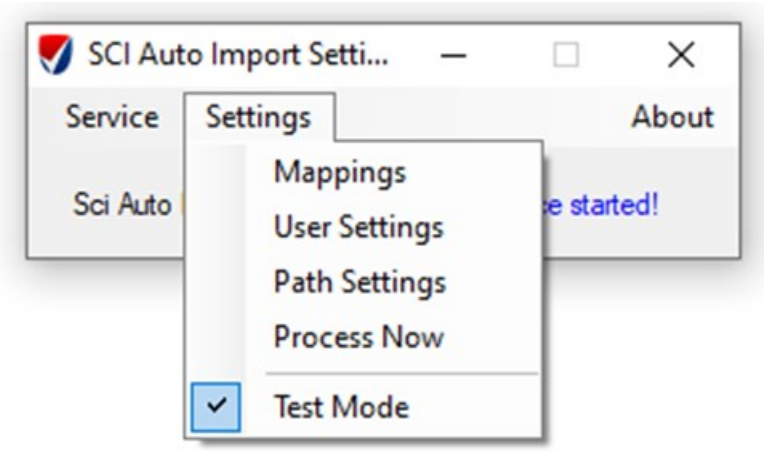
Step 1: Open the Auto Import Application and select the Settings drop down menu.
Step 2: Uncheck Test Mode.
Configuration: Process Now
The client service will upload the files on server at a specific time every day. If updates need to happen before the scheduled window for upload (6 P.M. - 6 A.M.), users can manually upload files for import.
To manually upload the files, open the Auto Import Application and select the Settings drop down menu.
Step 2: Select Process Now.
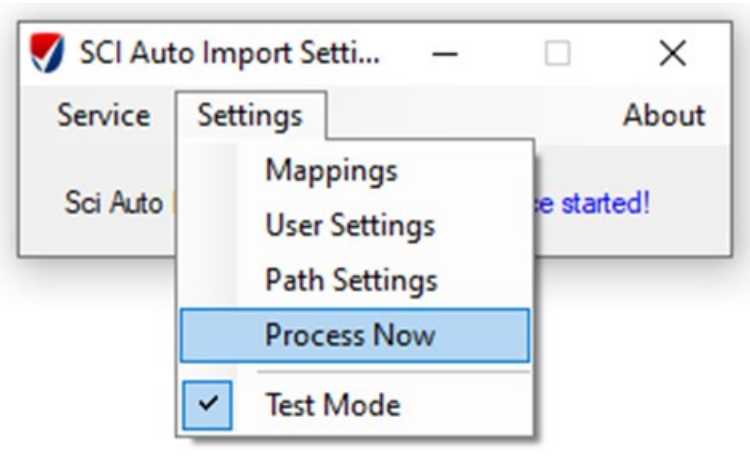
When Process Now is selected:
- The file will be imported automatically and uploaded to the School Check IN servers at www.schoolcheckin.net
- The file will be placed in queue to be imported overnight between 6 P.M. to 6 A.M.
- The source file on the local computer will be renamed and moved to a sub-folder under the same primary folder where the import files are located. Ex. “students.cvs” will be moved to a sub-folder and renamed “students08222021_13:20.csv”
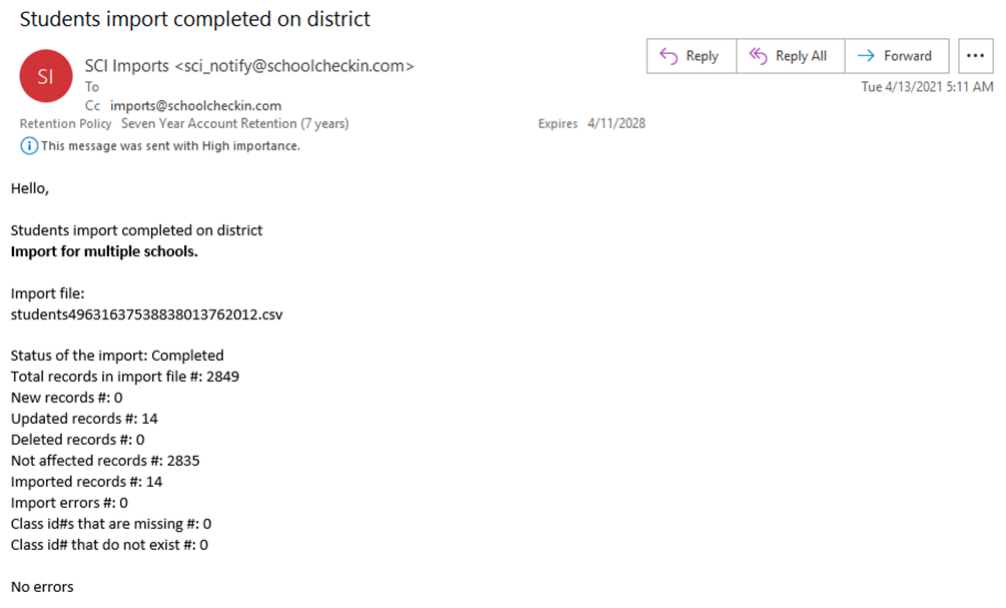
Configuration: Email Alerts
Once the nightly import has been completed, the District Admin will receive the import confirmation email.
Confirmation Email Example: