Launch: Renewing School- PBIS Rewards
Learn how to manage your settings and renew your school.
- Emergency Management
- Campus360
- Connect360
- PBIS Rewards
- Hall Pass
- Preparation & Response Training
- Behavioral Case Manager
- Visitor Management
-
Compass
Training Workshops Getting Started On-Demand Data & User Management Compass Curriculum for Students, Staff, & Families Compass Behavior Intervention Compass Mental Health + Prevention Compass for Florida - Character Ed, Resiliency, & Prevention Compass for Texas - Character Ed Analytics & Reporting Release Notes & Updates Additional Resources
- School Check In
- ALICE Training Institute
- Detect
- Anonymous Tip Reporting
- Resources
- Back-to-School
Note: Video may display a previous version of the software. See article below for more recent images.
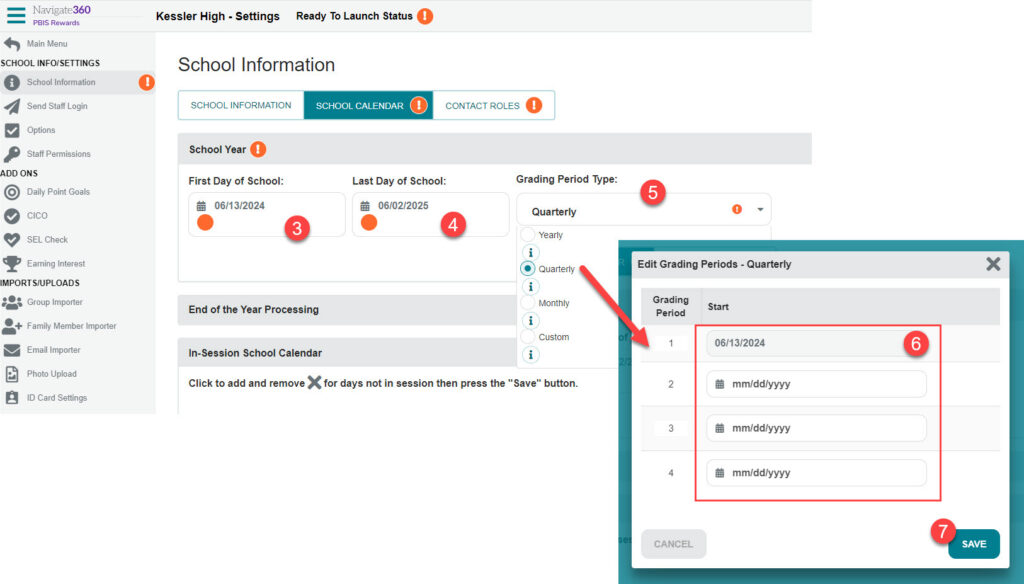
Once you have renewed PBIS Rewards, you’ll be able to set up for the school year right in the software. Start setup by updating your School Calendar and Contact Roles. Students and Staff will need to be updated also, but that can be done at a later time.
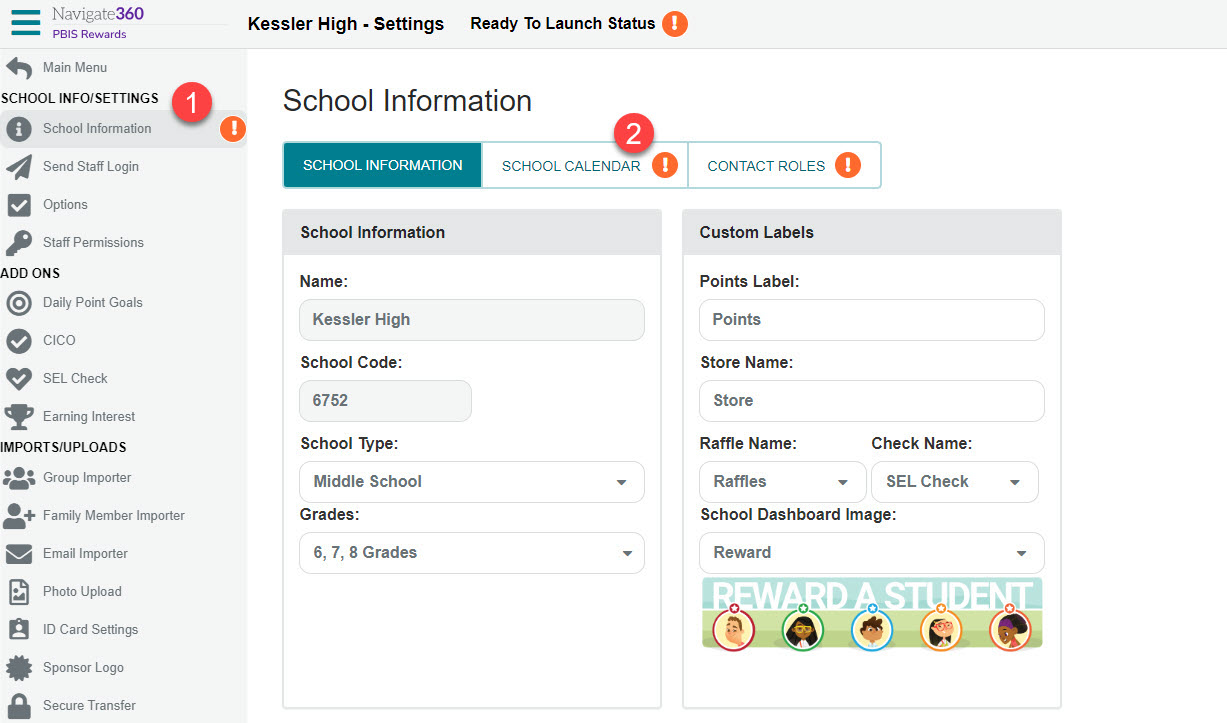
- Select “Settings” for the left-side main menu. The screen will now display “School Information.”
- Choose “School Calendar.”
3. Add the dates for the beginning of your academic year (MM/DD/YYYY formatting).
4. Set the date for the end of your academic year (MM/DD/YYYY formatting).
5. Set the “Grading Period Type” you would prefer. These can match your school’s grading periods or they can reflect the length of time you prefer for quickly checking reports or creating incentives. If you select “Custom,” you will be prompted to enter the number of grading periods desired.
6. Set the beginning date of each grading period. This will only be needed if you selected “Quarterly” or “Custom” as the grading period type.
7. Save the date selections.
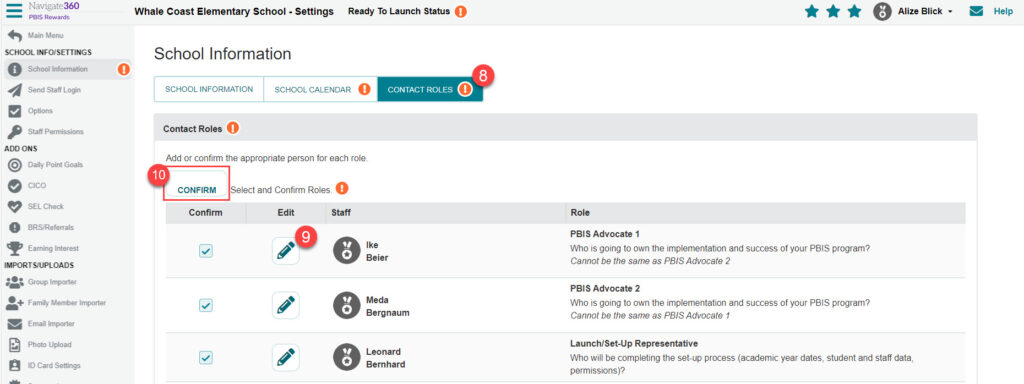
8. Set up your contact roles. Edit and confirm your contacts.
9. Make changes to assigned staff using the edit pencil.
10. Confirm your contacts with the “Confirm” button.
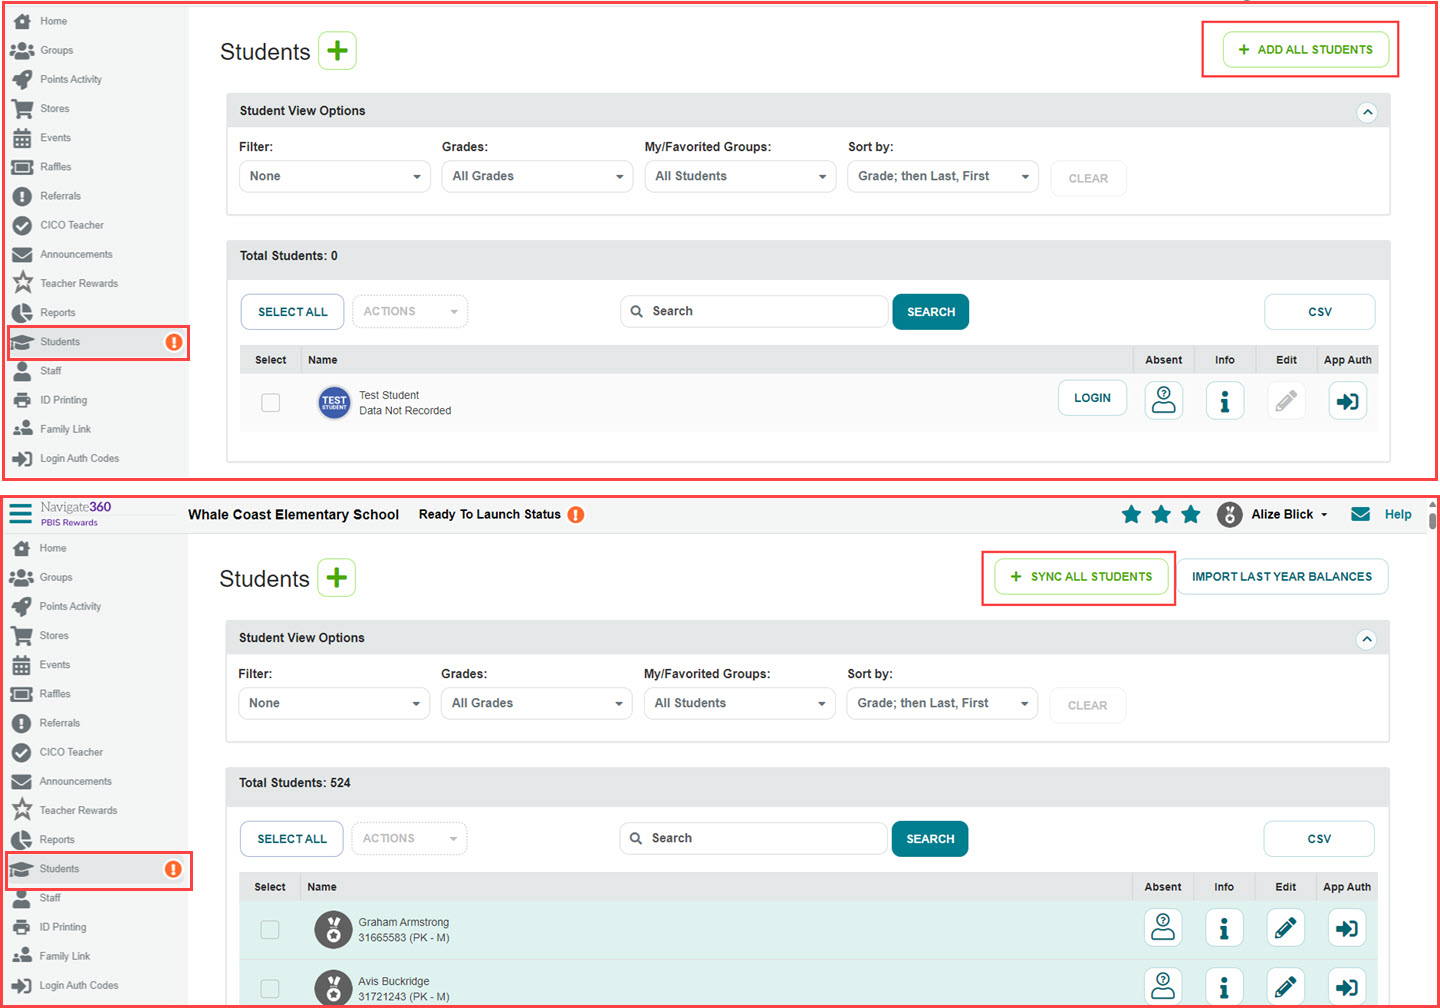
Important: When you have obtained student information for the new school year, you will update the students on the student screen. Navigate to the main menu then select the student screen.
A. Schools that manually update their students will create and upload a file to add their students to PBIS Rewards.
B. Schools that are syncing with Clever or ClassLink will sync their students.
Use the green “Sync All Students” button in the upper-right corner of the page. Then you will click to “Show Synced Students.” This will allow you to review a list of the students syncing into your school. If your students are correct, you will choose that option and confirm the sync. If your students are incorrect, you will need to wait to confirm the sync until the correct students are showing in this list. Reach out to your IT for further information about your data.
After the students are confirmed, PBIS Rewards will be able to update from the school information system through Clever or Classlink nightly. Some or all of these features may be available, depending upon the set up done by the school or district IT.
- Staff and students will be updated nightly
- Groups will be created and updated nightly
- Single sign on will be available for login