Completing a PCCD Case in Navigate360
- Emergency Management
- Campus360
- Connect360
- PBIS Rewards
- Hall Pass
- Preparation & Response Training
- Behavioral Case Manager
- Visitor Management
-
Compass Curriculum
Training Workshops Getting Started On-Demand Release Notes & Updates Data & User Management Compass Curriculum for Students, Staff, & Families Compass Behavior Intervention Compass Mental Health + Prevention Compass for Florida - Character Ed, Resiliency, & Prevention Compass for Texas - Character Ed Analytics & Reporting Additional Resources
- School Check In
- ALICE Training Institute
- Digital Threat Detection
- Anonymous Tip Reporting
- Resources
- Back-to-School
Effectively managing and completing a PCCD (Pennsylvania Commission on Crime and Delinquency) case is essential for ensuring compliance and maintaining accurate records within the Navigate360 Behavioral Case Manager platform. This guide will walk you through the key steps required to successfully complete a PCCD case, helping you streamline the process while maintaining thorough documentation.
1. From the home screen, select "Create Case"

2. Choose the PCCD Threat Assessment model and then click Proceed at the bottom

3. Verify the Team and Case Manager information is correct

4. Document details about the report that was received.

5. Document details about the Reporting Party

6. Document details about the student who may pose a threat of violence

7. Document information about the mode of the threat and whether a weapon was involved

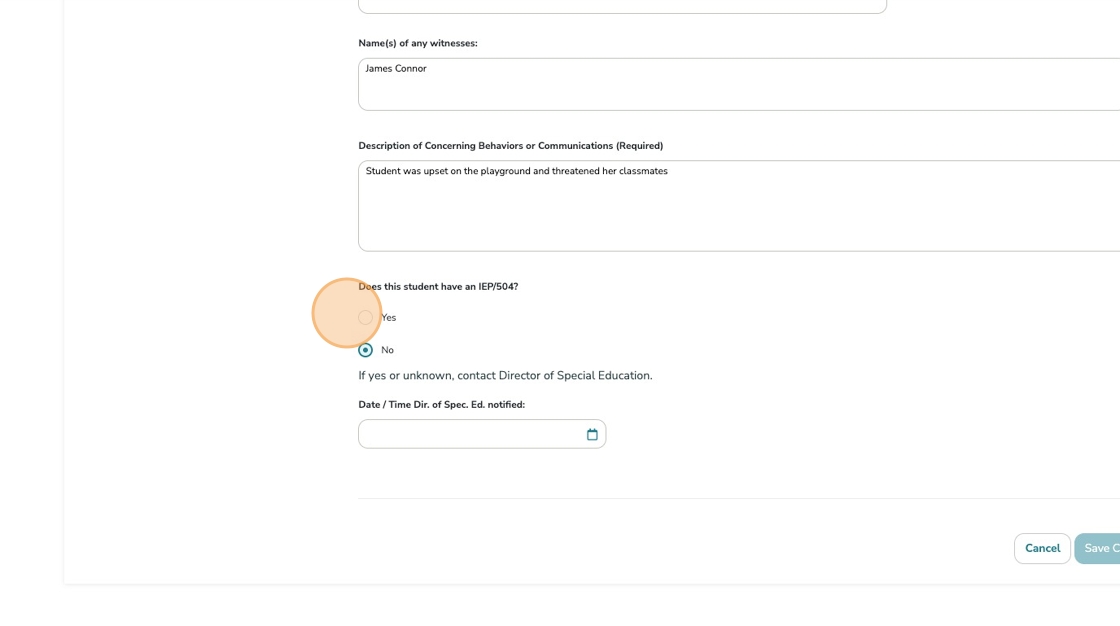
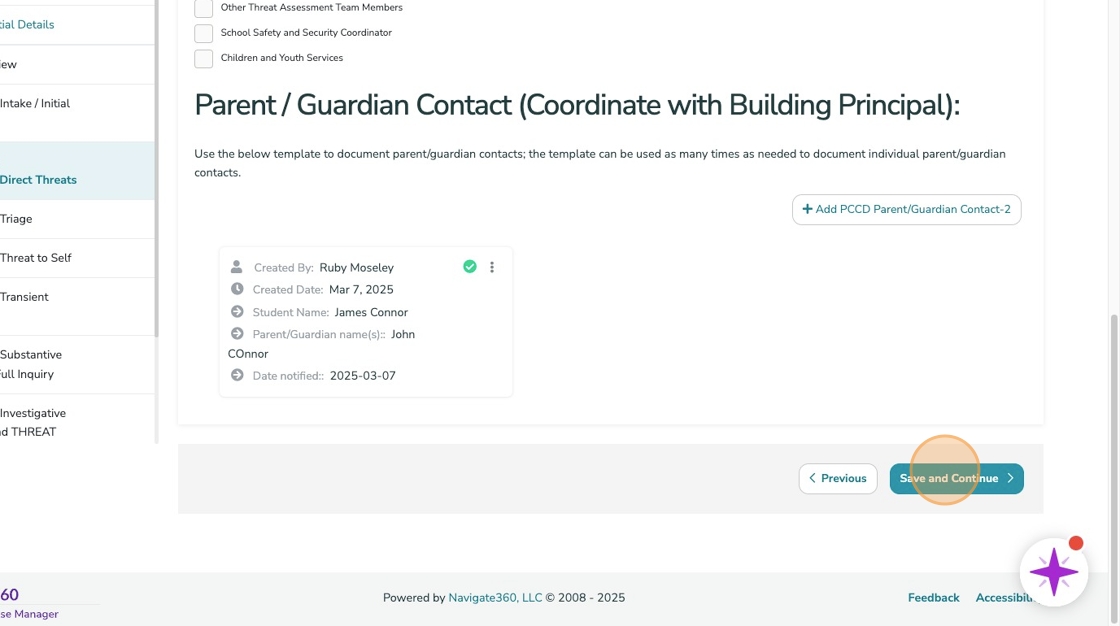
8. List any witnesses to the threat and a brief overview of the concerning behavior or communication
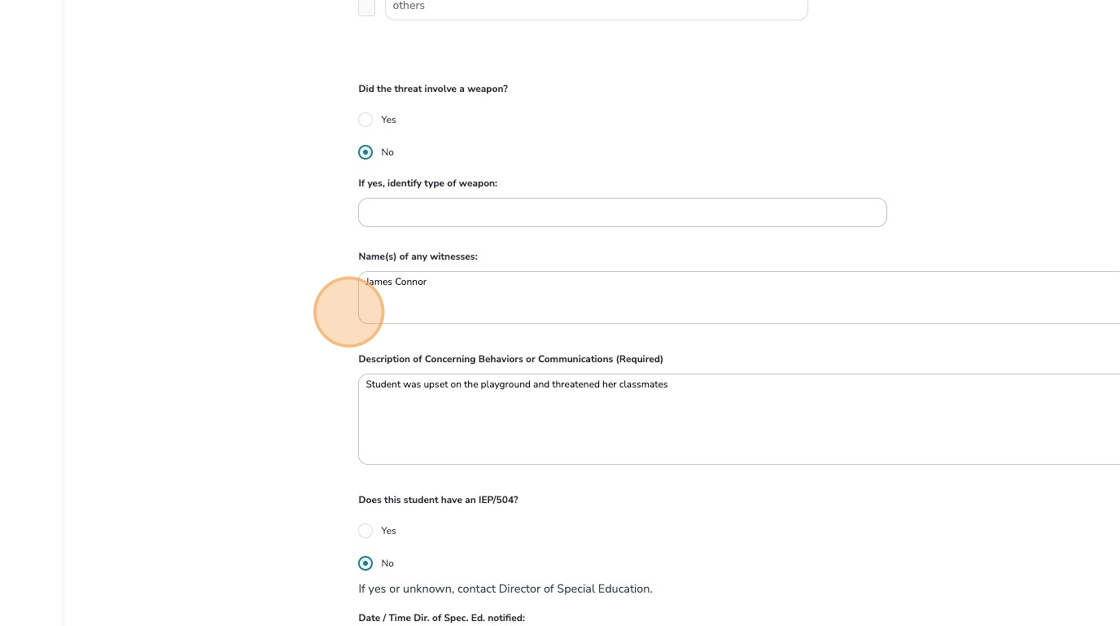
9. Document whether the student receives special education services, and when the Director was notified.
10. Click Save or Create Case to move forward

11. Part 1: Intake / Initial Inquiry
This section is used to document interviews with the person of concern, any identified targets and any witnesses.

12. By clicking "Add PCCD Target Interview" and selecting "Add Interview Form" the target interview form will open. As many Target Interviews as needed can be documented.
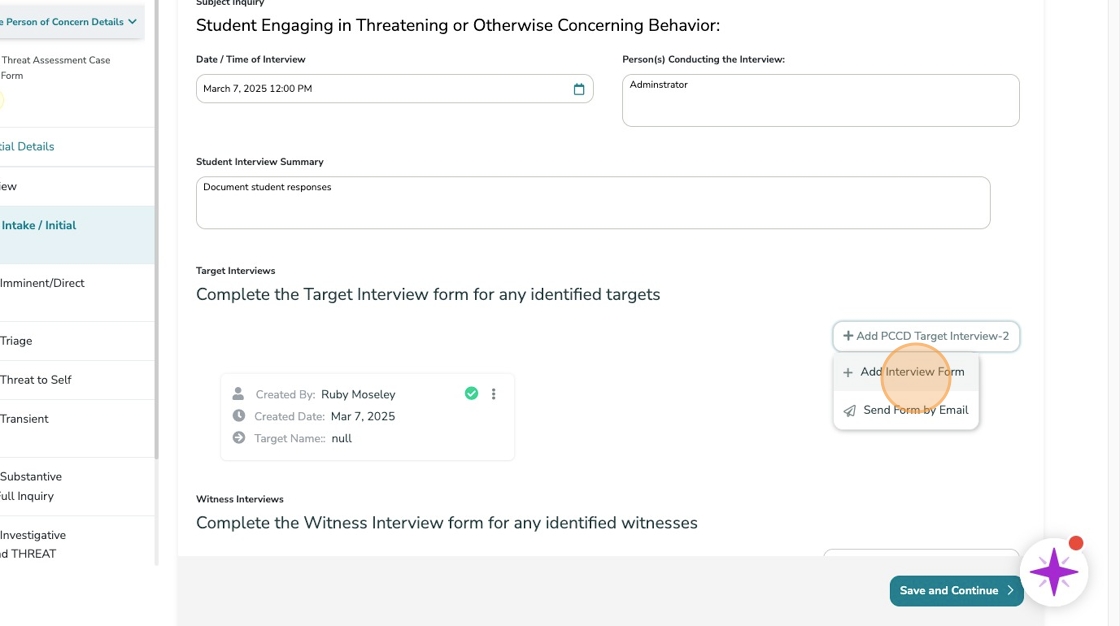
13. Complete the needed information as part of the target interview

14. Click "Complete"

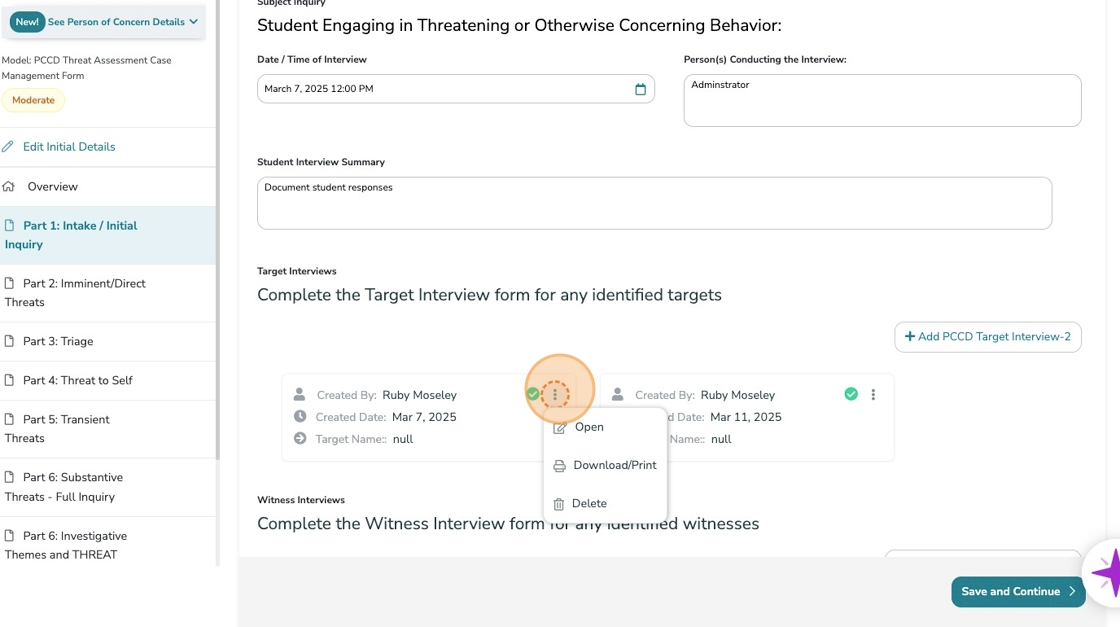
15. Once the data has been successfully saved, use the arrow to move back into the case.

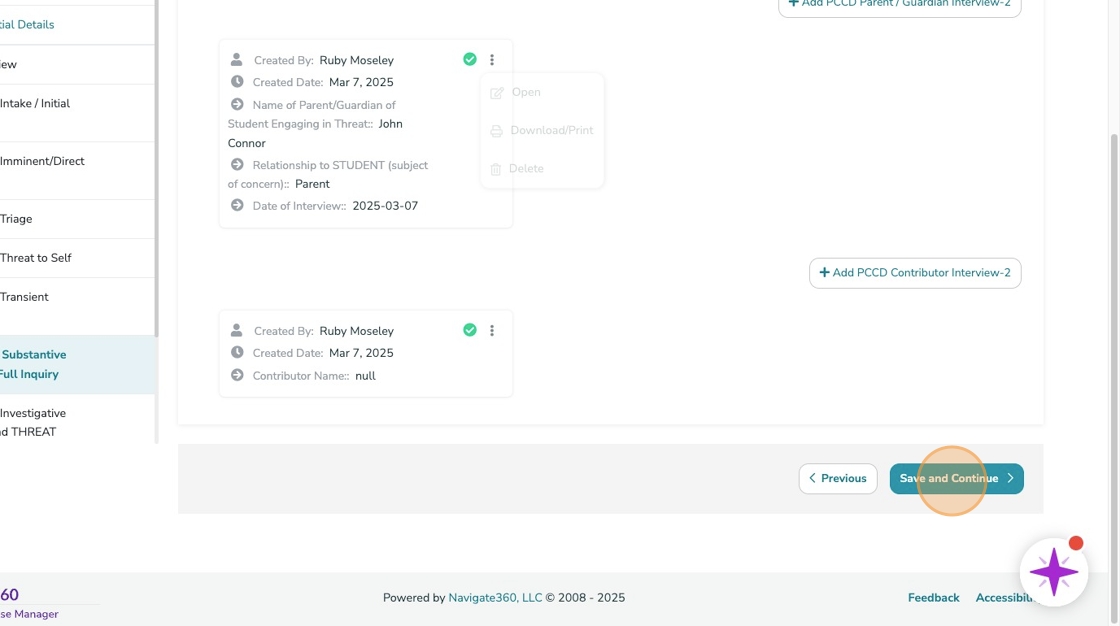
16. Interview reports can be opened, downloaded/printed or deleted as needed.
17. Follow the same process to document any Witness Interviews

18. When checking records, select the appropriate option under each record type and document any significant findings in the "Remarks" section

19. If there are unlisted records that are utilized, that can be documented in the final section "Other"

20. Click "Save and Continue"

21. Part 2: Imminent / Direct Threats
This section should only be completed if the team has determined the threat to be imminent or direct.

22. If the threat is NOT imminent or direct, skip Part 2 and move directly to Part 3: Triage

23. Part 2 is used to document the elements that indicate this was an imminent or direct threat. Complete all of the required information related to the target and notification of the threat.

24. Document information related to law enforcement or medical services provided.

25. Document any additional parties that have been notified of the concerning behavior or communication

26. Following the same process as the interview forms, document communication with any parents or guardians.

27. Click "Save and Continue"
28. Part 3: Triage
This section documents information related to the investigative themes developed by NTAC. For each investigative theme, select the appropriate response and document any significant findings in the provided space.

29. Additional notes can be added at the bottom of the themes.

30. Select the preliminary threat classification and follow the appropriate triage recommendation. You can move to the appropriate part using the navigation panel on the left-hand side of the screen.

31. Part 4: Threat to Self
If a threat to self has been expressed, ensure that the two tasks listed are appropriately assigned and completed.

32. Click "+ Add assignee" and select the appropriate team member.

33. Once the task has been completed, the team member can select "Findings" to add additional information or documentation to the task.
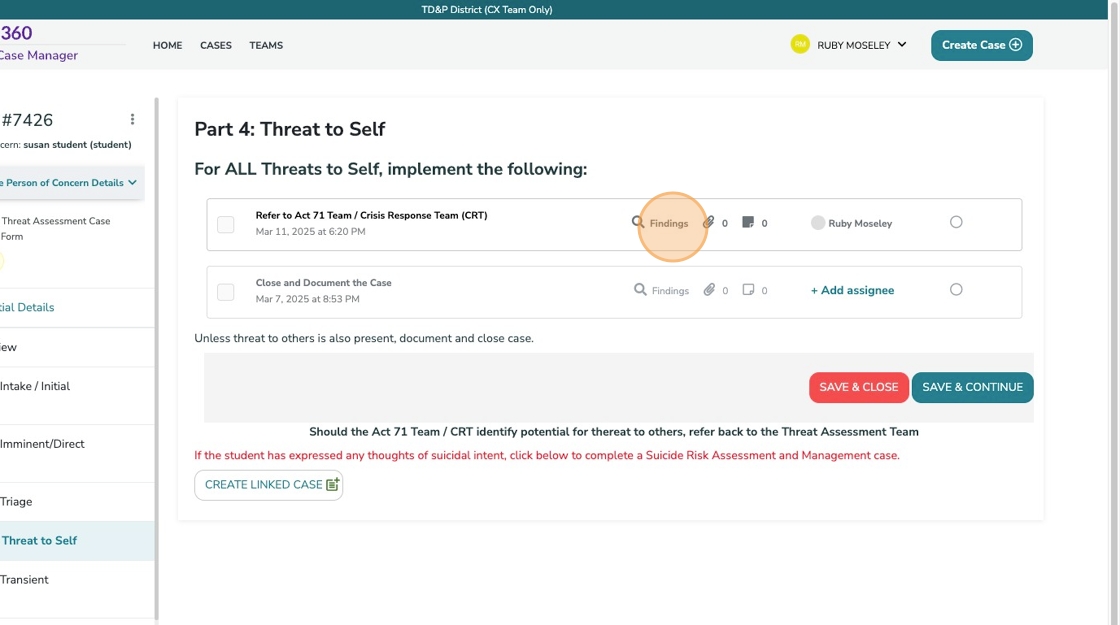
34. The assigned team member can be modified, additional details such as the due date and reminders added or findings and files attached to the task.

35. Once the information has been added, mark the task complete by selecting the circle at the end of the task line.

36. If the case does not involve a threat to others, select "Save & Close" to complete the case.
If a threat to others is also present, select Save & Continue

37. Part 5: Transient Threats
This section is used to document transient threats and any other concerns present. If there are no other concerns, choose NO from the drop down, then select Save & Close to complete the case.

38. If there are other concerns, proceed with Part 5.

39. Use the tasks to document who completed and who reviewed the triage section.
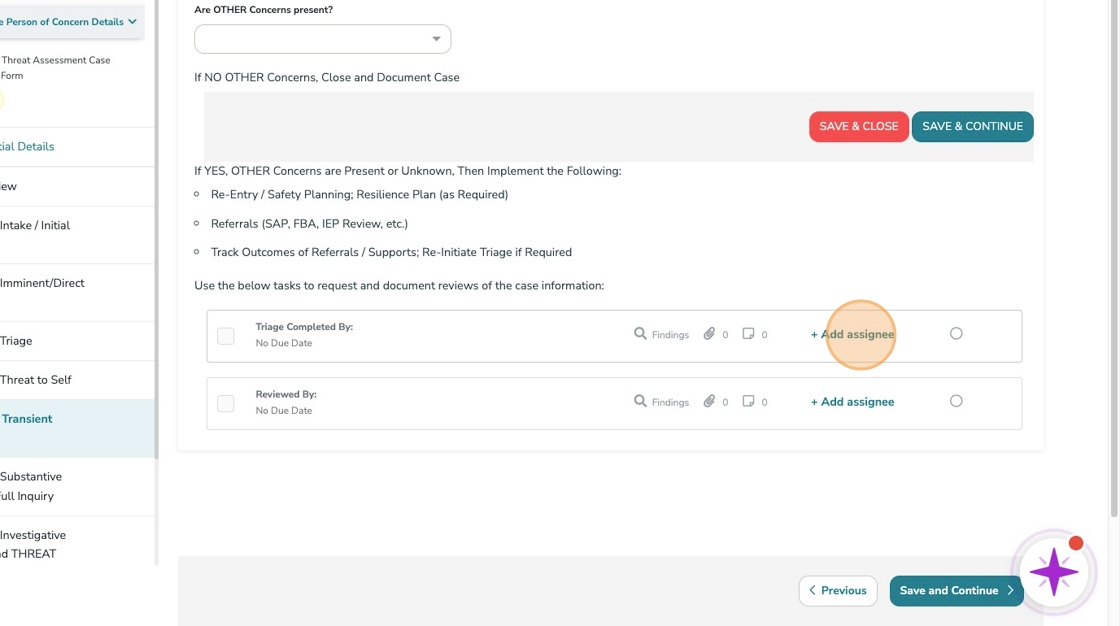
40. Click "Save and Continue"

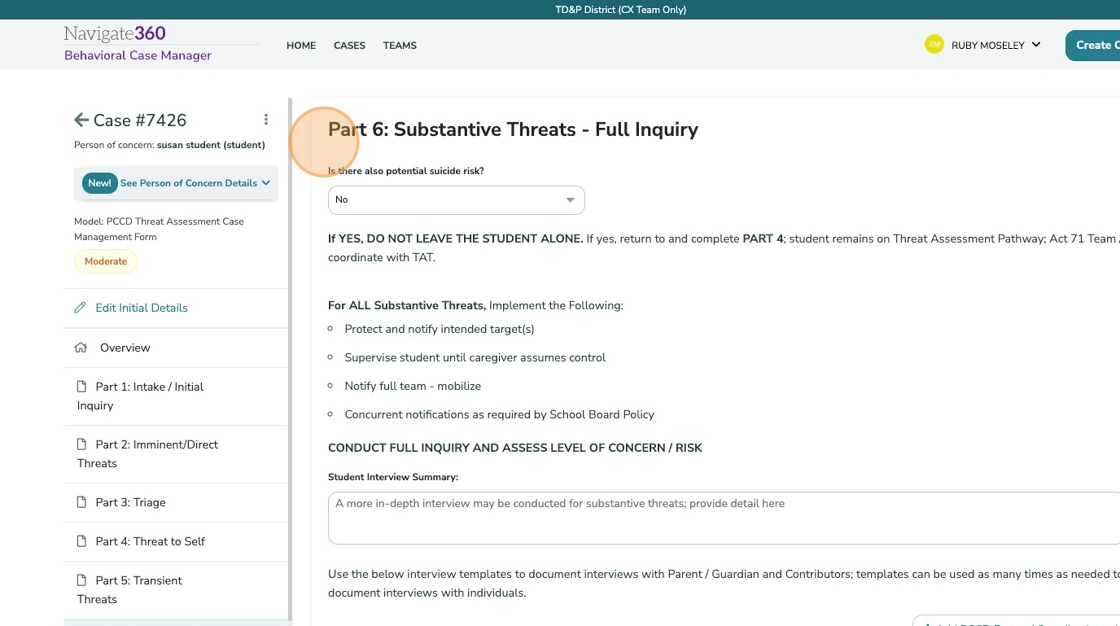
41. Part 6: Substantive Threats - Full Inquiry
This section documents tasks associated with conducting a full inquiry for all substantive threats.
42. More in-depth interviews with the student of concern, parent/guardians, and other contributors can be documented using the same process as Part 1.

43. Click "Save and Continue"
44. The next portion of Part 6 replicates the investigative themes covered in Part 3 with the additional context provided by information gathered since that time.
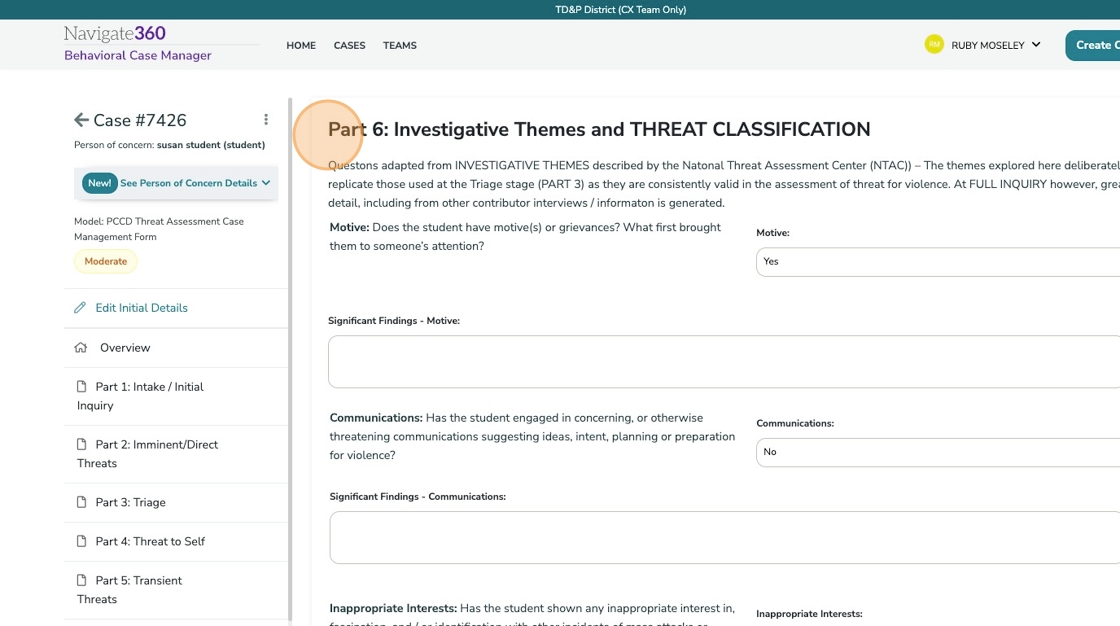
45. Notes about the Full Inquiry can be added at the end of the investigative themes to note overall thoughts from the team.

46. Select the appropriate information related to suicide risk, imminent or direct threat status and any STEP concerns.

47. Utilize the tasks to assign and document who completed the full inquiry and who it was reviewed by.
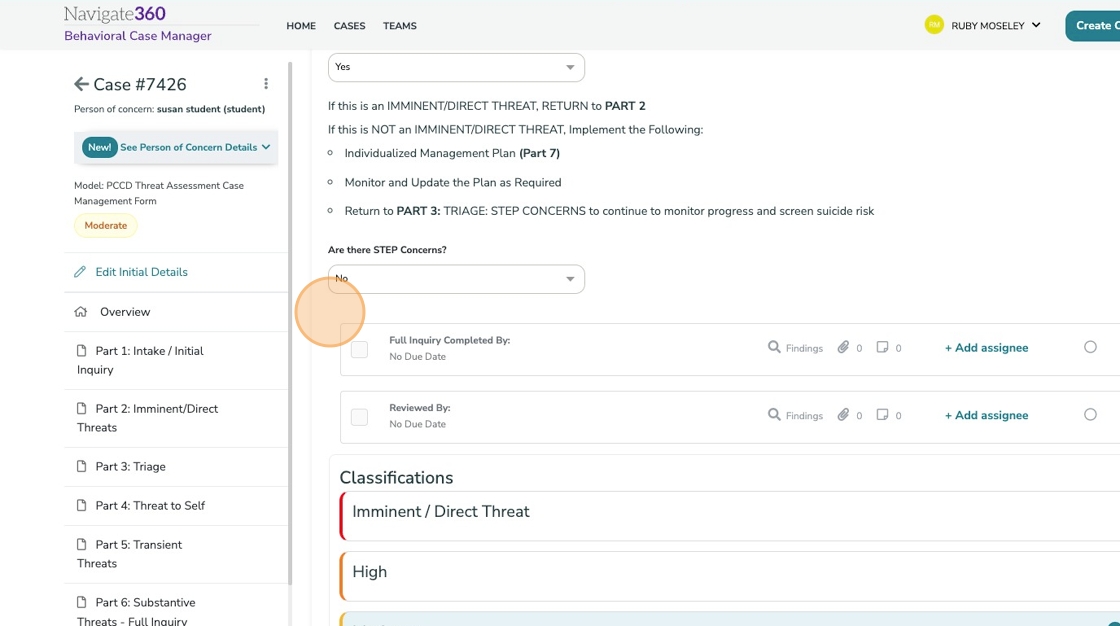
48. Select the appropriate final classification.

49. Click "Save and Continue"

50. Part 7: Management Plan
This section is utilized to document resources, referrals, and staff assignments related to providing supportive interventions to the student of concern.

51. Reviews should be regularly scheduled and the "PCCD Current Triage Recommendation" form can be utilized to document review meetings and adjustments to the management plan.

52. Resources can be added to the management plan by selecting "Add Resources"

53. This pre-populated list of resources can be customized at the district level if needed. As resources are selected they will be added in the right-hand column.

54. Specific notes can be added to each resource if more details are needed.

55. Click "Add" to move resources to the management plan.

56. Resources listed can be edited or removed as needed to update the management plan.

57. Tasks can also be added and assigned to the appropriate team members to complete.

58. Once the case management plan has been documented or updated, click save to ensure all case data is maintained.
