DYMO Connect Setup/Troubleshooting on MacOS- VMS
Learn how to configure and troubleshoot your DYMO Connect on your Mac.
- Emergency Management Suite
- Navigate360 Training Institute
- Suite360
- PBIS Rewards
-
Behavioral Threat Assessment Case Manager
Getting Started BTA Webinar Links User Management BTA Feature/Function Overview Behavioral Threat Assessment: CSTAG Behavioral Threat Assessment: NTAC Behavioral Threat Management: Suicide Risk Screening and Management Analytics & Reporting Troubleshooting Release Notes & Updates Click here for BTA Resources / User Guides State Specific Guidance
- Visitor Management
- School Check In
- ALICE Training Institute
- Detect - Social Sentinel
- P3 - Anonymous Tip Reporting
- Resources
- Back-to-School
Please install the most updated version of DYMO Connect directly from DYMO’s website:
https://www.dymo.com/support?cfid=user-guide
Uninstall any older version of DYMO Label that is currently on the computer. Exit the DYMO Label Web Service that is located on the toolbar at the top of the screen if it is still running. We want only the DYMO Connect Service to be running.
If DYMO is not connecting to VMS, follow the steps below:
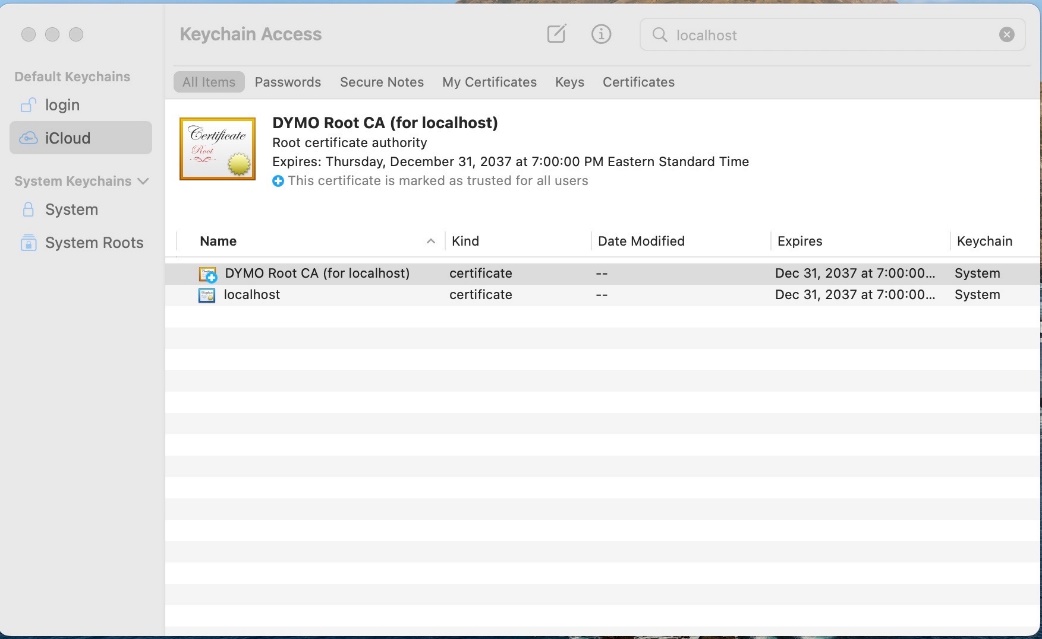
Ensure DYMO Connect Service is running and check the connection by clicking Diagnose. If it is working, you should see a message that it is running on port 41951. If it is not working, open Keychain Access on your Mac.
- Search for any keychain with the name “localhost”. If there is one named “DYMO Root CA (for localhost)” please delete it, as this is the certificate used with the old DYMO Label software and needs to be removed.
- Find the one named “localhost” that expires December 31, 2037 and double-click it to open the settings.
- Expand the Trust tab and change all settings to Always Trust, then click the red "x" to close this window. You will be asked to enter an admin password.
- Close Keychain Access and Restart DYMO Connect Service by clicking “Reset” from the app icon on the toolbar.
- Click Diagnose again. You should receive a message saying it is running on port 41951.
Go back to Visitor Management at this point and verify the fix resolved the issue with the connection. You will need to go to Device Settings and configure the printer to be used in VMS.
If DYMO Connect is running but the printer is not connecting to VMS, please power cycle the printer by unplugging it for at least 20 seconds from the USB and power cables before plugging it back in. Then, be sure to refresh VMS and go to Device Settings to set up the printer that is now connected.