How do I find and activate missing groups?
Group Owners and Admins can locate and activate inactive groups
- Emergency Management
- Campus360
- Connect360
- PBIS Rewards
- Hall Pass
- Preparation & Response Training
- Behavioral Case Manager
- Visitor Management
-
Compass
Training Workshops Getting Started On-Demand Data & User Management Compass Curriculum for Students, Staff, & Families Compass Behavior Intervention Compass Mental Health + Prevention Compass for Florida - Character Ed, Resiliency, & Prevention Compass for Texas - Character Ed Analytics & Reporting Release Notes & Updates Additional Resources
- School Check In
- ALICE Training Institute
- Detect
- Anonymous Tip Reporting
- Resources
- Back-to-School
To activate a single group (admin or group owner):
- Navigate to “Groups” from the left-side main menu and scroll down to the bottom section named “My Inactive Groups.” Open that section with the arrow on the right. If an Admin needs to reactivate an inactive group, they will first need to locate the group in “All User Groups,” “All Inactive Groups,” or “Synced” groups or use the feature described at the end of this article.
- Select a grayed out group to enter it. From in the group, press the “Settings” button in the top right corner of the group screen.
- Choose the “Edit Group” tab from the “Settings” drop down menu.
- Check the “Active” checkbox.
Use the “Save” button to finalize.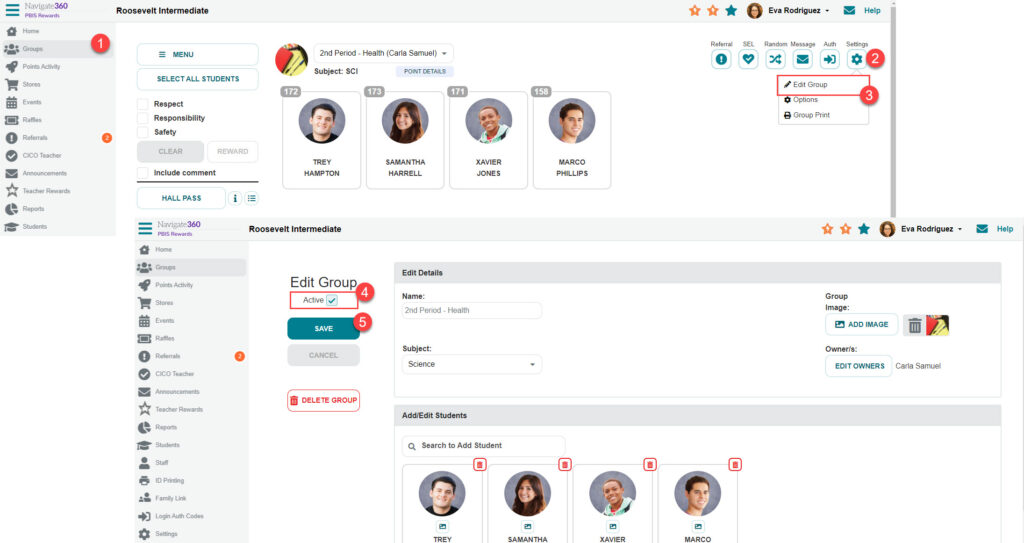
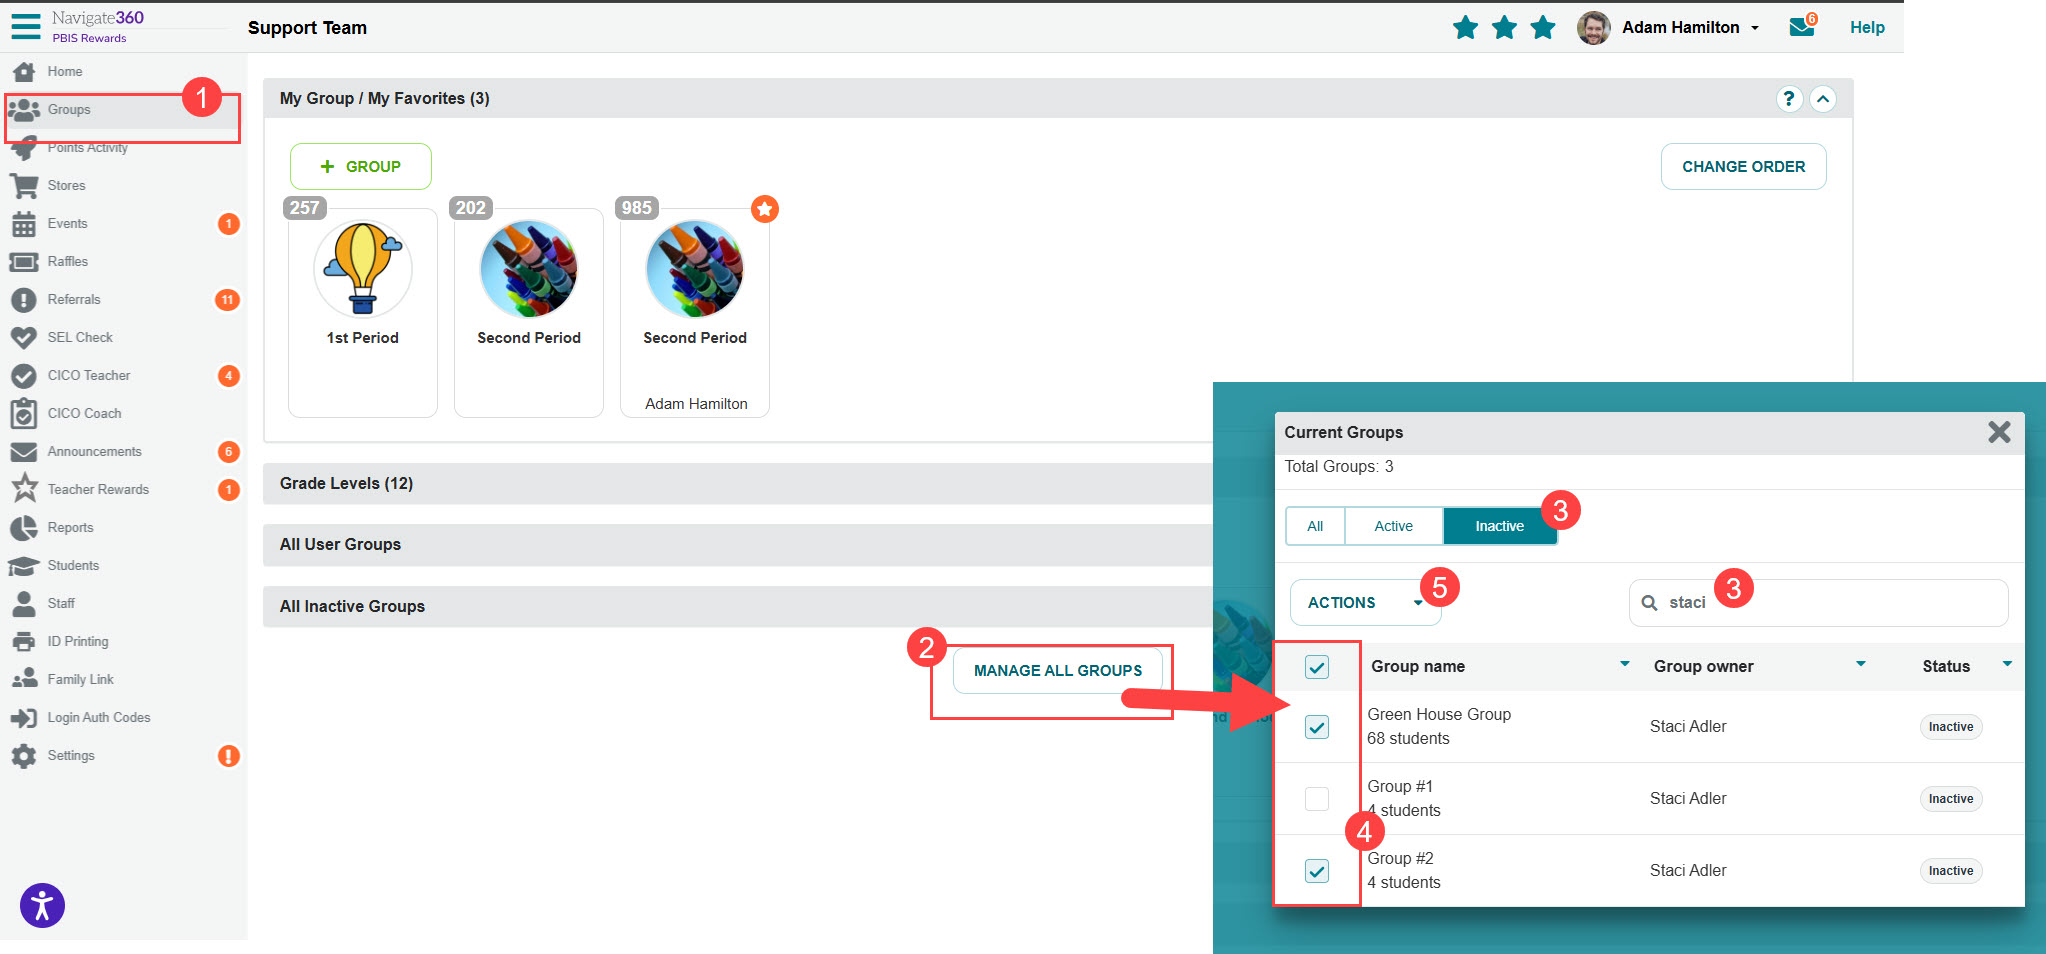
To activate multiple groups (admin only):
- Navigate to the “Groups” page.
- Select “Manage All Groups.”
- Search for the appropriate groups by name or group owner or select the “Inactive” filter.
- Click the select all checkbox or select individual groups with the boxes to the left of the group name.
- Use the “Actions” dropdown to activate groups and confirm the action by clicking the “Yes” button.