KIOSK Hardware Set Up- School Check In
Learn how to configure and assemble KIOSK hardware components to create a secure, optimized software setup.
- Emergency Management
- Campus360
- Connect360
- PBIS Rewards
- Hall Pass
- Preparation & Response Training
- Behavioral Case Manager
- Visitor Management
-
Compass Curriculum
Training Workshops Getting Started On-Demand Data & User Management Compass Curriculum for Students, Staff, & Families Compass Behavior Intervention Compass Mental Health + Prevention Compass for Florida - Character Ed, Resiliency, & Prevention Compass for Texas - Character Ed Analytics & Reporting Release Notes & Updates Additional Resources
- School Check In
- ALICE Training Institute
- Digital Threat Detection
- Anonymous Tip Reporting
- Resources
- Back-to-School
The Elo Kiosk comes in several parts that need to be assembled. It is impossible to ship the kiosk fully assembled because shipping a fully assembled Kiosk would likely result in damage from shipping.
A single kiosk will consist of three (3) parts:
- Kiosk
- Kiosk stand
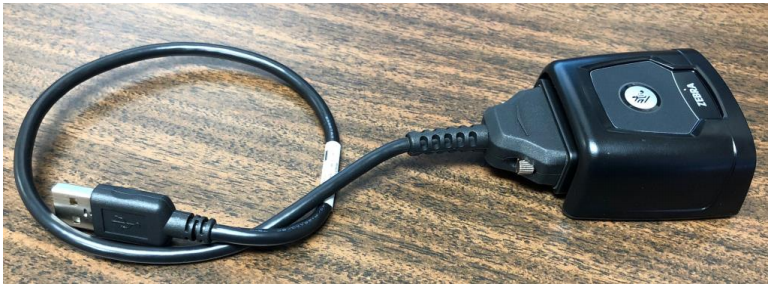
- Kiosk driver license scanner
Open the kiosk box. The kiosk and barcode scanner are in one box and the stand is in another separate box.
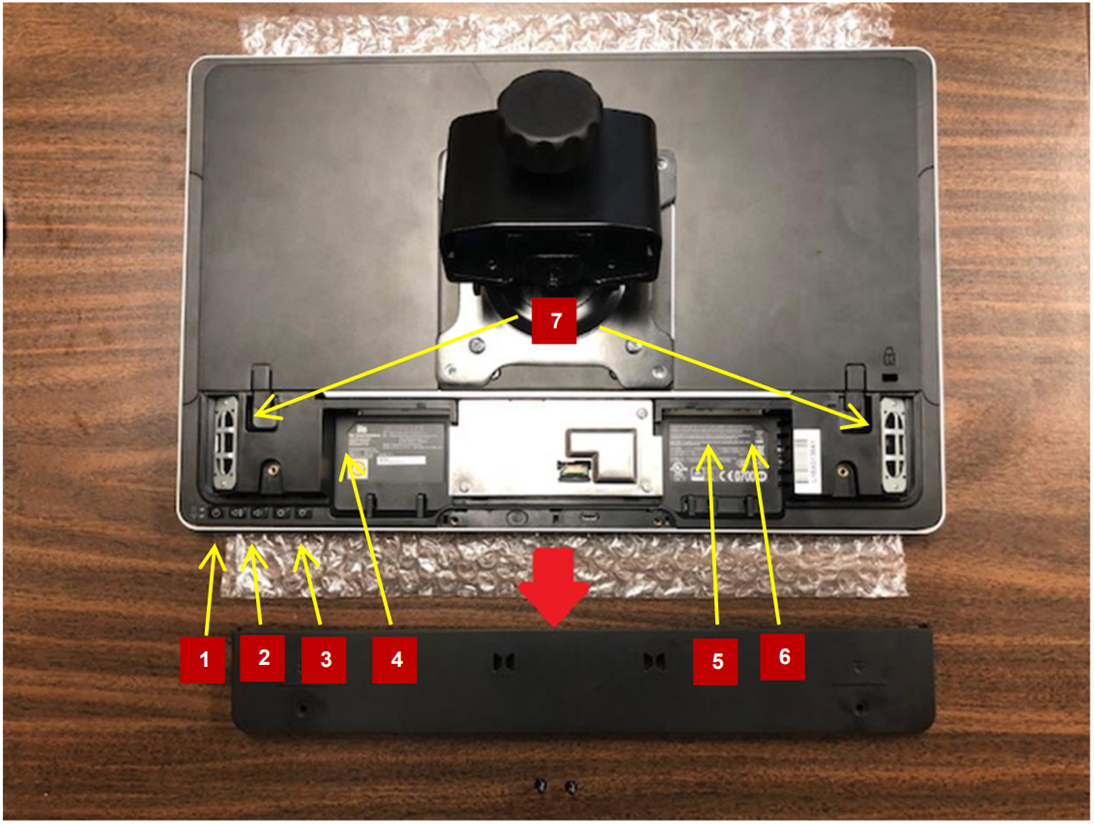
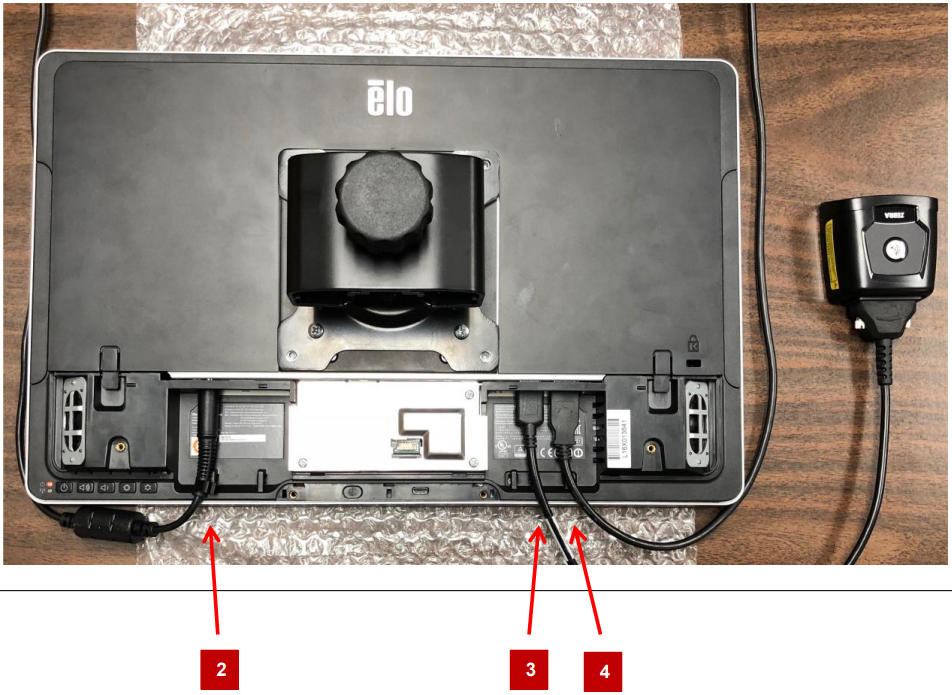
Remove the back panel.
- Power On/Off Button
- Speaker Volume Control
- Screen Brightness Control
- Power Plug
- USB Ports
- RJ 45 Network Connection
- Speakers
KIOSK STAND SET UP
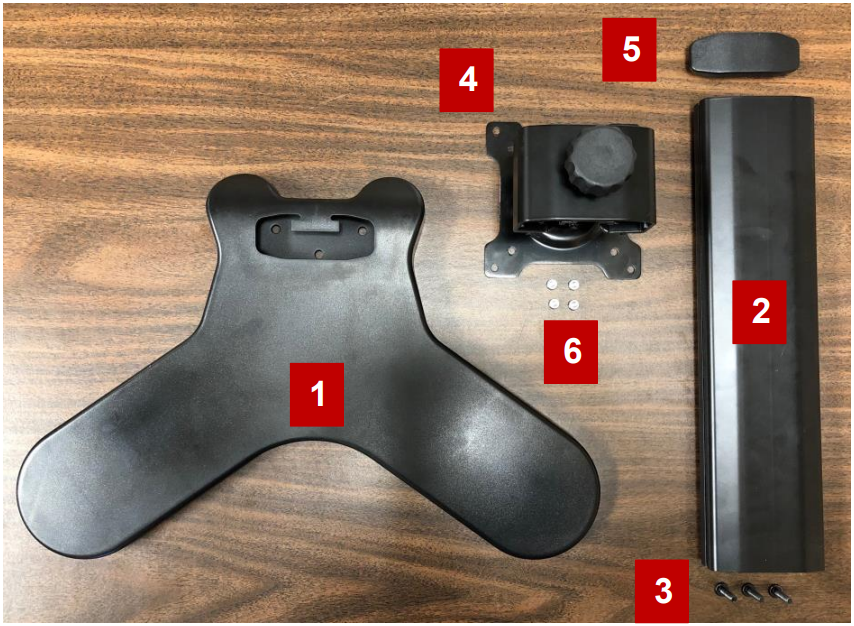
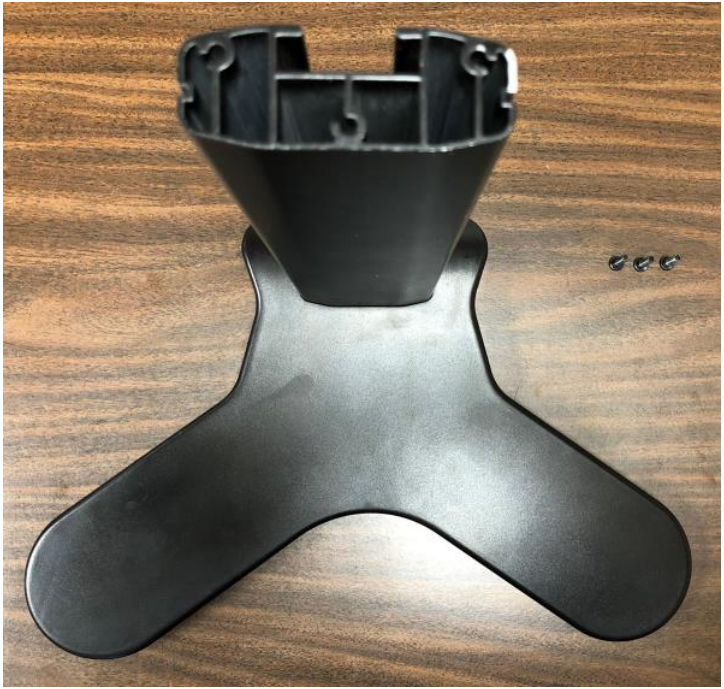
The Kiosk stand consists of six (6) parts:
- Base
- Stand
- Three (3) screws used to attach the base to the stand
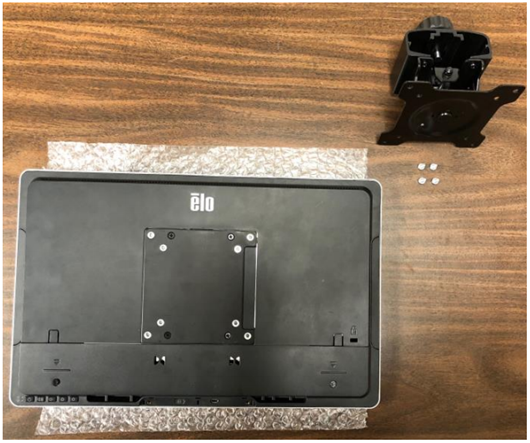
- Kiosk Mounting Bracket
- End Cap for Kiosk Stand
- Four (4) screws used to attach Mounting Bracket to Kiosk (not shown on this page)
The Kiosk stand consists of six (6) parts.
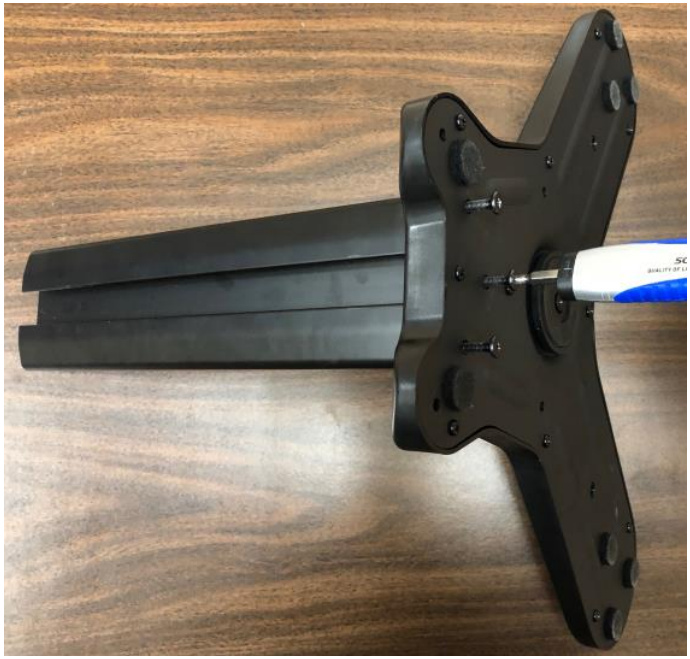
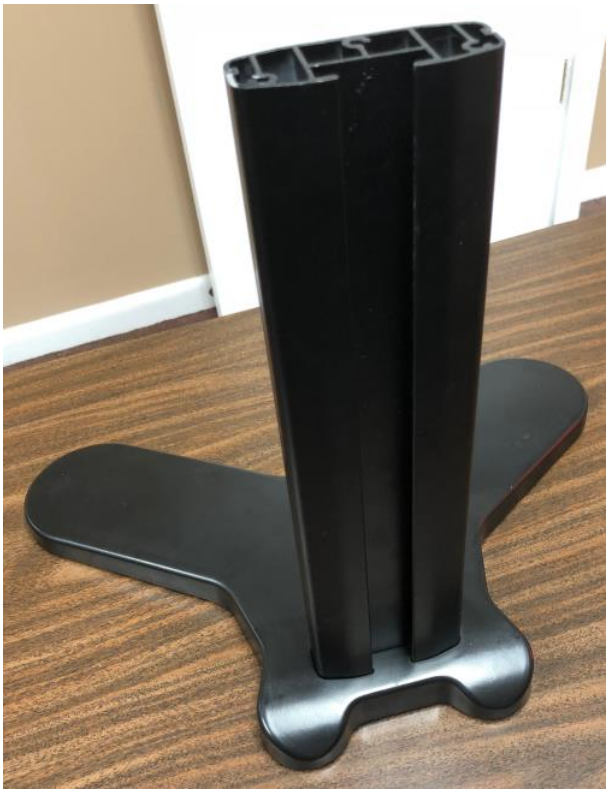
- Fit stand into base. It only fits in one way.
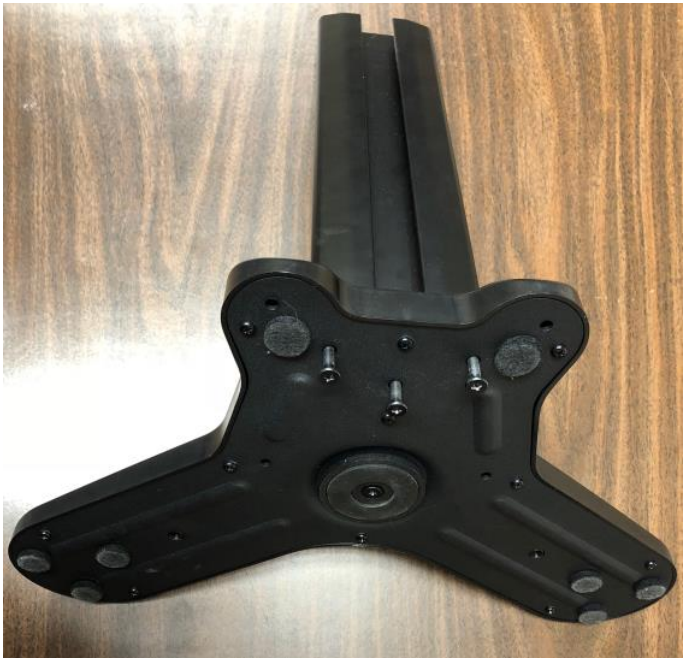
- Insert base screws through bottom of base into the holes in the stand.
- Tighten the screws.
MOUNTING BRACKET INSTALLATION
Lay Kiosk screen side down on a protective cloth or other protective item.
Place mounting bracket onto back of kiosk.
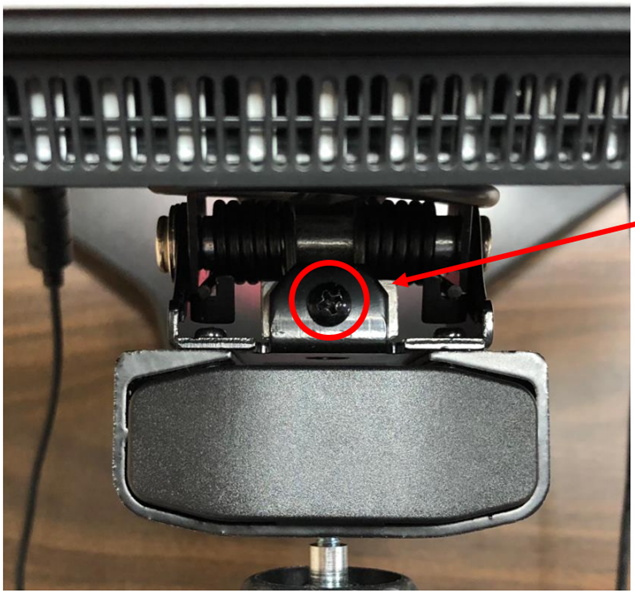
Which Way Should The Mounting Bracket Be Set?
This is a top down view looking down on the bracket. The screw head should be showing.
- Place mounting bracket onto back of kiosk.
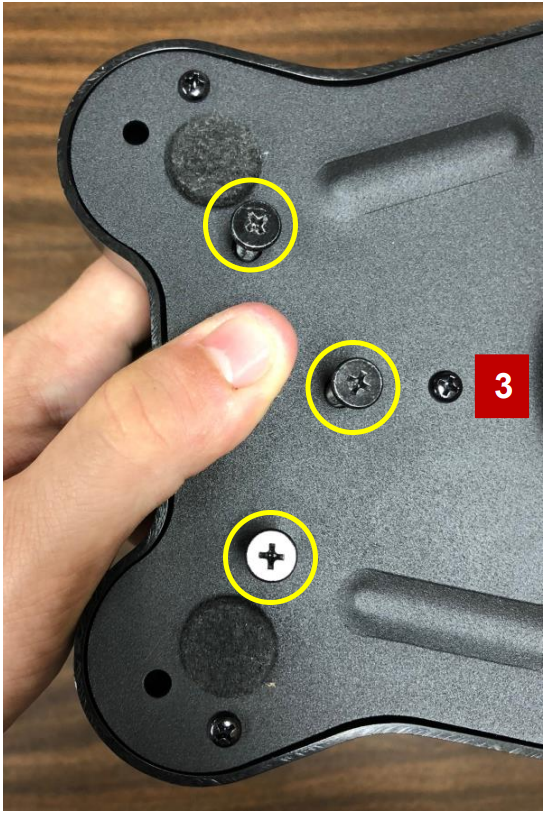
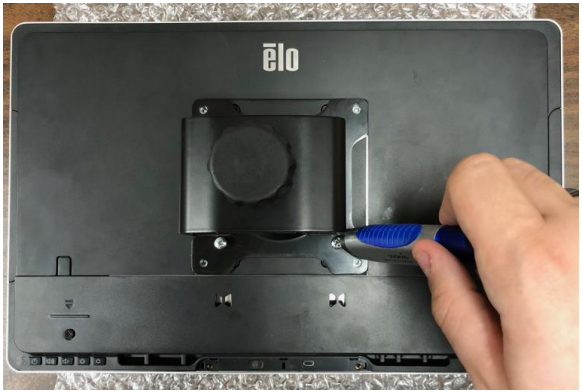
- Insert small screws through bracket into kiosk holes. Do not tighten screws until all four are inserted.
- Tighten each screw about half way. Work your way around all four screws tighten 1 turn, then next screw 1 turn, etc…
DO NOT over-tighten the screws. - Attach the mounting bracket and kiosk using the outer holes.
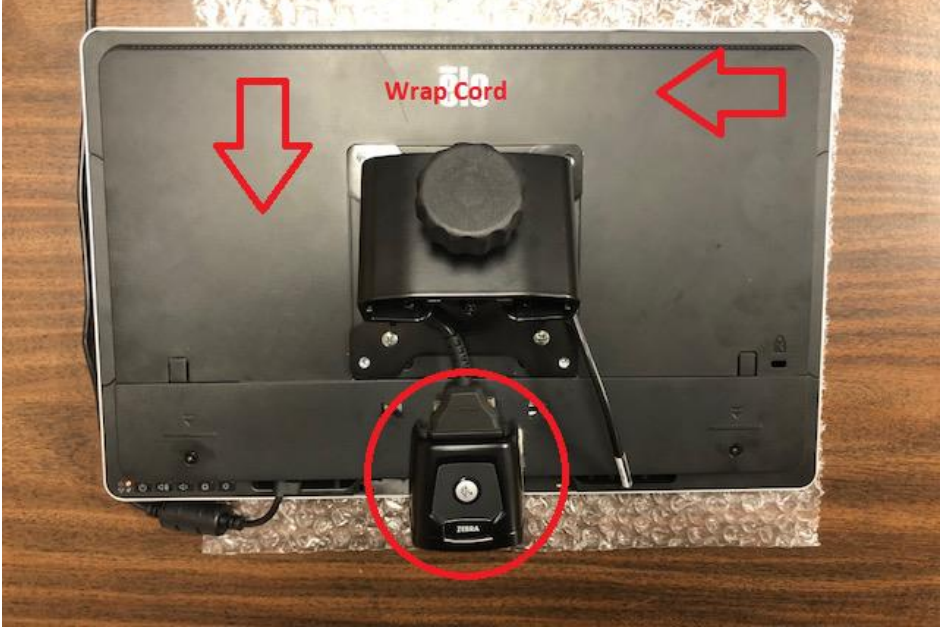
ATTACHING THE BARCODE SCANNER
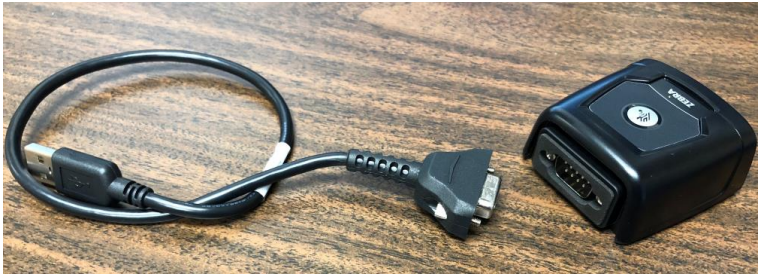
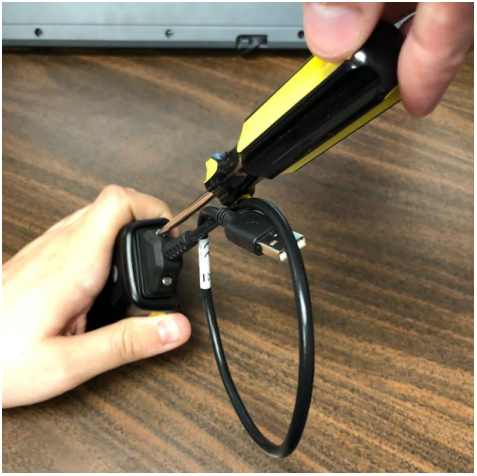

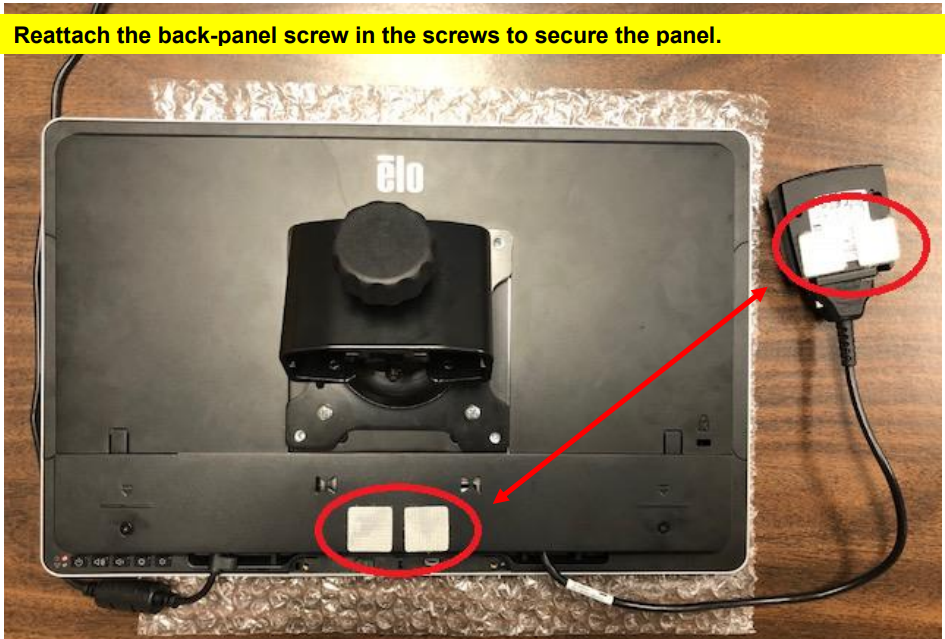
Connect the following cables/cords according to the pictures below.
|
|
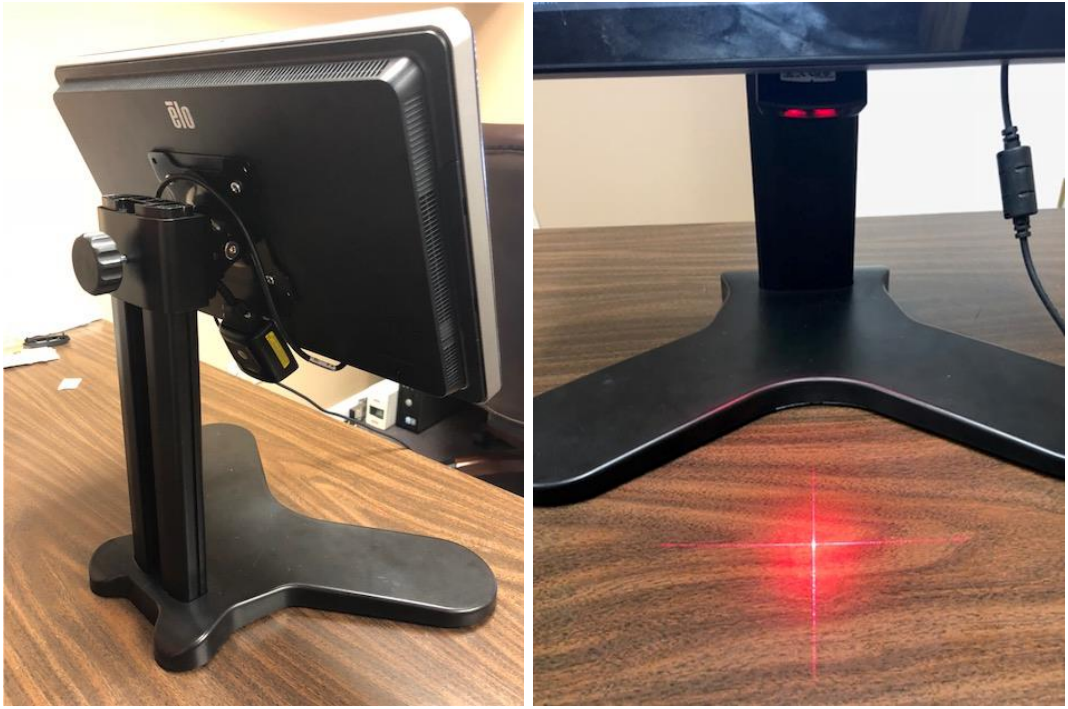
- Lift Kiosk up and slide on to stand.
- Secure Kiosk to stand by tightening the turn knob
Scanner light illuminated on Kiosk’s side and front view.
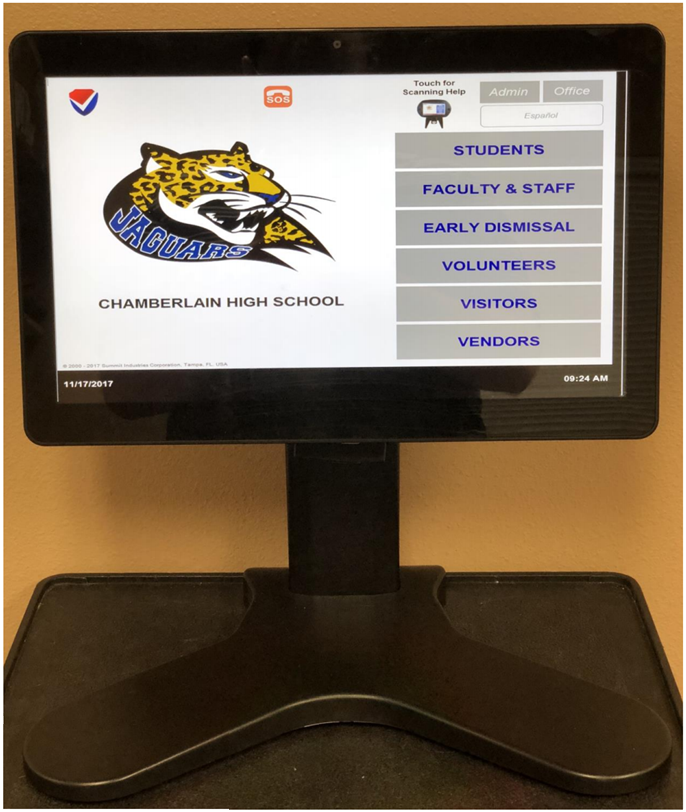
FULLY ASSEMBLED AND RUNNING KIOSK