Features- PBIS Rewards
Learn about group features to stay connected in one place.
- Emergency Management
- Campus360
- Connect360
- PBIS Rewards
- Hall Pass
- Preparation & Response Training
- Behavioral Case Manager
- Visitor Management
-
Compass
Training Workshops Getting Started On-Demand Data & User Management Compass Curriculum for Students, Staff, & Families Compass Behavior Intervention Compass Mental Health + Prevention Compass for Florida - Character Ed, Resiliency, & Prevention Compass for Texas - Character Ed Analytics & Reporting Release Notes & Updates Additional Resources
- School Check In
- ALICE Training Institute
- Detect
- Anonymous Tip Reporting
- Resources
- Back-to-School
Note: Video may display a previous version of the software. See article below for more recent images.
Overview
The group screen is where classroom teachers will spend most of their time in the web portal. It is a great way to reward and redeem student points quickly and efficiently. All groups can be accessed by any staff member to use
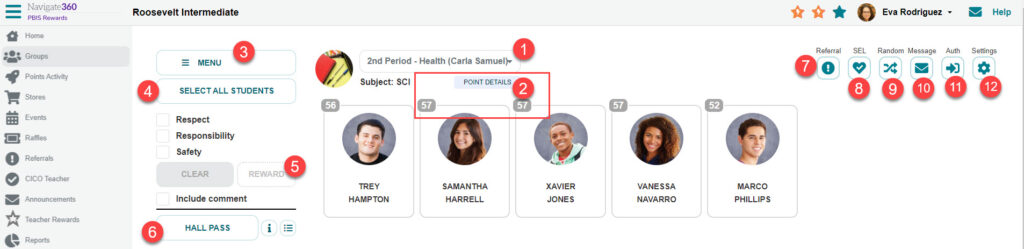
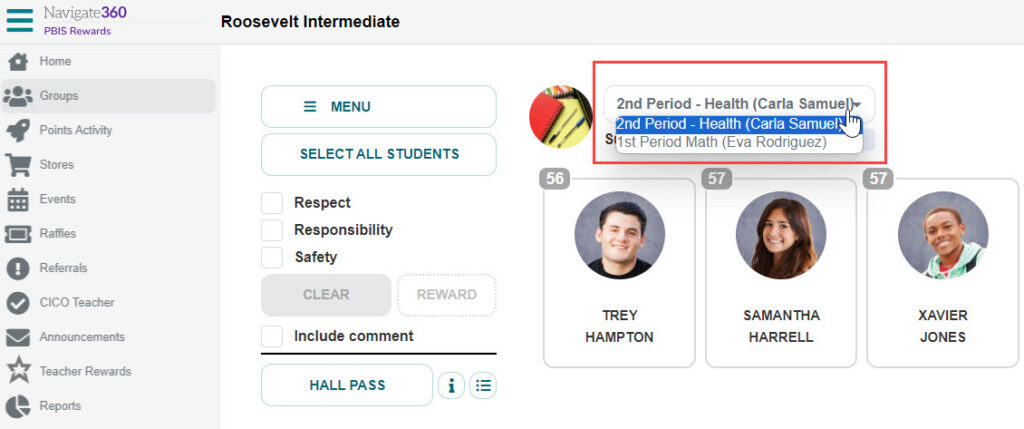
- Switch – Switch between your favorited groups using the drop-down.
-
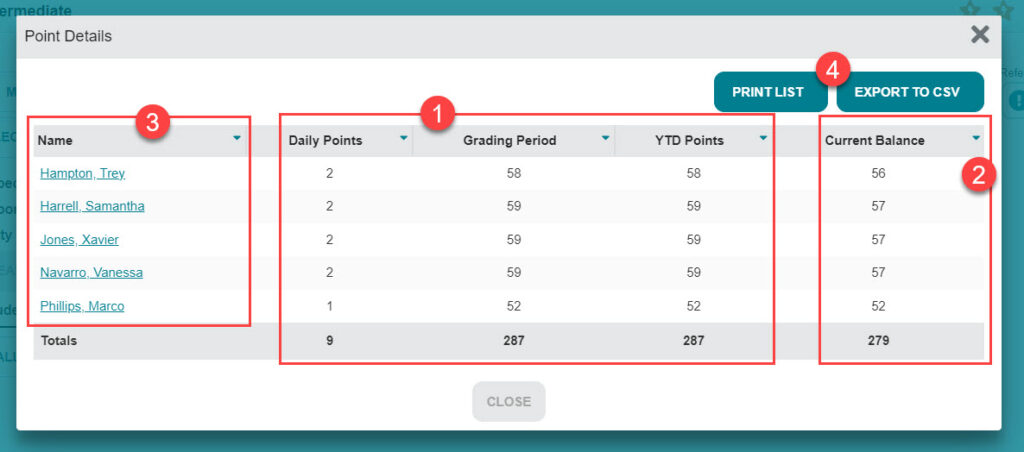
Points Details – The small number in the upper left of each student card indicates their current point balance. Selecting Points Details below the group name will provide more point information.
- Points awarded to students
- Current balances
- Selecting a student name will be available to users with Student Dashboard report permission
- Print options include a list or spreadsheet format
-
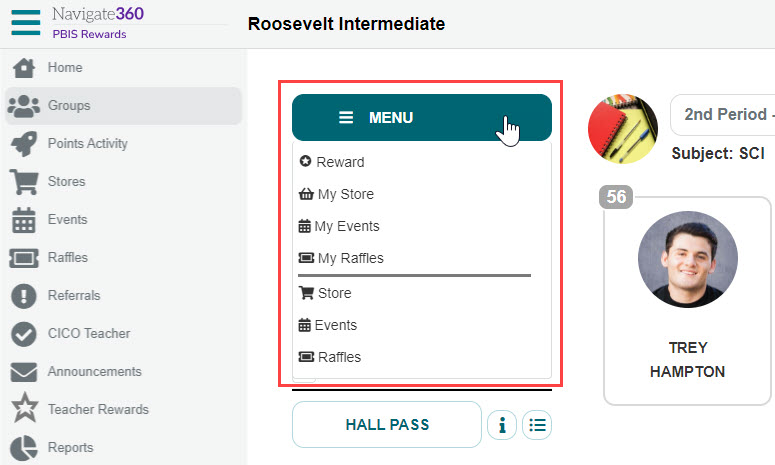
Menu – The default setting for the group screen will be “Reward,” but several other options are available. Select the “Menu” to reveal them.
- Sell items from your classroom store/”My Store.”
- Register student for classroom events/”My Events.”
- Register students for classroom raffles/”My Raffles.”
- Sell from the School Store.
- Register students for School Events.
- Sell Entries to School Raffles.
Select an incentive category from the “Menu.” All of the items, events, or raffles available will be revealed. Select the students and then the incentive. A confirmation screen will appear. Review the selection and then submit.
-
Select All Students/Deselect All Students
- If you want to award points to everyone in your group, click “Select All.” To cancel all of the students you have selected, click “Select None.”
- If most of your students should earn a point, click “Select All” and click on the students who should not earn a point. This will deselect them and they will not receive a point.
- Reward – Use the numbers or matrix at the left to award points to students. Select the students to be awarded by clicking on them. Next, choose the points to be awarded and select “Reward.”
- Hall Pass – If Hall Pass Plus is part of your purchase or you currently have basic hall pass functions, staff can mark a student on a hall pass and the student will be identified as on a hall pass schoolwide. Students can quickly be marked on or off a hall pass from the homepage, group page, students page (admin), scanned with the mobile app or from the group page on the mobile app. Staff can also see how long a student has been on a hall pass by selecting the student in a group, searching for them on the home page or scanning their badge with the mobile app. Here are directions for how to use Hall Pass in the groups page.
1. Select the student(s).
2. Press the “Hall Pass” button (formerly Toggle Presence).
3. Select the student(s) on a hall pass to see the elapsed time or take them off a hall pass by pressing the “Back To Present” button.
4. Use the “Show Presence List” button to see all the students in the group on a hall pass and their elapsed times.
5. If Admin have selected the options to show hall passes and balances, a toggle will allow the group user to select which they are viewing.

- Referral – You can record a Major or Minor referral by first selecting an individual student and then the “Referral” button.
- SEL/Status Check – View or submit an SEL/Status Check for the student in your group.
- Random – Select a student with the random selection feature. First, select the students to be drawn from (typically, you will Select All). Next, click the random button. You can continue to select the button to have a “round” that will exclude the previously selected students from being drawn again.
- Message – Start a message to connected family members with this button.
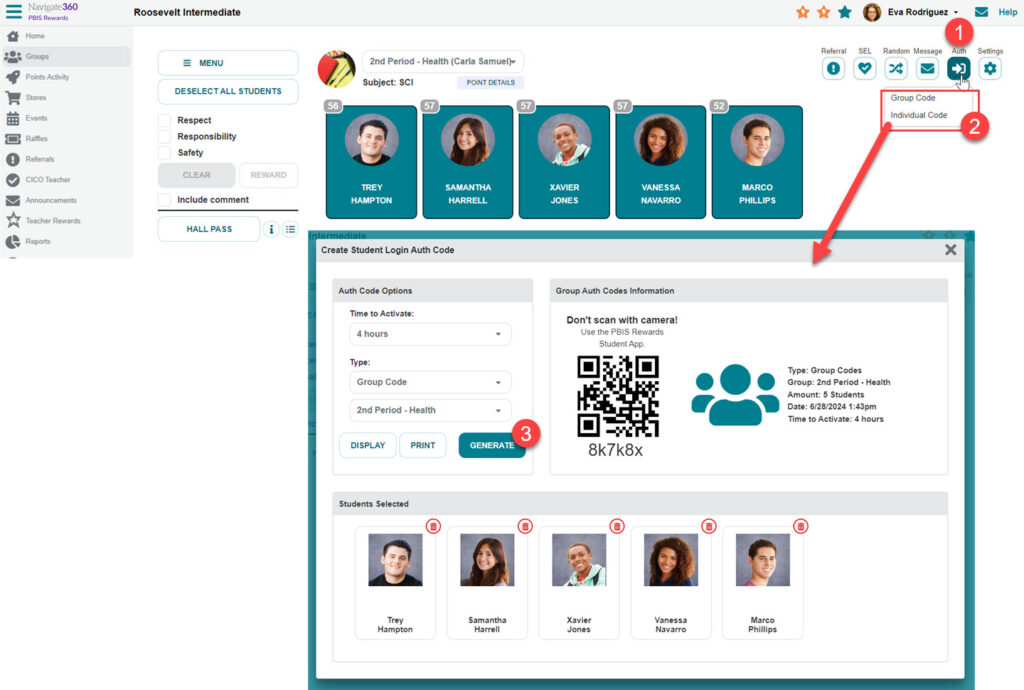
- Auth – Create a Student Auth Code.
-
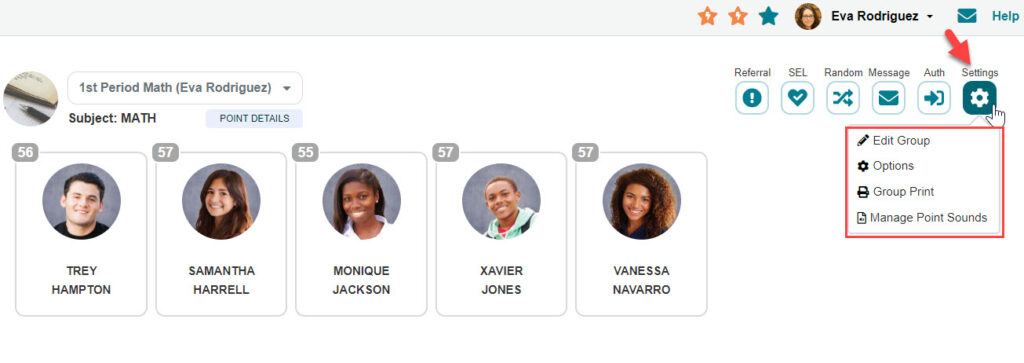
Settings
-
Edit Group: Pencil Icon – Only an Admin will be able to edit a group that is not their own
- Change the group name
- Change and/or add group owners
- Add a Group Image
- Change the subject
- Add students
- Remove students
-
Delete the group (located on the left)
- On the left, you will choose “Delete Group.” You will then need to type in the first three characters from the group name before you select “OK” to delete.
- “Inactive” checkbox. Uncheck the box and then save to make a group inactive.
- Save on the left when changes are complete
-
Options: Gear Icon
- Display Size – Change the size of the students’ icons.
- Volume Control – Mute volume or make the beep louder/quieter.
- Sort – Organize students by first name or last name.
-
Group Print
- You may print a group roster in various formats. Visit the article “How do I print out a QR code roster of my class?” for detailed instructions.
- Note: Other printing options are available, but not on this screen.
- If you would like to print ID cards or labels for your group, use “ID Printing” from the left-side “Main Menu.”
- If you would like to print or email Family Letters for your group, use “Family Link” from the left-side “Main Menu.”
-
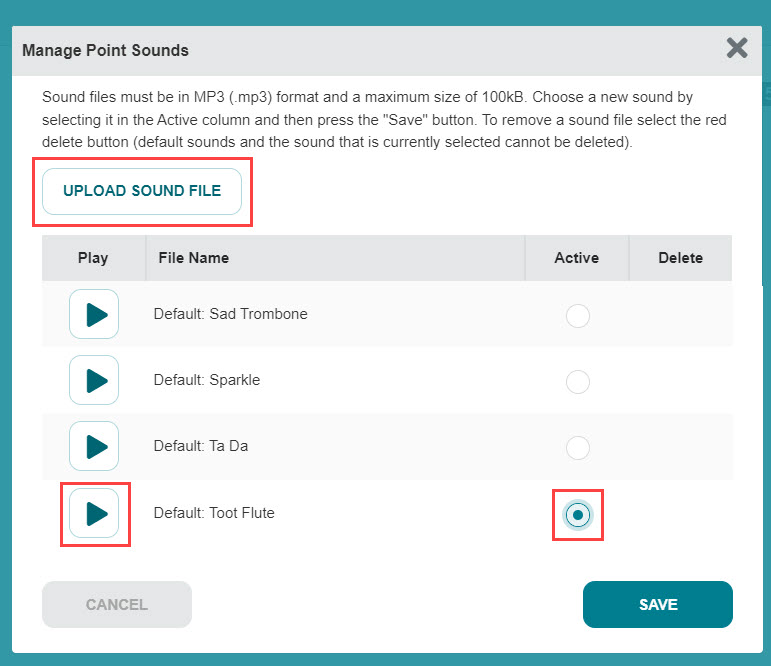
Manage Point Sounds – This option is only available if you are the owner of the group
- Upload a custom sound or select a default for when points are awarded
- Preview using the arrow at the left
- Select “Active” to select a sound
- Save changes in the bottom right
-
Edit Group: Pencil Icon – Only an Admin will be able to edit a group that is not their own