Auto Import- School Check In
Learn how to quickly and easily import school check-in data into your system.
- Emergency Management
- Campus360
- Connect360
- PBIS Rewards
- Hall Pass
- Preparation & Response Training
- Behavioral Case Manager
- Visitor Management
-
Compass Curriculum
Training Workshops Getting Started On-Demand Release Notes & Updates Data & User Management Compass Curriculum for Students, Staff, & Families Compass Behavior Intervention Compass Mental Health + Prevention Compass for Florida - Character Ed, Resiliency, & Prevention Compass for Texas - Character Ed Analytics & Reporting Additional Resources
- School Check In
- ALICE Training Institute
- Digital Threat Detection
- Anonymous Tip Reporting
- Resources
- Back-to-School
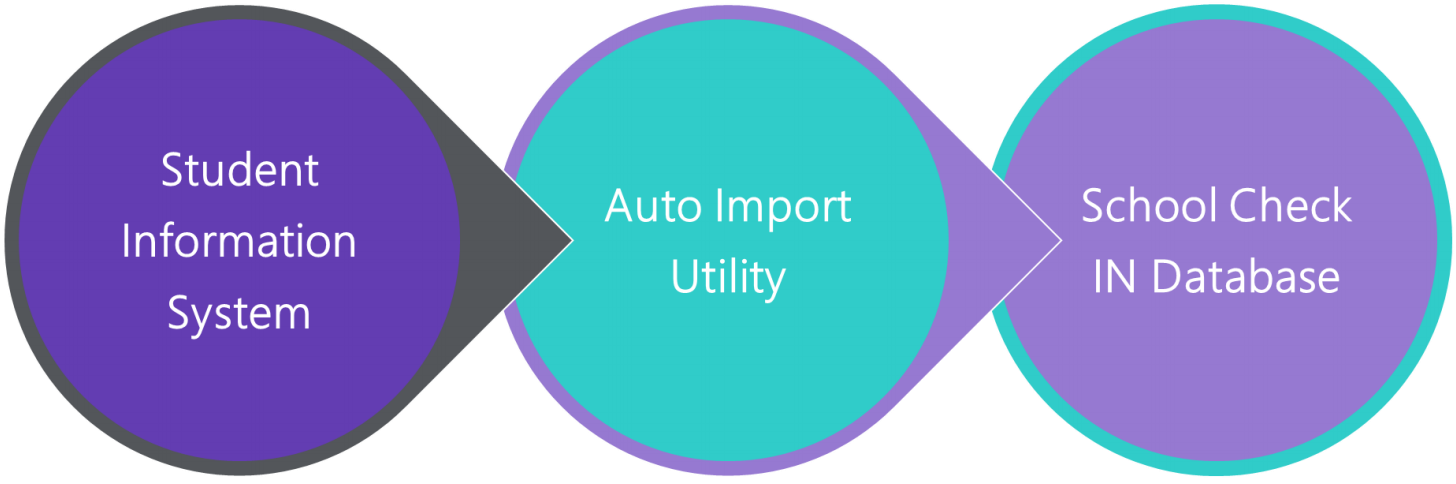
School Check IN’s Auto Import Application was designed to facilitate the import process and provide schools with the ability to automatically update data on a regular basis.
Installation Overview
Using your Student Information System (SIS), create and run a data export. Save this export to be run automatically between 6 P.M. and 6 A.M. In this export script, designate a specific location on a specific computer. This will be called your “SCI Import Computer.”
On the same SCI Import Computer, install the School Check IN Auto Import Application. Once installed, this application will run as a service on your SCI Import Computer. Configuring the import requires that you “map” the data fields and save the mapping. It is very important that the SIS export process retains the same field order moving forward.
Once configuration is complete and the Auto Import Application knows where your import files will be found (designated location), then the application will automatically “sense” when a new import file is deposited and will automatically import the data from the new import file. It is very important that this designated location remain constant. Should the designated location change, then you will need to update the configuration and mappings in the Auto Import Client
Installation Requirements
For the Auto Import Application to work, the following requirements must be met:
- Auto Import Application is installed on the SCI Import Computer. Both the files will be imported and the Auto Import Application must reside on the same computer.
- Run as a service on the SCI Import Computer.
- The Auto Import Application is properly configured with the correct field mappings.
- Have new data to import.
- Have Internet access.
- Net Framework 4 Extended.
- NET 4.0 is required.
- Visual C++ 2005.
- Visual C++ 2008 Redistributable –x86
- Port 22 open in the district firewall for SFTP file transfers.
Installation Steps: Auto Import App
Step 1: Navigate to the following download link:
PS_Import.zip
Step 2: Double click the unzipped file to start the installation.
Step 3: Walk through the installation screens:
- Welcome to the Setup Wizard. Click Next.
- Browse for a location where the application will be installed.
- Install Auto Import App Setup for “Just Me”
- Click Next.
- Confirm Installation window, click Next.
- Installation Complete window, click Close.
To access the Auto Import Application, click on the new Icon on your desktop.