Flipcharts- EMS
Learn how to develop effective key emergency response practices
- Emergency Management Suite
- Navigate360 Training Institute
- Suite360
- PBIS Rewards
-
Behavioral Threat Assessment Case Manager
Getting Started BTA Webinar Links User Management BTA Feature/Function Overview Behavioral Threat Assessment: CSTAG Behavioral Threat Assessment: NTAC Behavioral Threat Management: Suicide Risk Screening and Management Analytics & Reporting Troubleshooting Release Notes & Updates Click here for BTA Resources / User Guides State Specific Guidance
- Visitor Management
- School Check In
- ALICE Training Institute
- Detect - Social Sentinel
- P3 - Anonymous Tip Reporting
- Resources
- Back-to-School
Creating Flipcharts
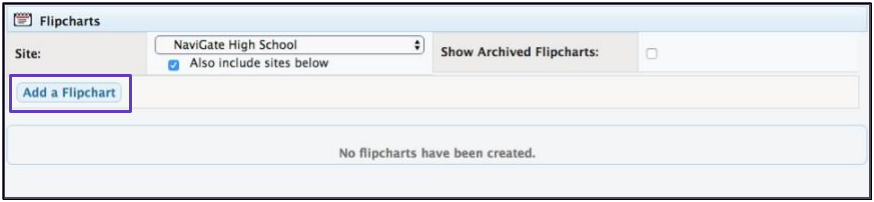
To begin, choose Flipcharts from the Dashboard.
Select Add a Flipchart.
You will be given five options for creating a flipchart. These include starting from scratch with a blank flipchart or creating a flipchart from the annexes in your Safety Plan.
Click to highlight your choice, select desired site, then click Create Flipchart to begin.
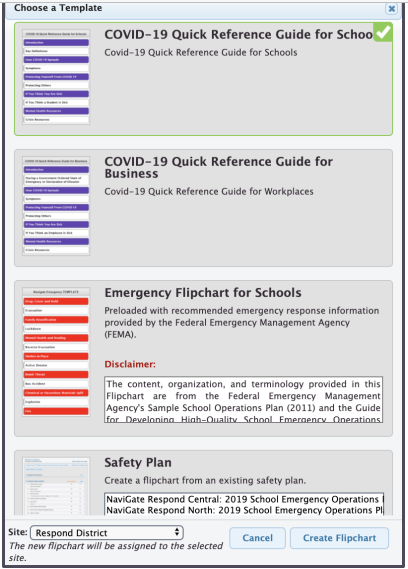
You will have the ability to edit the template. If Safety Plan is chosen, this ties to the Annexes, and any edits will need to be made from the Safety Plan page.
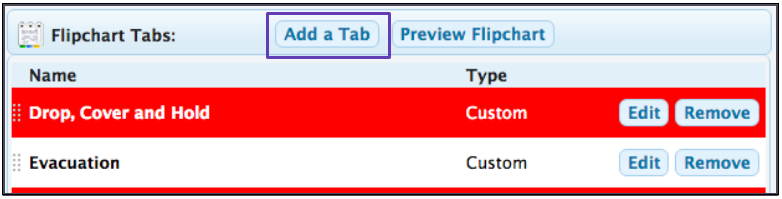
Adding Tabs
You will have the ability to edit the template. For the Legacy Safety Plan, if a Safety Plan is chosen, this ties to the Annexes, and any edits must be made from the Safety Plan page.
Within the Flipchart Tab Editor, you can specify details about your tab, including title, subtitle, and colors. You have the option to choose your content type between “Custom," "Call List,” and “S.P.Annex.”
“Custom” allows you to enter any text you want. “Call List” includes a call list you previously created from your Emergency Management Call List section. “S.P. Annex” allows you to attach a completed annex from any Safety Plans that you have done through the wizard on the Emergency Management site.
If you are entering “Custom” content, you can easily copy and paste content from another source, such as a Microsoft Word document. You may need to adjust the formatting and spacing accordingly.
The Flipchart Tab Editor features a selection of basic formatting tools, including changing the text color, making bulleted lists, and altering text size.
Once you have a number of tabs in your Flipchart, you can rearrange the order by clicking, holding, and dragging a tab up or down the list to suit your preference.

Previewing & Printing
You are able to print your flipchart by using Print on the left-hand side.
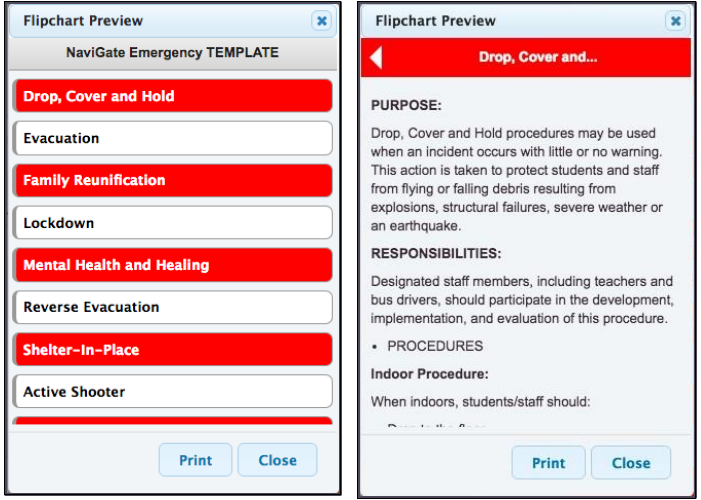
You can also click Preview Flipchart for a view of how your flipchart will appear on a mobile device.
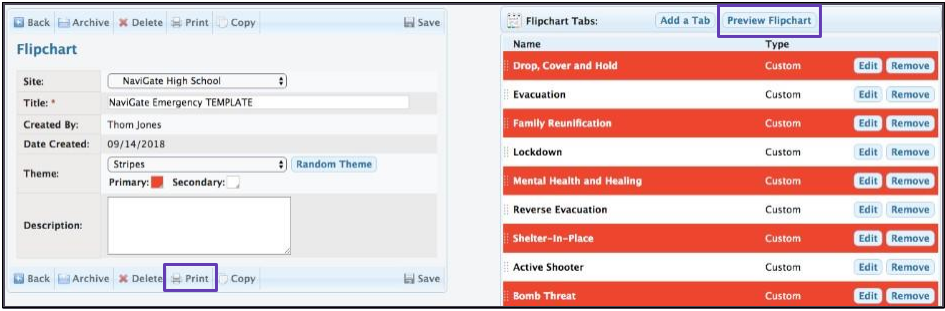
Upon clicking to preview your Flipchart, you can select various tabs to view the current content within each. You may also print your Flipchart from the preview mode.
Publishing
The Preview feature serves as a general guide. There may be slight variances on actual mobile devices.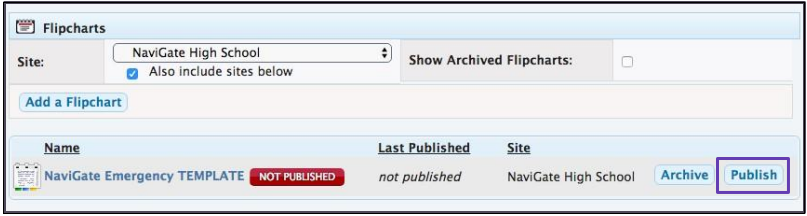
Editing an Existing Flipchart
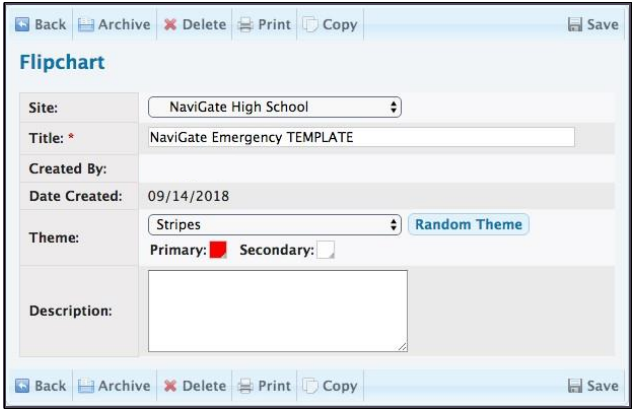
To edit an existing flipchart, go to your list on the Flipcharts page and select the title of the one you want to edit.
To edit the main flipchart information on the left side of the screen, simply make the intended changes and save.
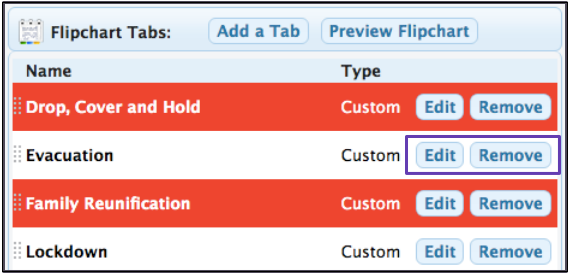
To edit flipchart tab information, select Edit to the right of the tab you wish to change, make your edits and save. If you want to delete a tab, click Remove.
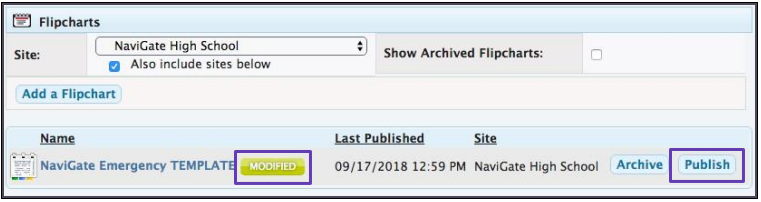
When you are finished editing, go back to the main Flipcharts page. Notice the newly edited flipchart is now marked yellow as Modified and the Publish button is available again.
When you are ready to push your changes to the NaviGate Prepared app, select Publish. The status next to your title will change back to green and read as published.
Granting User Access
While you can assign flipcharts to certain sites, initial user access is not restricted to certain flipcharts. Any Admin, View Only, or Limited Access user can view Flipcharts from the website or the NaviGate Prepared app.
First responders are not provided access to your flipcharts through the mobile app, however, they are able to view them from within their first responder portal for your Emergency Management site.
To revoke access to flipcharts, disable that user account. Anyone who attempts to log in as that user will have all the local flipchart content erased on their device and will be denied access until the account is enabled.