SSO (Single Sign-On) Set Up
Understand how to set up SSO for Navigate360 Visitor Management System to streamline user access and authentication.
- Emergency Management Suite
- Navigate360 Training Institute
- PBIS Rewards
- Compass
-
Behavioral Case Manager
Getting Started Webinar Links User Management Feature/Function Overview Behavioral Threat Assessment: CSTAG Behavioral Threat Assessment: NTAC Behavioral Threat Management: Suicide Risk Screening and Management Analytics & Reporting Troubleshooting Release Notes & Updates Resources / User Guides State Specific Guidance
- Visitor Management
- School Check In
- ALICE Training Institute
- Detect
- Anonymous Tip Reporting
- Resources
- Back-to-School
This article will detail the needed steps by a School District to set up SSO for Navigate360 Visitor Management System. Each section must be followed in order, first by the school district in Section A, then by Navigate360 in Section B, and then finally by the school district in Section C.
A. Azure Setup - Completed by District
To fill in the basic information section for the connection between Auth0 and Microsoft Azure AD, you'll need to gather and send specific details (Client ID, Client Secret, and Azure AD Domain) from your Azure AD portal. Please follow the below steps to complete this task.
- Log in to the Azure Portal: Open the Azure Portal and log in with your account.
- Navigate to Azure AD (Active Directory): From the left-hand navigation pane, select “Azure Active Directory.”
- Go to App Registrations: Select "App registrations" from the menu.
- Create or Select an Application: If you have an existing application that you want to use, click on its name. Otherwise, click "New Registration" to create a new application.
- Copy the Client ID: In the "Overview" section, you'll find the Application (client) ID. Copy this value.
- Create a Client Secret: Go to the "Certificates & secrets" section, then click on "New client secret." Enter a description and select an expiration period, then click "Add." Copy the value of the client secret as it won't be visible again after you leave this page.
- Find Your Azure AD Domain: Go back to the "Azure Active Directory" overview page. You should see your primary domain listed under the "Custom domain names" section. It will typically be in the format “yourdomain.onmicrosoft.com.”
- Send the Client ID, Client Secret, and Azure AD Domain to your Navigate360 Implementation Consultant.
B. Auth0 Setup - Completed by Navigate360
Once you provide the Client ID, Client Secret, and Azure AD Domain to your Navigate360 Implementation Consultant (Section A), the Navigate360 team will complete the needed Auth0 steps.
The Implementation Specialist will then inform you so that you can complete the steps in the VMS Configuration (Section C).
C. VMS Configuration - Completed by District
Now that both Azure and Auth0 setup is complete, Please follow the below steps to complete configuration and confirm setup.
Configure the group name to the permission level
- Find the group names within your Azure AD. You’ll link the group names created in Azure to the SSO Permission Mapping page in VMS.
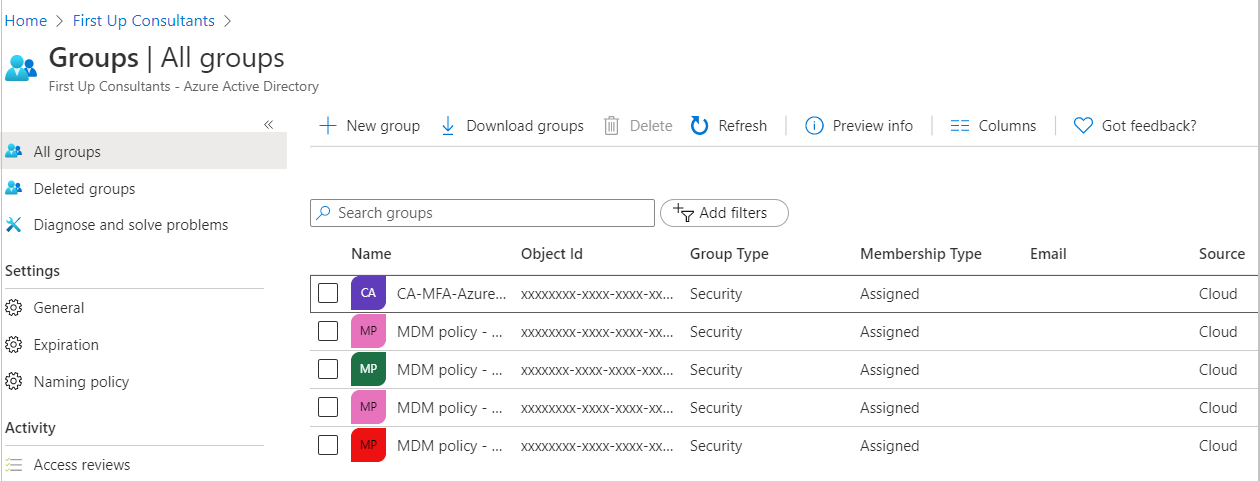
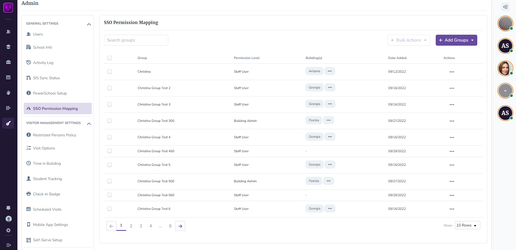
- In VMS, under the Admin menu, click SSO Permission Mapping.
Note:
This activity requires District Admin permissions
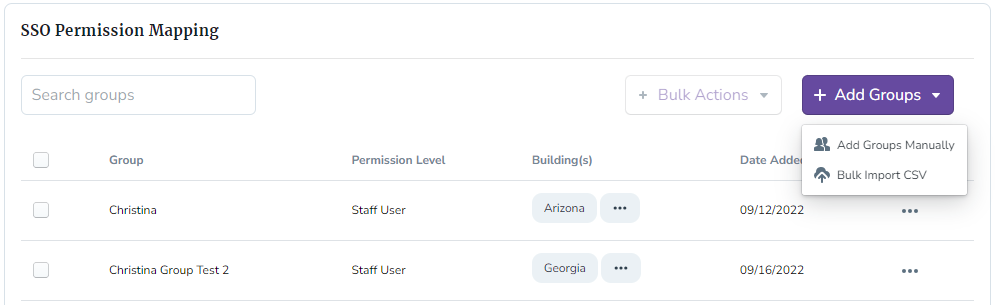
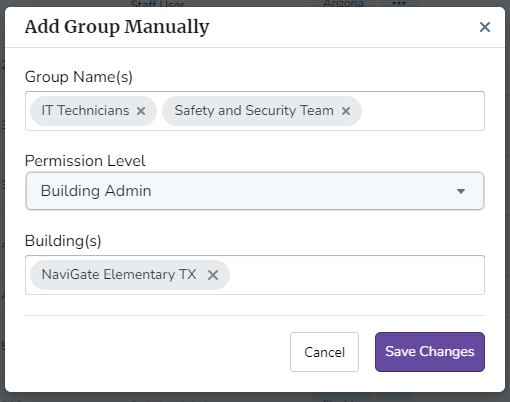
- Click on the Add Groups button.

- Click Add Groups Manually.
- Enter the Group Name.
Make sure the Group Name is entered exactly how it is listed in Azure AD
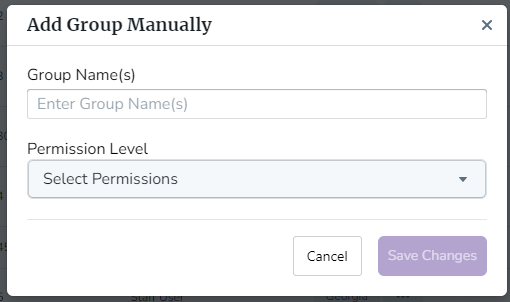
- Press enter after typing a Group Name. You can add multiple Group Names for a single Permission Level prior to saving.
- Ensure you've selected the Permission Level for any Group Name(s) showing in the dialogue. Click Save Changes.
- The Group name and the permission are now saved in the group name table.
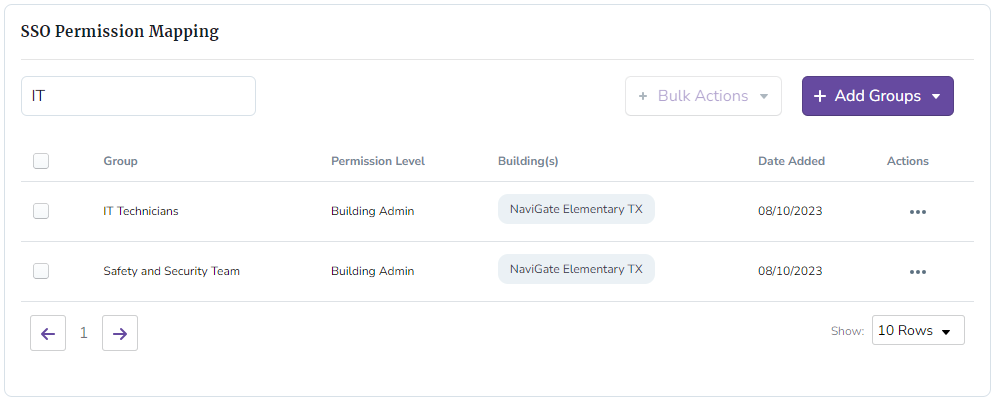
- Repeat the process for any remaining Group/Permission combinations
Testing the SSO
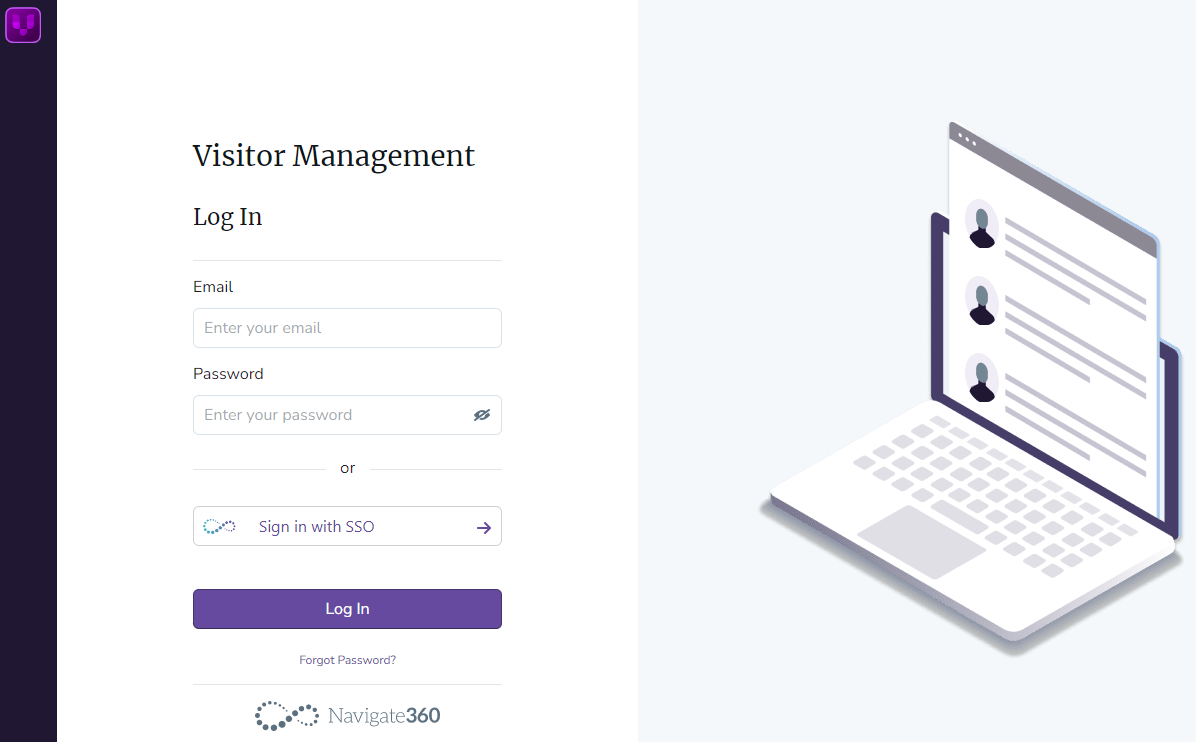
- Log into VMS to test the SSO authentication. Click Sign in with SSO.
- A popup will appear and you may enter the email you have access to.
- Note that the testing email address will need to have access to Group Name configured in VMS (Section C).
- Note that the testing email address will need to have access to Group Name configured in VMS (Section C).
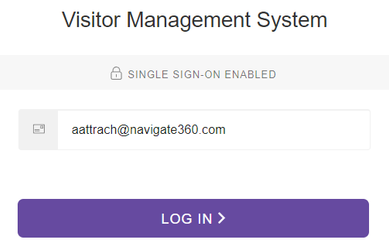
- You will see a message “SINGLE SIGN-ON ENABLED.”
- When pressing on Log In, you will be redirected to your Microsoft Account authentication.
- Once Microsoft has authenticated, the popup will be closed and the system will redirect you to the main VMS page.
Troubleshooting
- Ensure steps outlined have been completed.
- Check that pop-up blockers or cross-site limiters are not preventing the VMS to Azure communication.