Student School ID (Barcode scanning/RFID reading)- VMS
Learn how to setup student profiles to implement Barcode/RFID in your process.
- Emergency Management Suite
- Navigate360 Training Institute
- Suite360
- PBIS Rewards
-
Behavioral Threat Assessment Case Manager
Getting Started BTA Webinar Links User Management BTA Feature/Function Overview Behavioral Threat Assessment: CSTAG Behavioral Threat Assessment: NTAC Behavioral Threat Management: Suicide Risk Screening and Management Analytics & Reporting Troubleshooting Release Notes & Updates Click here for BTA Resources / User Guides State Specific Guidance
- Visitor Management
- School Check In
- ALICE Training Institute
- Detect - Social Sentinel
- P3 - Anonymous Tip Reporting
- Resources
- Back-to-School
In this article, learn how to implement a student barcode/RFID, add a new student barcode/RFID, and discover how to download a barcode/RFID template from your Visitor Management System.
Compatible Hardware:
Note: Select each tab below to see the compatible hardware options.
Barcode
RFID
Devices
Student Barcode/RFID Implementation:
Students can use their school-issued barcode or RFID on self-serve by utilizing the corresponding hardware. This will speed up the process of late check-in and early check-out of the building by reducing the need to manually search for student profiles. Within VMS, each school can upload the barcode ID or RFID of each student in order to use this function.
Template to add Barcode/RFID to existing students:
The Barcode/RFID Setup option is available on the Student page. Any user can download the template. The template will consist of all existing students for the selected building:

- From the Student Page, select the Barcode/RFID Setup button.
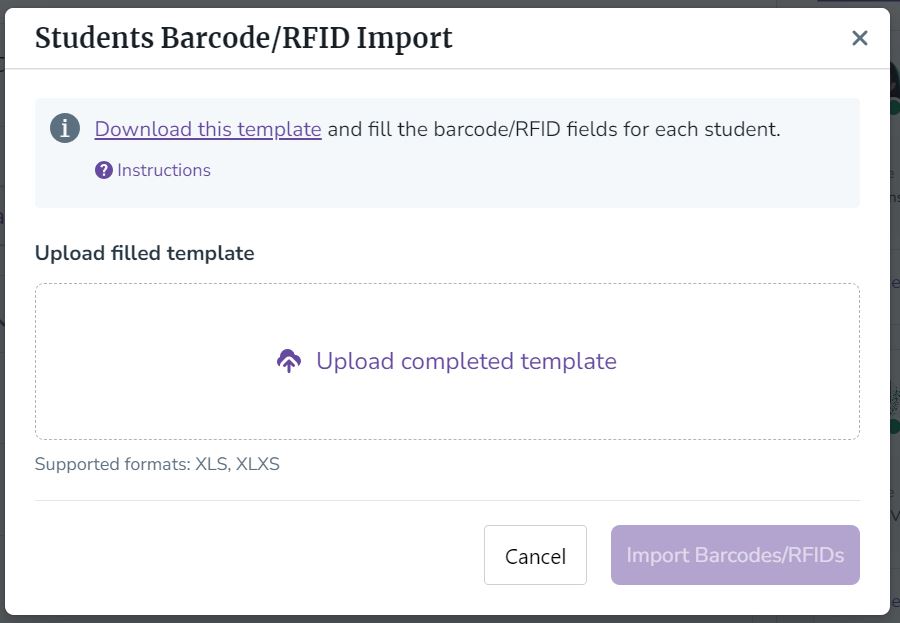
- From the pop-up menu, select the purple text: Download this template.
- From the downloads on your computer or device, click into the Excel file.
- On the template you will see fields for:
- First Name
- Last Name
- Grade Level
- Student ID
- Student SIS ID
- Student Barcode/RFID
- The Barcode/RFID field is the only editable column
- Note: These IDs are alpha-numeric and have a 20-character limit, with no duplicates.
- If the Student ID is being used for barcode or RFID, this number can be copied/pasted into the field.
- The Barcode/RFID field is the only editable column
- Once complete, you can upload the finished template back into the system by returning to the Student Page and clicking, Upload completed template.
- Once uploaded, the Barcode/RFID information will be added to the corresponding student profiles
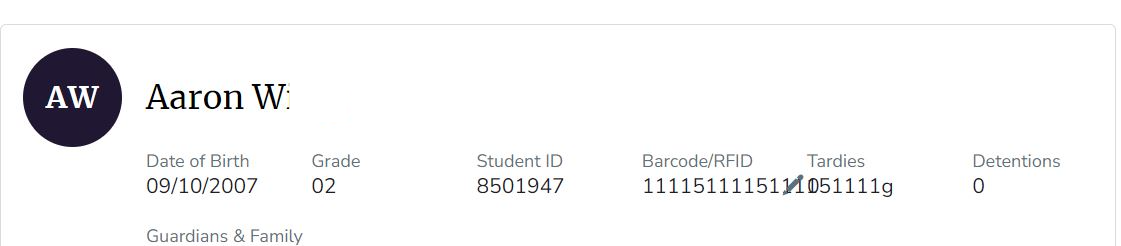
Student Profile - Barcode/RFID field
- From the Student page, users can select a student name to view their profile
- On a student profile, the Barcode/RFID field is available
- Any user can modify it by using the (pencil) edit icon
- Validations: Alpha-numeric, 20-character limit, not a duplicate
Self-Serve Settings:
Admin users can set up their self-serve workflow per building. From the Admin screen, the user can select the Self-Serve Setup tab. From here, the user can enable or disable the self-serve page. The user can enable or disable Barcode/RFID Scanning from using self-serve. Below, review what admin users can adjust for student settings.
-
- Can enable or disable Barcode/RFID scanning
- Name or ID # is always enabled by default
Student Self-Serve Workflow:
Scanning from the main screen:
Students can use their Barcode or RFID when using self-serve. From the main self-serve screen, student will see they can scan their school ID. Once scanned, student will see an animation on the screen to indicate they scanned. Once complete, student will see their profile information and options to check in or out. The student can continue the process as normal.
Scanning from the student screen:
Students can use their Barcode or RFID when using self-serve. From the main self-serve screen, students can select the Student option. From the Student screen, the student will see these options:
Manually search by name or ID#
- If scanned, student will see their profile information and options to check in or out
- The student can continue the process as normal
Running into error messages? Visit our Barcode & RFID Troubleshooting article.