User Setup: Classic- EMS
Learn how to configure your user account for the Classic version of EMS.
- Emergency Management Suite
- Navigate360 Training Institute
- Suite360
- PBIS Rewards
-
Behavioral Threat Assessment Case Manager
Getting Started BTA Webinar Links User Management BTA Feature/Function Overview Behavioral Threat Assessment: CSTAG Behavioral Threat Assessment: NTAC Behavioral Threat Management: Suicide Risk Screening and Management Analytics & Reporting Troubleshooting Release Notes & Updates Click here for BTA Resources / User Guides State Specific Guidance
- Visitor Management
- School Check In
- ALICE Training Institute
- Detect - Social Sentinel
- P3 - Anonymous Tip Reporting
- Resources
User Roles:
Admins
- Have full edit access to the Emergency Management Suite.
- This role should be used for those who will be performing setup and/or maintenance of information within the site.
View Only
- View Only Users will have viewing privileges only.
- This role will NOT be able to edit information on the site.
Limited Access
- Similar to View Only Users, but Limited Access users can ONLY view Flipcharts, Respond, and Reunification.
First Responders
- This role is reserved for your local first responders such as the 911 center, police department, and fire department.
- They will have View Only access to information and will not be able to edit.
- They will NOT have access to the mobile apps.
Adding Users
From the Dashboard, choose User Setup under the Setup area or click Users in the toolbar.
To start adding users, click Add beside the role you wish to add a user to.
You can have as many users on your site as needed.

User Accounts
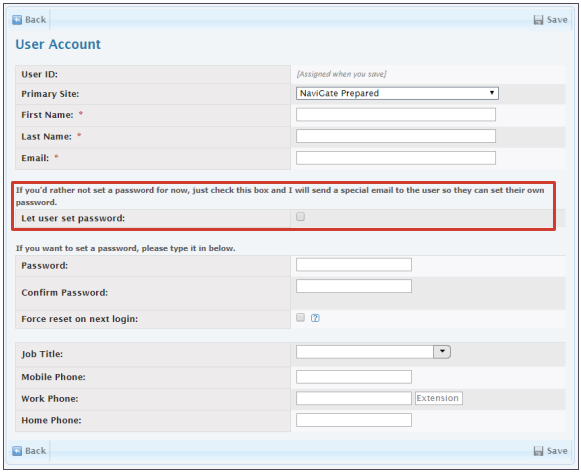
To add a user you must include: First name, Last name, and Email address. Job title and phone numbers are optional fields. When adding a user, you will also designate a Primary Site.
Once created, users can edit their own profile to keep their information updated.
When creating an account, we recommend using the option Let user set password. The user will receive an email with the information necessary to finalize their account including how to log in and the Secure ID. If you choose to manually set a password for them, you will have to notify them of their login details. (Secure ID is unique to your district/organization. All users in your district use the same number)
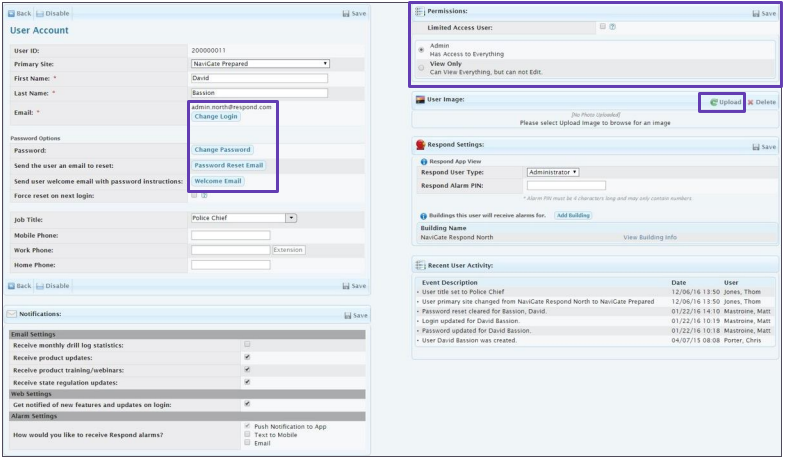
You can edit the details of all existing users by clicking their name from the User Setup page. You will be able to change their permission, update contact or log-in information, and upload or update an image for this user.
Uploading an image allows first responders to recognize key players quickly when they arrive on scene.
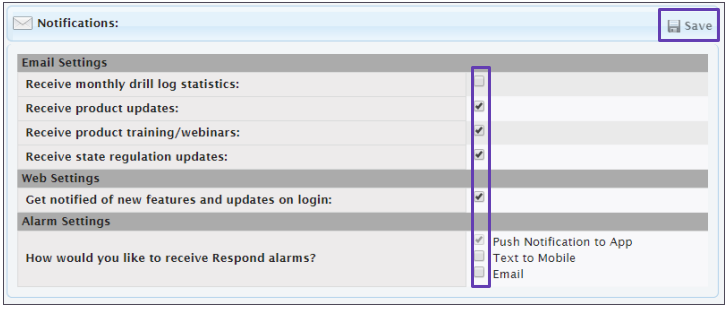
You can also designate to receive various emails.
To do so, select the boxes desired at the bottom of the User Account screen. Once the boxes have been selected, click the save button.
Disable Users
You can disable user accounts at anytime to revoke their access.
To disable a user, click the Disable button on the User Account screen.
You can choose to enable a user again even after being disabled.

User Management by Sync
Organizations may also have the option to sync information (including users and students) automatically. This is usually setup during implementation or in consultation with their Customer Experience Consultant and Technical Support.
A connection is created from the district's Student Information System (SIS) to Emergency Management Suite. Generally, this is done via ClassLink or Clever to streamline the flow of information.
Users are then created, disabled, and reenabled, as needed, based on the data provided by the district's SIS.
Syncing is paused by default during the Summer months to allow for maintenance. If your district needs to continue updating data during this time (summer school, etc.) please have the administrator contact Technical Support