Options- PBIS Rewards
Learn how to customize PBIS Rewards for your school’s needs using the Options screen.
- Emergency Management Suite
- Navigate360 Training Institute
- Suite360
- PBIS Rewards
-
Behavioral Threat Assessment Case Manager
Getting Started BTA Webinar Links User Management BTA Feature/Function Overview Behavioral Threat Assessment: CSTAG Behavioral Threat Assessment: NTAC Behavioral Threat Management: Suicide Risk Screening and Management Analytics & Reporting Troubleshooting Release Notes & Updates Click here for BTA Resources / User Guides State Specific Guidance
- Visitor Management
- School Check In
- ALICE Training Institute
- Detect - Social Sentinel
- P3 - Anonymous Tip Reporting
- Resources
Learn how to customize PBIS Rewards for your school’s needs using the Options screen.
Why is this important?
PBIS Rewards has so many features that can be customized to your school’s needs. Though the system works great using the default settings, you can fine-tune it to serve you better with some customization. Do you want your team to be able to make comments? Will you allow students to purchase from the Student Portal or App? You get to decide in PBIS Rewards.
Reward Options
How do I do this?
- Select “Settings” from the bottom of the left-side main menu.
- Next select “Options.”
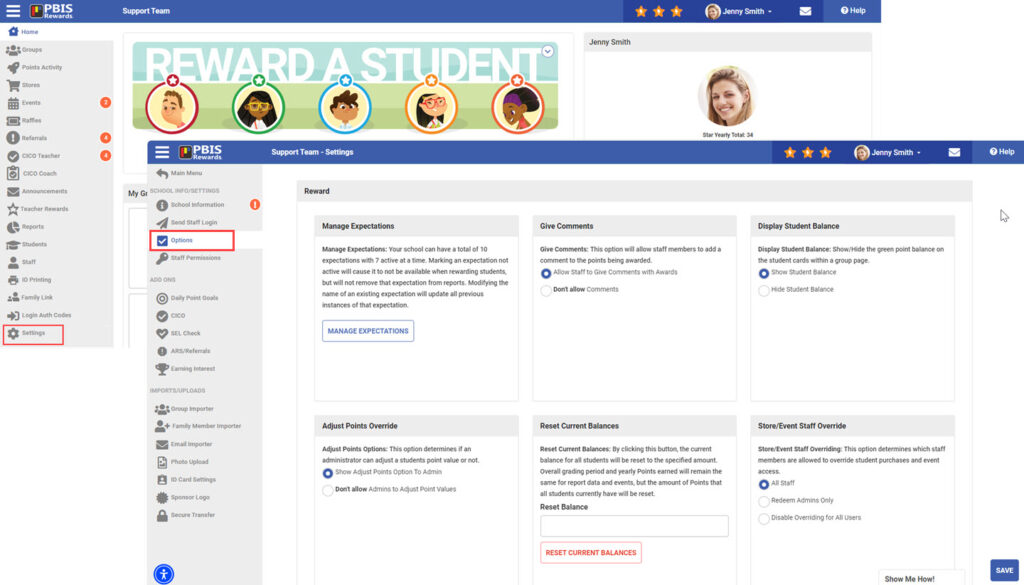
The information below describes the settings you can choose in greater detail. All Admins have access to make changes to these settings.
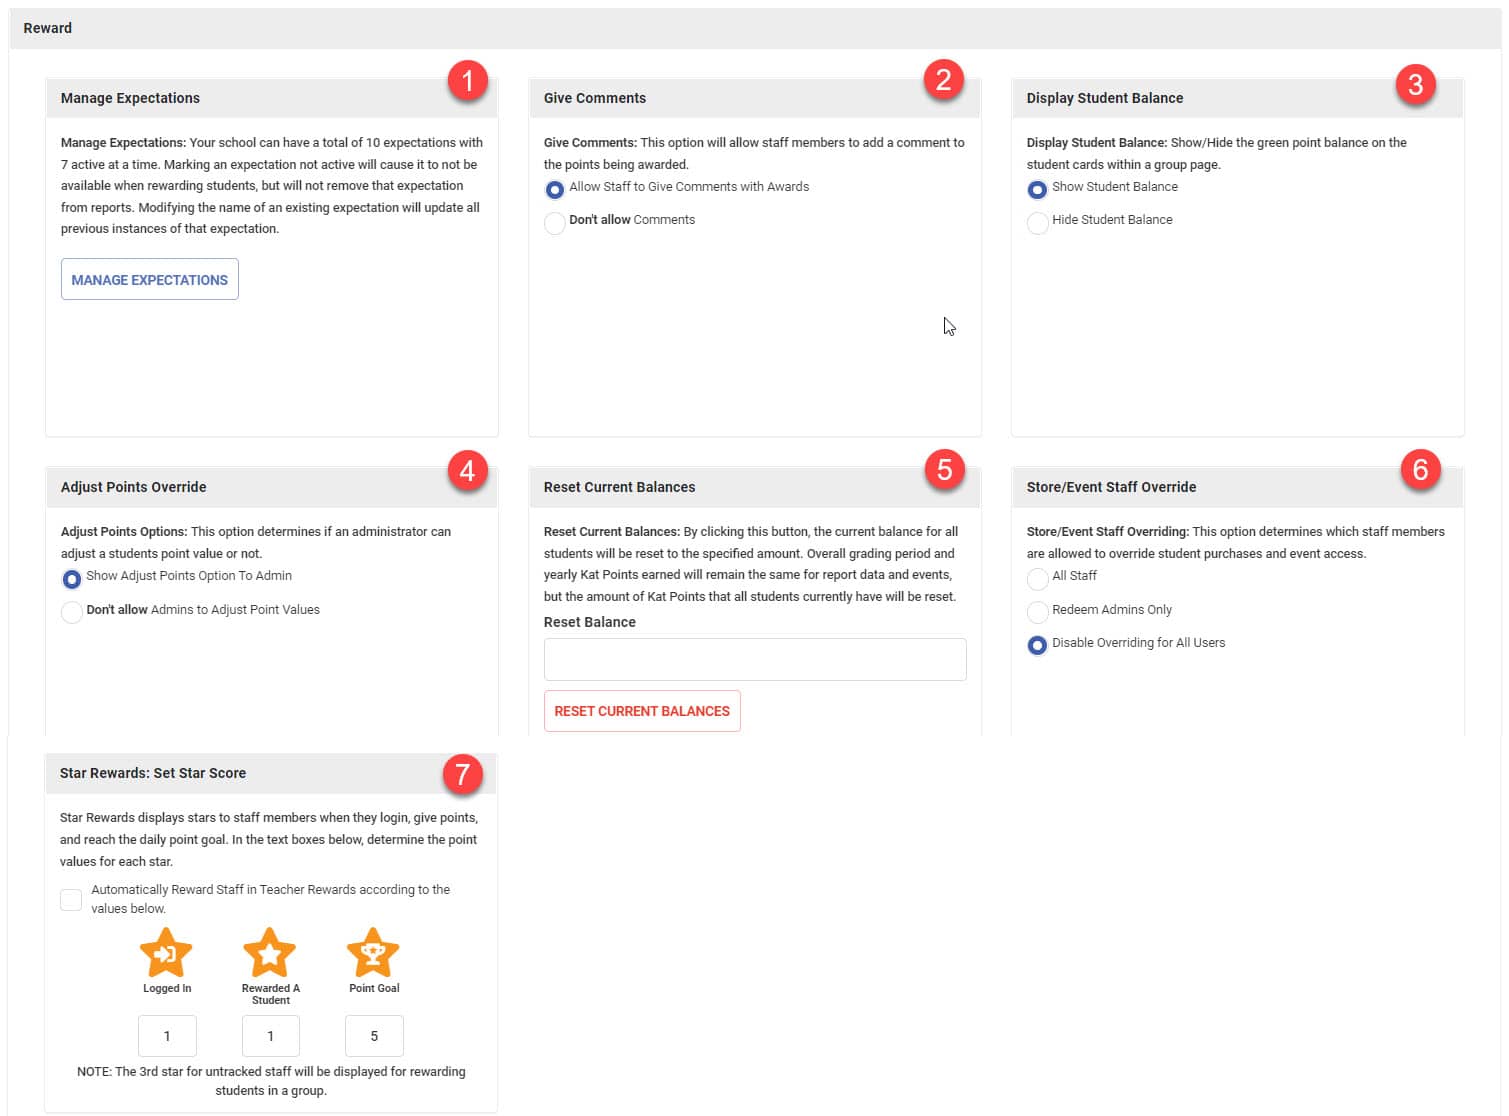
1. Manage Expectations: You can change your point type, add new expectations, edit expectations, or mark expectations you no longer use inactive.
2. Give Comments: Selecting this option will allow staff members to add a comment to the points being awarded. If selected, comments can be given anywhere points are awarded, as well as in the “My Activity” page located on the left-side menu.
3. Display Student Balance (Groups): This setting will determine if student current balances are visible in the Groups screen.
- Show Student Balance will display the student balance in a small green bubble on each student in the group.
- Hide Student Balance will not display the balance bubble.
4. Adjust Points Override: This option can allow an Admin to adjust a student’s balance due to an error from the Students tab/page in the Main Menu.
- Show Adjust Points Option to Admin will allow any Admin to adjust a student’s points.
- Don’t Allow Admins to Adjust Point Values will restrict Admins from adjusting students’ points.
5. Reset Current Balances: Allows an Admin to reset current balance for all students to a specified amount.
- The overall grading period and yearly points earned will remain the same for report data and events.
- The number of points in every student’s current balance will reset to the amount entered. (Note: setting the balance to zero will remove all student balances.)
6. Store/Event Staff Override: Choose if Staff Members will be able to override in the Store and Events screens. Overriding a purchase or event allows the student to purchase the item or register for an event even if the student does not have enough points.
- All Staff gives all staff members the ability to override.
- Store/Event Admins Only will allow only store/event admins to override.
- Disable Overriding for All Users means that no one in the school will have override capability.
7. Star Rewards: Set Star Score: Star Rewards displays stars to staff members when they login, give points, and reach the daily point goal. In the text boxes below, determine the point values for each star.
Student Portal Options
Note: Video may display a previous version of the software. See article below for more recent images.
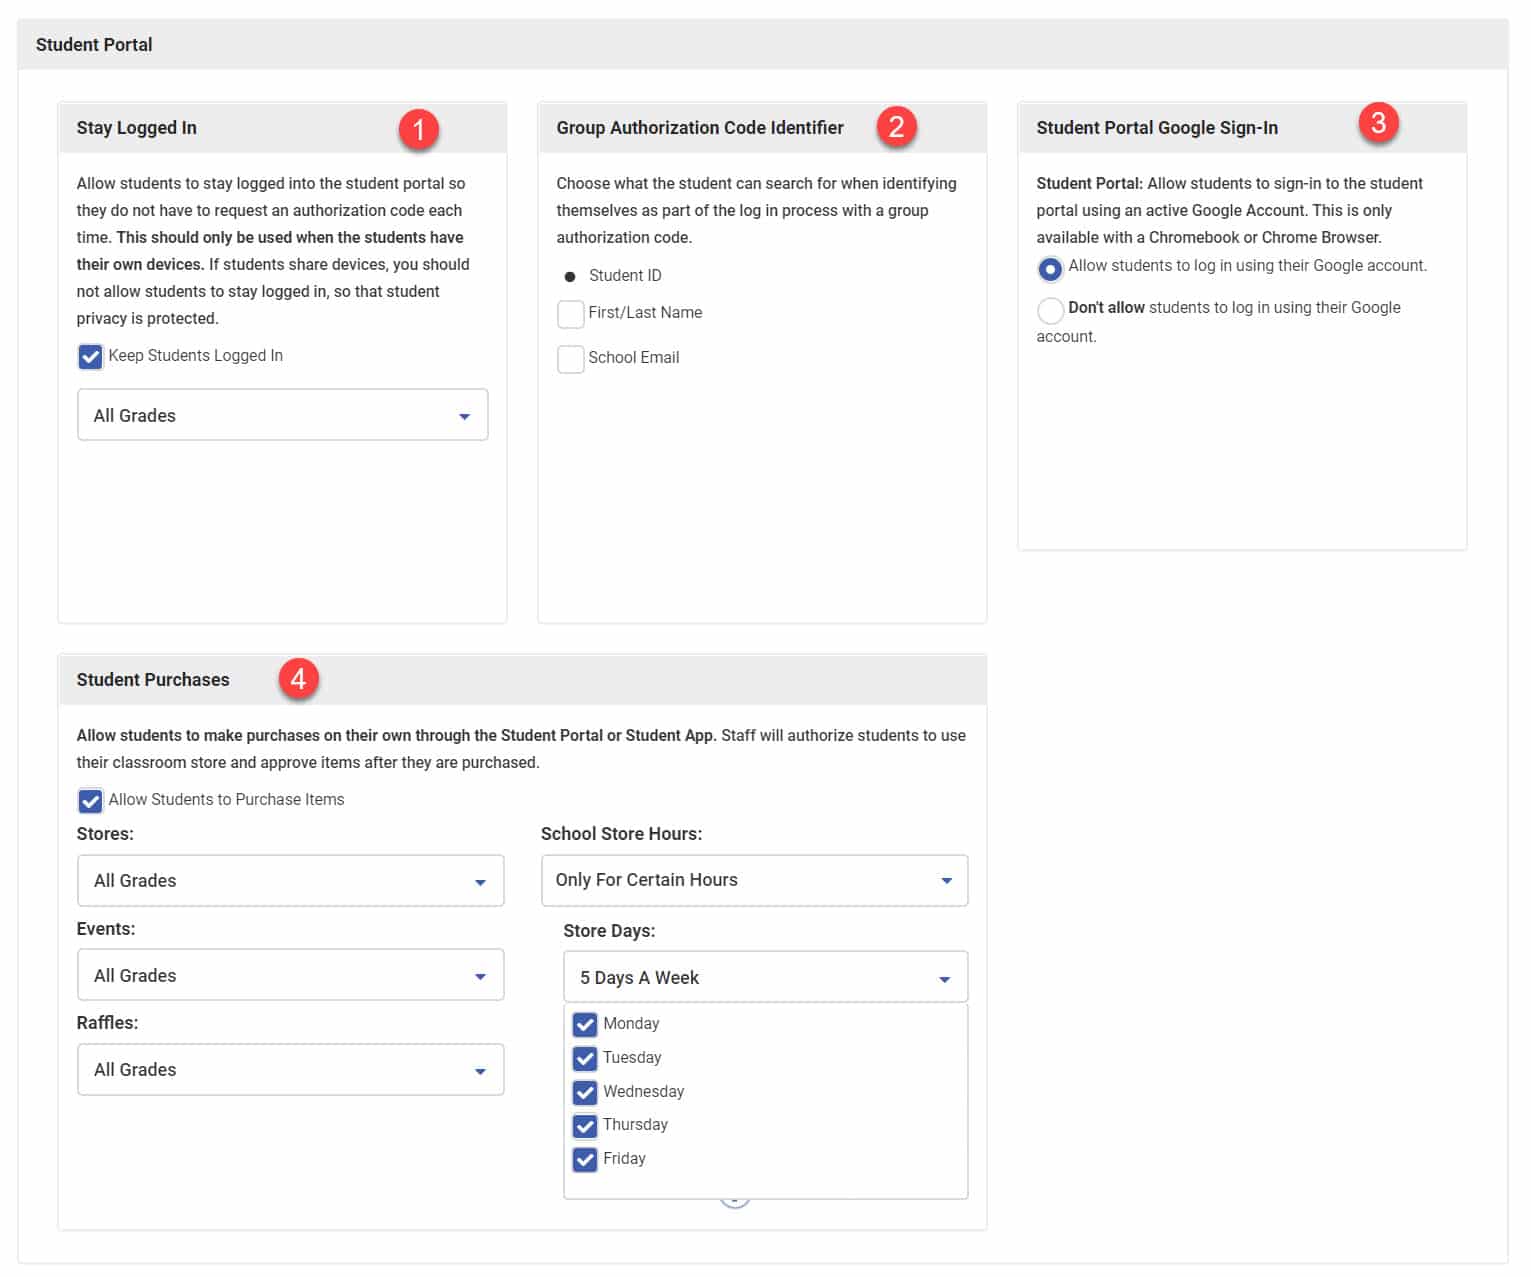
1. Student Portal Log In: Allow students to stay logged into the student portal so they do not have to request an authorization code each time (student portal only).
- This should only be used when the students have their own devices. If students share devices, you should not allow students to stay logged in, so that student data privacy is protected.
2. Group Authorization Code Identifier: Admins can choose how students are able search for their account when they are given a group auth code. They can search by Student ID, as well as First/Last Name and/or School email.
3. Student Portal login with Google Sign-in: Allows students to sign-in to the student portal using an active Google Account. Google Connected Student email addresses will need to be provided to PBIS Rewards in order to use Google Single Sign On. Email addresses can be uploaded in Settings on the Email Importer tab.
4. Student Purchases: You can choose to allow students to purchase their own items, register for events, or enter a raffle.
In order for a student to have access to this, the student must use an authorization code. The authorization code is given by an admin or staff member confirming their identity. (Note: students using single sign-on with Clever/ClassLink/Google Sign-in will not need an authorization code.)
- Once this access has been granted, the student will be able to make purchases on the student app or in the student portal.
- Student purchases can be viewed/approved/redeemed from the store by selecting the Redeem button in the upper right corner of the page, selecting Approve Purchases, then Show all
- Specific store items, events, or raffles can be marked as “not available for student purchasing” when they are created.
- You must select the types of purchases your students will be able to make (i.e., Store Items, Raffle Entries, Events). Check all that apply.
Student Dashboard and Family Messaging
-
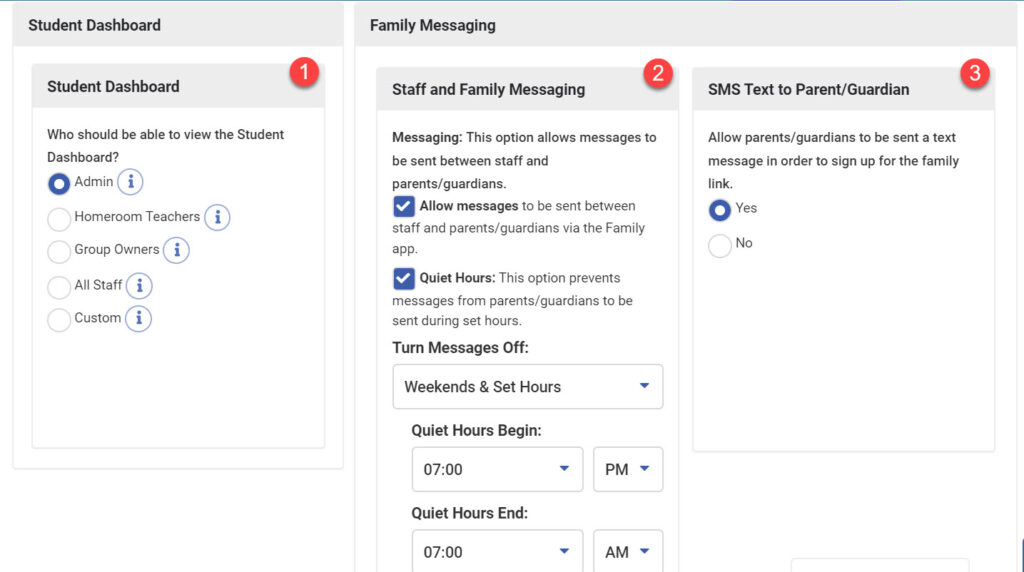
Student Dashboard Permissions: This option allows you to determine who will have access to the student dashboard, choose from the following.
- Admin – includes Admin and those with Reports View Permissions.
- Homeroom Teachers – includes Admin, those with Reports View Permissions and Staff will be able to see students in their homeroom group.
- Group Owners – includes Admin, Reports View Permissions and Staff members will be able to see students they have in a group.
- All Staff – all users would have access to all student dashboards.
- Custom – search for and select each staff that you want to have access to all student dashboards.
- Staff to Family Messaging: This option allows your staff to send messages to parents via the PBIS Rewards Parent App. Schools that allow messaging have the ability to set hours for messaging using Quiet Hours.
- SMS Text to Parent/Guardian: Allow text messaging to send parents/guardians a message to set up the connection.
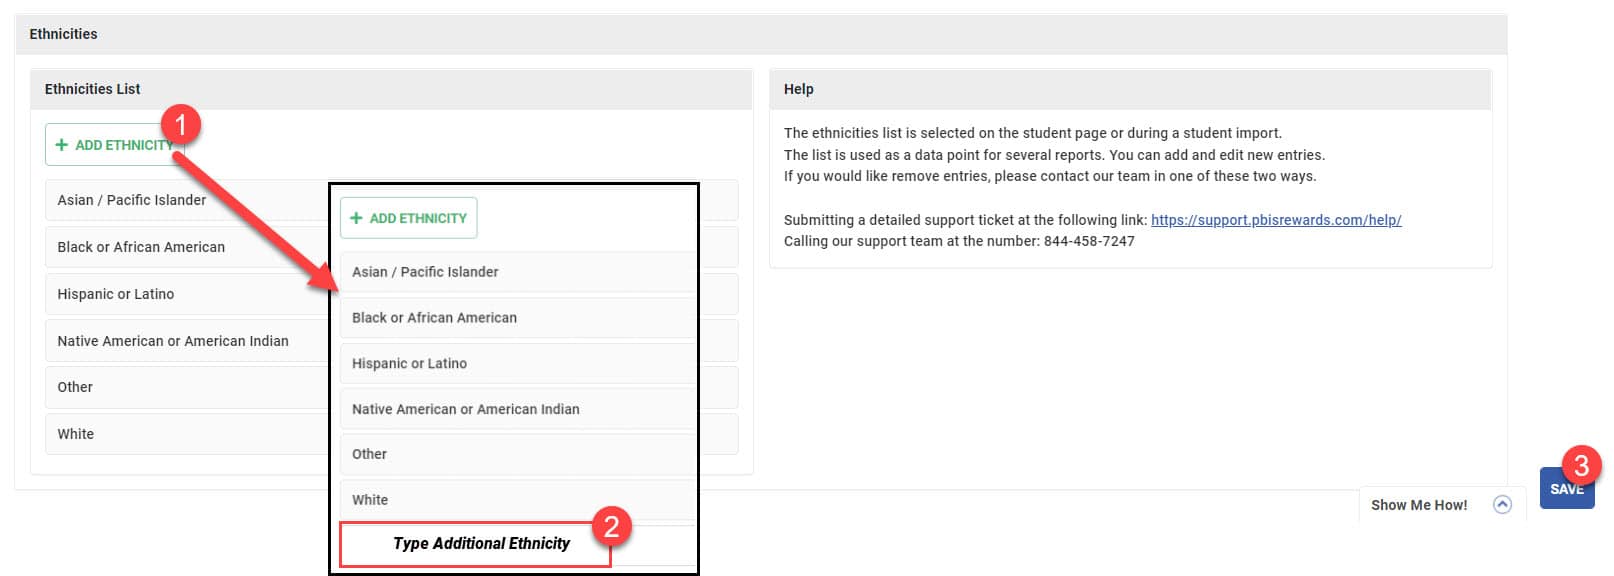
Ethnicities
- Select “Add Ethnicity”
- Type the additional ethnicity in the new field at the bottom of the list
- Save the change
Important! Save after making any changes to the Options page