Respond & Alarm: Staff Users via Web- EMS
Learn how to account for students in an emergency situation through EMS web.
- Emergency Management Suite
- Navigate360 Training Institute
- Suite360
- PBIS Rewards
-
Behavioral Threat Assessment Case Manager
Getting Started BTA Webinar Links User Management BTA Feature/Function Overview Behavioral Threat Assessment: CSTAG Behavioral Threat Assessment: NTAC Behavioral Threat Management: Suicide Risk Screening and Management Analytics & Reporting Troubleshooting Release Notes & Updates Click here for BTA Resources / User Guides State Specific Guidance
- Visitor Management
- School Check In
- ALICE Training Institute
- Detect - Social Sentinel
- P3 - Anonymous Tip Reporting
- Resources
- Back-to-School
Initiating a Respond Alarm
Choose Respond from the Dashboard.
On the Respond Dashboard, you will be able to view current alarms as well as initiate a new alarm. If no alarms are active and you need to initiate an alarm, click on Activate Alarm.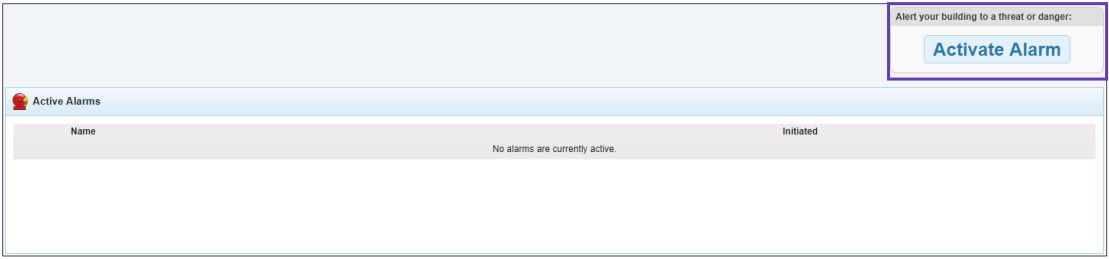
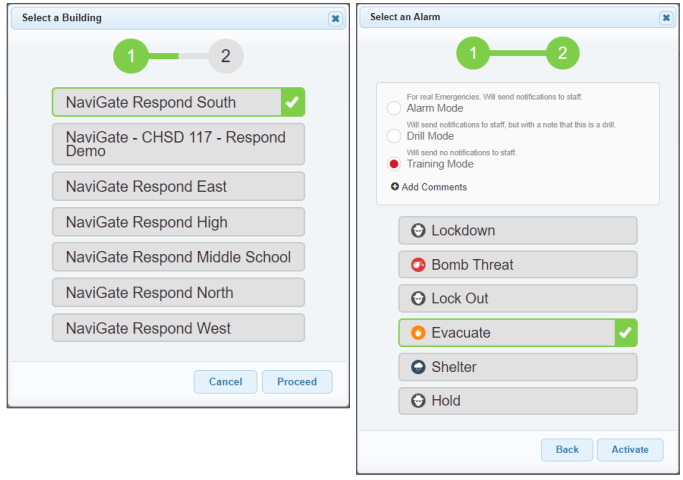
Select your desired building, then Proceed.
Select the mode, then choose an Alarm Type (e.g. fire, lockdown, etc. Available options are based on your district's settings).
Comments are optional and allow you to add information you want staff to see.
When ready, click Activate. The alarm will start and notifications will be sent, if appropriate for the mode.
Accounting for Yourself and Students
For Yourself
Once the alarm is activated, you can account for yourself by marking I am okay, I am not okay, or I am not here.
For Students
You can account for students by selecting a class under the My Classes option or switching the filter to All Classes if necessary.
Create Custom Roster is used if you only have a few students with you and not a listed class.
Select the class you need to account for.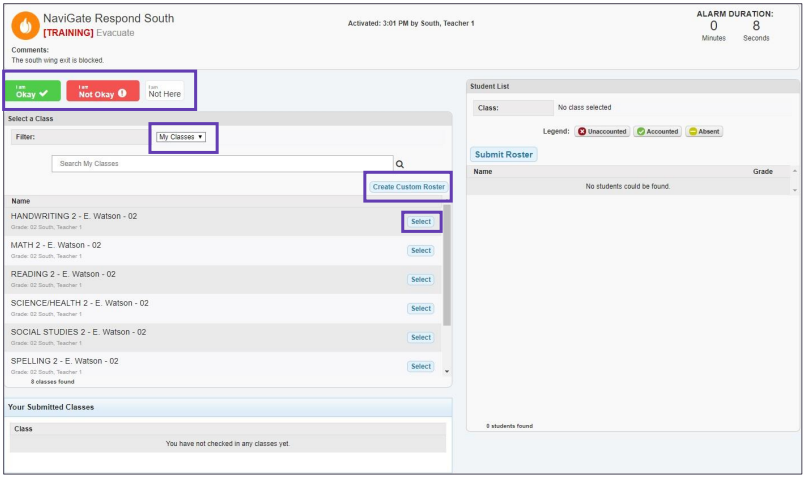
Once a class is selected you can start accounting for students. If all students are present, you can use Mark All Present. You can then go through and mark students absent and missing. Simply click the students name to toggle between different statuses.
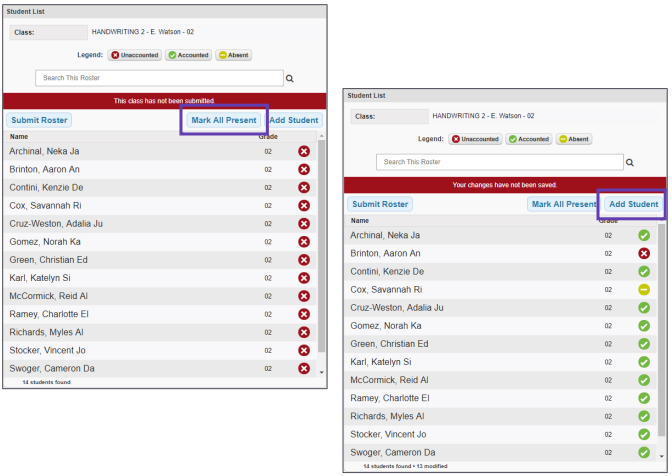
If you have a student who isn’t in your class (i.e. you pulled them in from the hall), use Add Student to search and select who needs added (the teacher missing the student will see your name to indicate you have found them).
The Add a Student screen shows all of the students who have not been accounted by staff yet. From here, you will be able to search and add students to your roster to account for them during the alarm.
To add the student, click Add beside the student's name. A prompt will appear to confirm the selection, click “OK” if that is correct.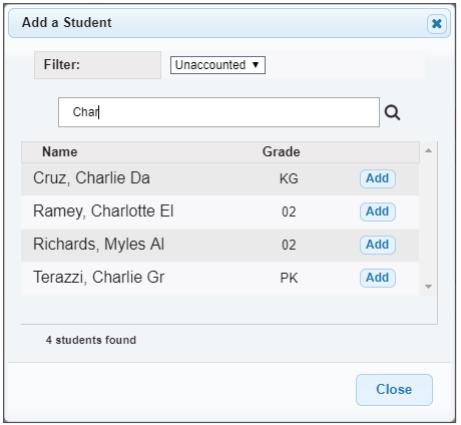
Once you are done adding students, you can close the Add a Student window and go back to your roster. You will see the student(s) that were added to your list at the bottom.
Once all students have been accounted for, click Submit Roster. This will send your count to administration and give them the ability to view your class and gather details of any students you marked as missing.
You can make necessary changes as you need even after the roster has been submitted.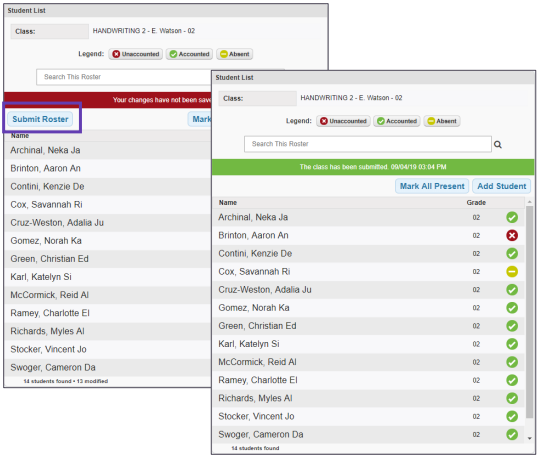
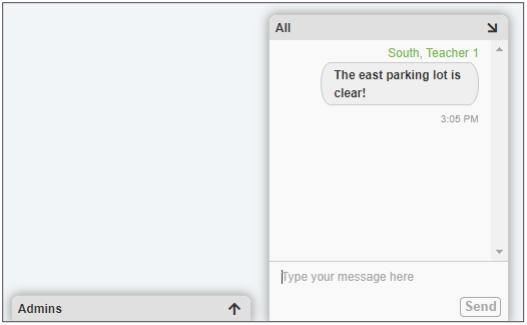
Chat Feature
The bottom right of the screen will have Chat options. This can be used to communicate with others in your building.
Click the chat title to bring up the option to type and view messages.
The All chat is for everyone to communicate together, while the Admins chat is to message your administration group directly.