Respond & Alarm: Staff Users via App- EMS
Learn how to quickly and effectively manage an emergency using the EMS app.
- Emergency Management Suite
- Navigate360 Training Institute
- Suite360
- PBIS Rewards
-
Behavioral Threat Assessment Case Manager
Getting Started BTA Webinar Links User Management BTA Feature/Function Overview Behavioral Threat Assessment: CSTAG Behavioral Threat Assessment: NTAC Behavioral Threat Management: Suicide Risk Screening and Management Analytics & Reporting Troubleshooting Release Notes & Updates Click here for BTA Resources / User Guides State Specific Guidance
- Visitor Management
- School Check In
- ALICE Training Institute
- Detect - Social Sentinel
- P3 - Anonymous Tip Reporting
- Resources
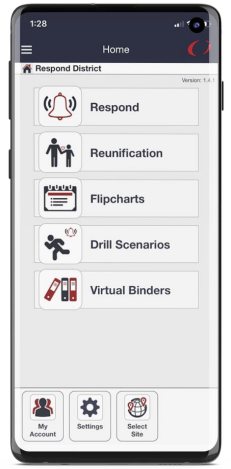
App Home Screen
On the Home screen of the app, you will see different available features listed.
Also on this screen is the option to edit My Account, view your Settings, and change buildings using Select Site.
You can use the lines in the top left corner at any point to open a side menu and easily navigate between screens
Settings
The settings screen has different options for Respond.
If the option has been enabled by your administration, you may have the ability to View Class / Student Data. This allows you to view all your assigned classes and create custom names for each.
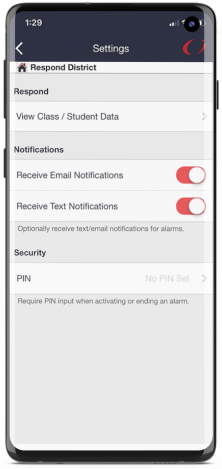
The default notification for Respond alarms are push notifications (and siren sound if volume permits). You can choose to receive email and text message notifications as well. Just toggle them active (red) or inactive (white) as you like. If you would like to receive the text notification, make sure your mobile phone number is entered on the My Account page.
You can set a 4-digit PIN for an extra confirmation level when activating or ending alarms. You will have to enter this PIN each time you activate an alarm.
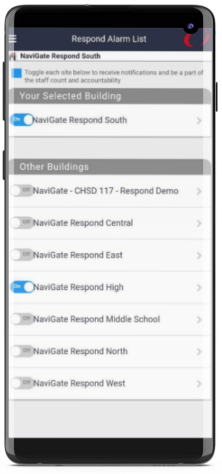
Initiating Alarms
When you want to start an alarm at a building, choose Respond from the Home screen. You will be presented with a building list to choose from.
The option to toggle each building ‘On’ will designate which locations you want to receive notifications for. When toggled in, you will be a part of the overall staff count for that location. (These choices may be limited by your organization. Contact your administrator with questions)
Depending on phone settings, notifications will be a push notification to your device and (depending on volume) an audible siren. If you’ve selected to receive them, you will also get the email and text notifications. For more information on options see these articles depending on your device: EMS Respond Sound Override Guide for Android and EMS Respond Sound Override Guide for iOS
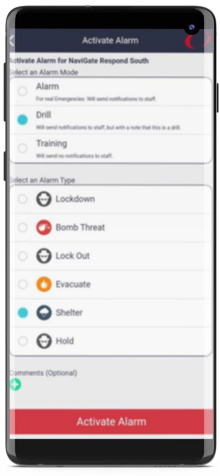
Click the building name where you want to initiate an alarm.
After selecting a mode, you will then choose an alarm type from the list. Comments are optional and allow you to add any notes, procedures, or information you want staff to receive.
When ready, Activate Alarm and your Respond alarm will start.
Anyone may initiate an alarm. After the alarm has started, only administrators can end the alarm.
Accounting for Students
The Home screen is where you can check yourself in. You can account for yourself by using I am okay, I am not okay, or I am not here. Administration will be immediately alerted when you check in as not okay.
You can choose to Account For Students and view any classes that you submit during this alarm.
On the Select Class screen, you will see your list of classes when My Classes is selected. If you do not have any classes listed or you need to account for someone else’s class, choose All Classes. All Classes will be a compiled list of classes at the building.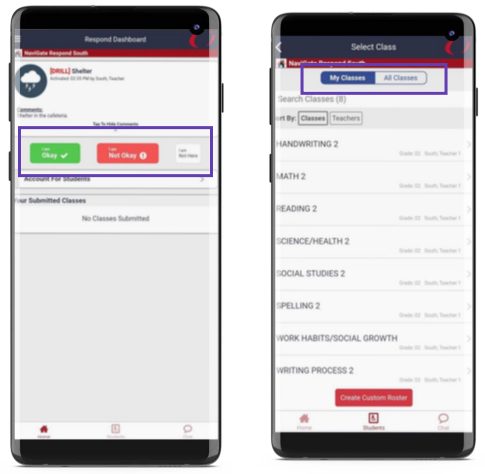
Create Custom Roster is another option if you do not have a class at this time, but you do have students with you (for example, you’re walking down the hall with a couple of students).
Once a class is selected, the list of students will appear.
A quick way to account for students is to Mark All and then change the status of any student by tapping their name. Tapping through can mark them as accounted for, absent from school, or unaccounted/missing. If you have a student who isn’t in your class (i.e. you pulled them in from the hall), use Add Student to search and select who needs added (the teacher missing this student will see your name to indicate you have found them).
Once you have marked all the students, use Submit Class to push the list to administrators.
If changes occur, you find another student or need to change a student’s status, you can make changes and submit your count multiple times.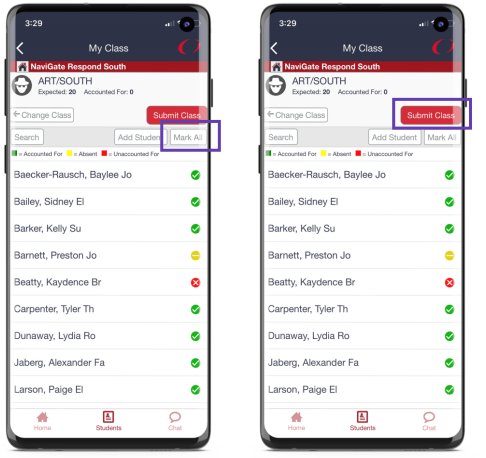
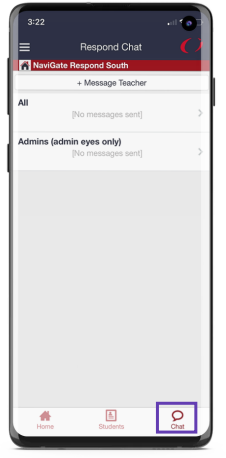
Chat Feature
Using Chat within the app is a good communication tool to relay information.
The All chat is available for everyone in the alarm to utilize. The Admins chat is an option for administrators to privately message as a team.
All messages that are sent will show the name of the staff member, mark if they are an admin, and timestamp when it was sent.
If you are on another screen in Respond and a new message comes through, the Chat button on the bottom of the screen will highlight NEW.